M 31 Take 2, and a Cocoon
June 26/27. The second attempt at M31. After moving the scope I managed to start earlier and get more frames:
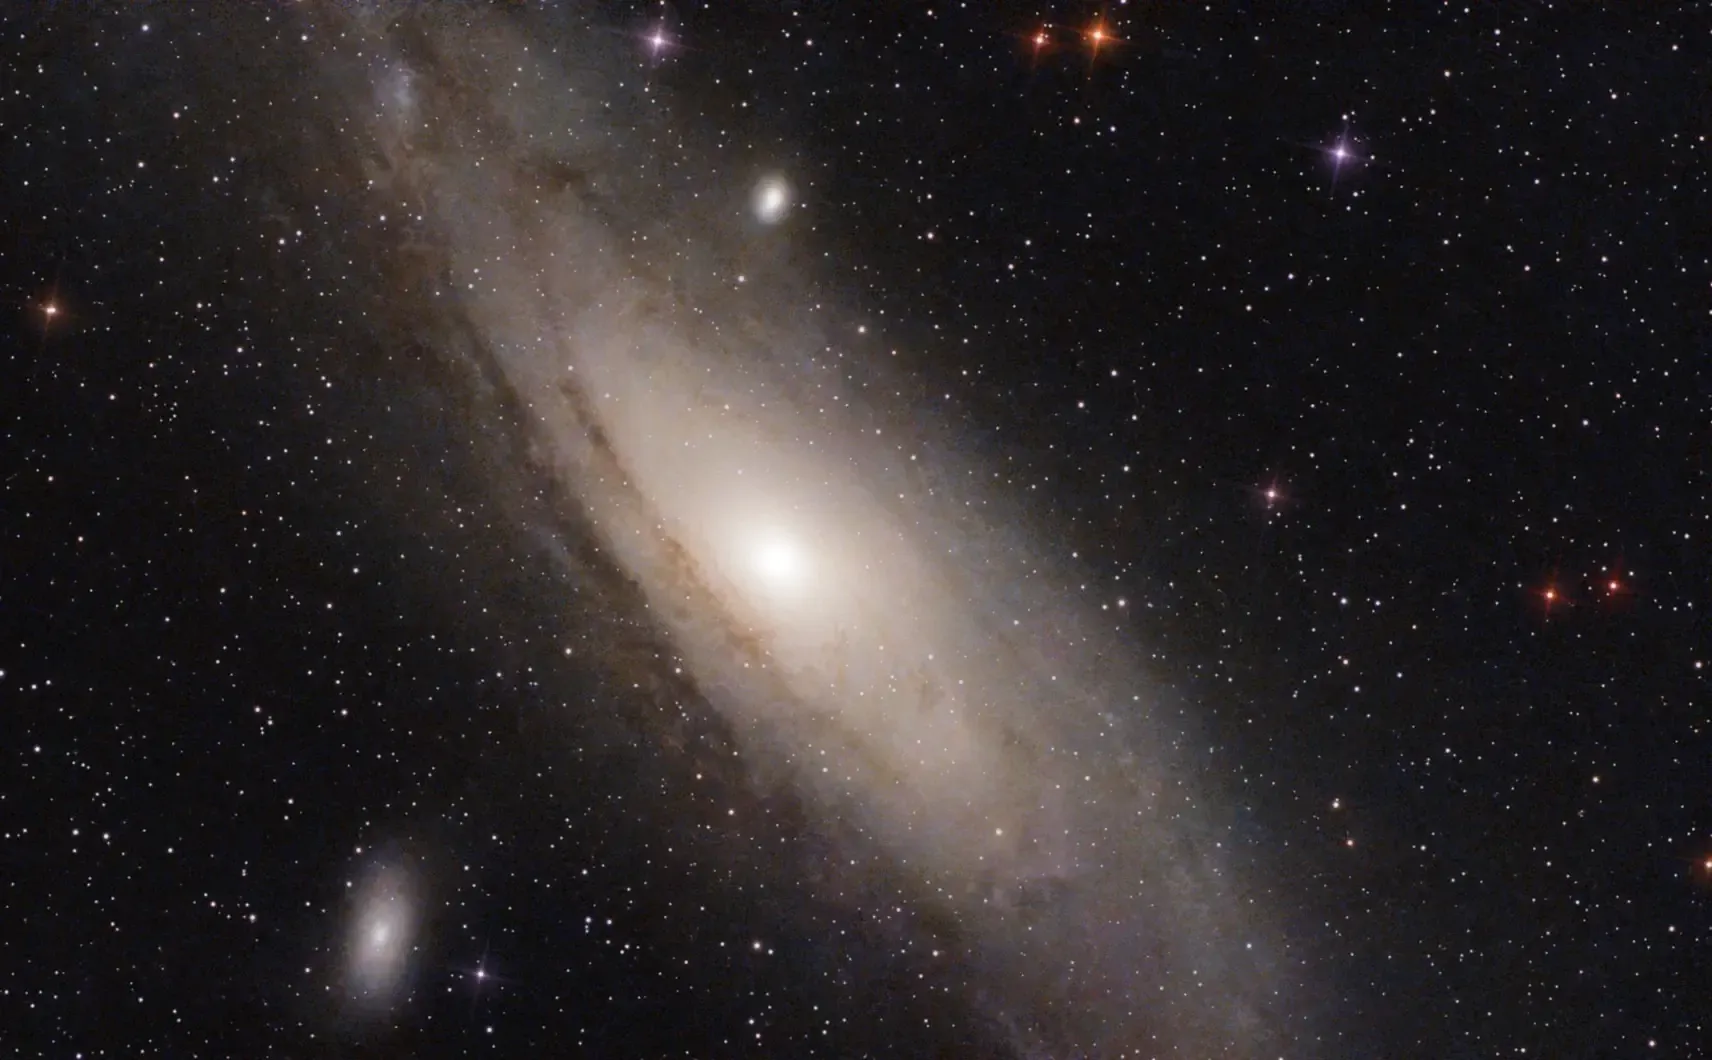
Despite some slight haze in the air, it’s a definite improvement. Upped the gain to 80. An oddity: despite being targeted in the same fashion as the previous attempt, from the Mini’s atlas, the framing is slightly different. Not sure what caused that.
Details:
Target: M 31 (NGC 224), Andromeda Galaxy
Time: 2026-06-27 01:17..02:43
Equipment: Dwarf Mini, Astro filter
Integration: 70mins (141×30secs, +4 failures), gain 80
Conditions: Clear but slight haze, Bortle 6
Processing: PhotoDesk equalisation, gamma
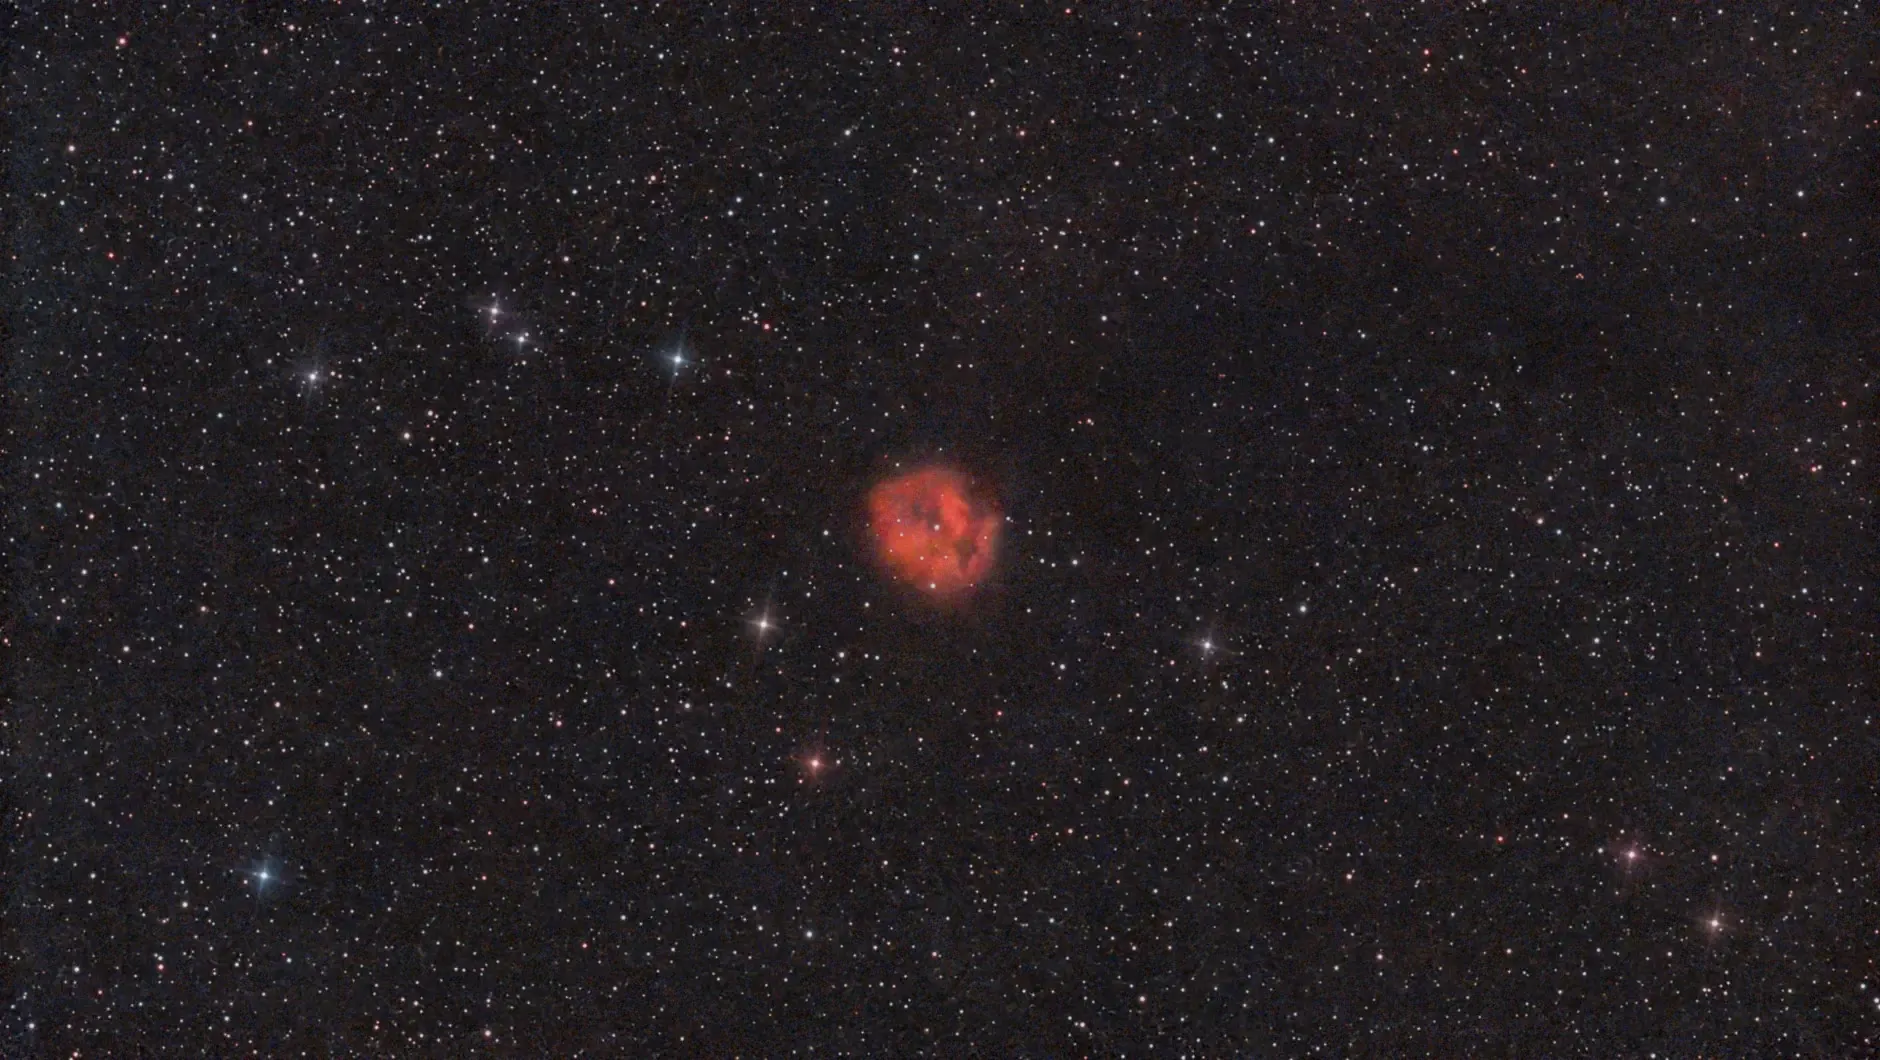
While waiting for M 31, I tried out C 19, the Cocoon Nebula. This is a small emission nebula in Cygnus, illuminated by the central star. Of interest is the dark area stretching to the right side of the image, which is a dark lane of dust; it’s probably not associated with the nebula.
Details:
Target: C 19 (IC 5146, Sh 2-125, Barnard 168), Cocoon Nebula
Time: 2026-06-26 22:59..01:01
Equipment: Dwarf Mini, Duo-Band filter
Integration: 95mins (191×30secs, +15 failures), gain 80
Conditions: Clear but slight haze, Bortle 6
Processing: PhotoDesk equalisation, gamma
And so to bed…
Birthday Galaxy
June 24/25. And at last the Andromeda Galaxy, M31, comes into view, just in time for my birthday. It only emerges from behind trees at about 2am, which at this time of year doesn’t give much time for exposures before the sky begins to lighten (noticeably so at about 2:30). But there was enough time to grab 90 shots, although that includes 14 failures.
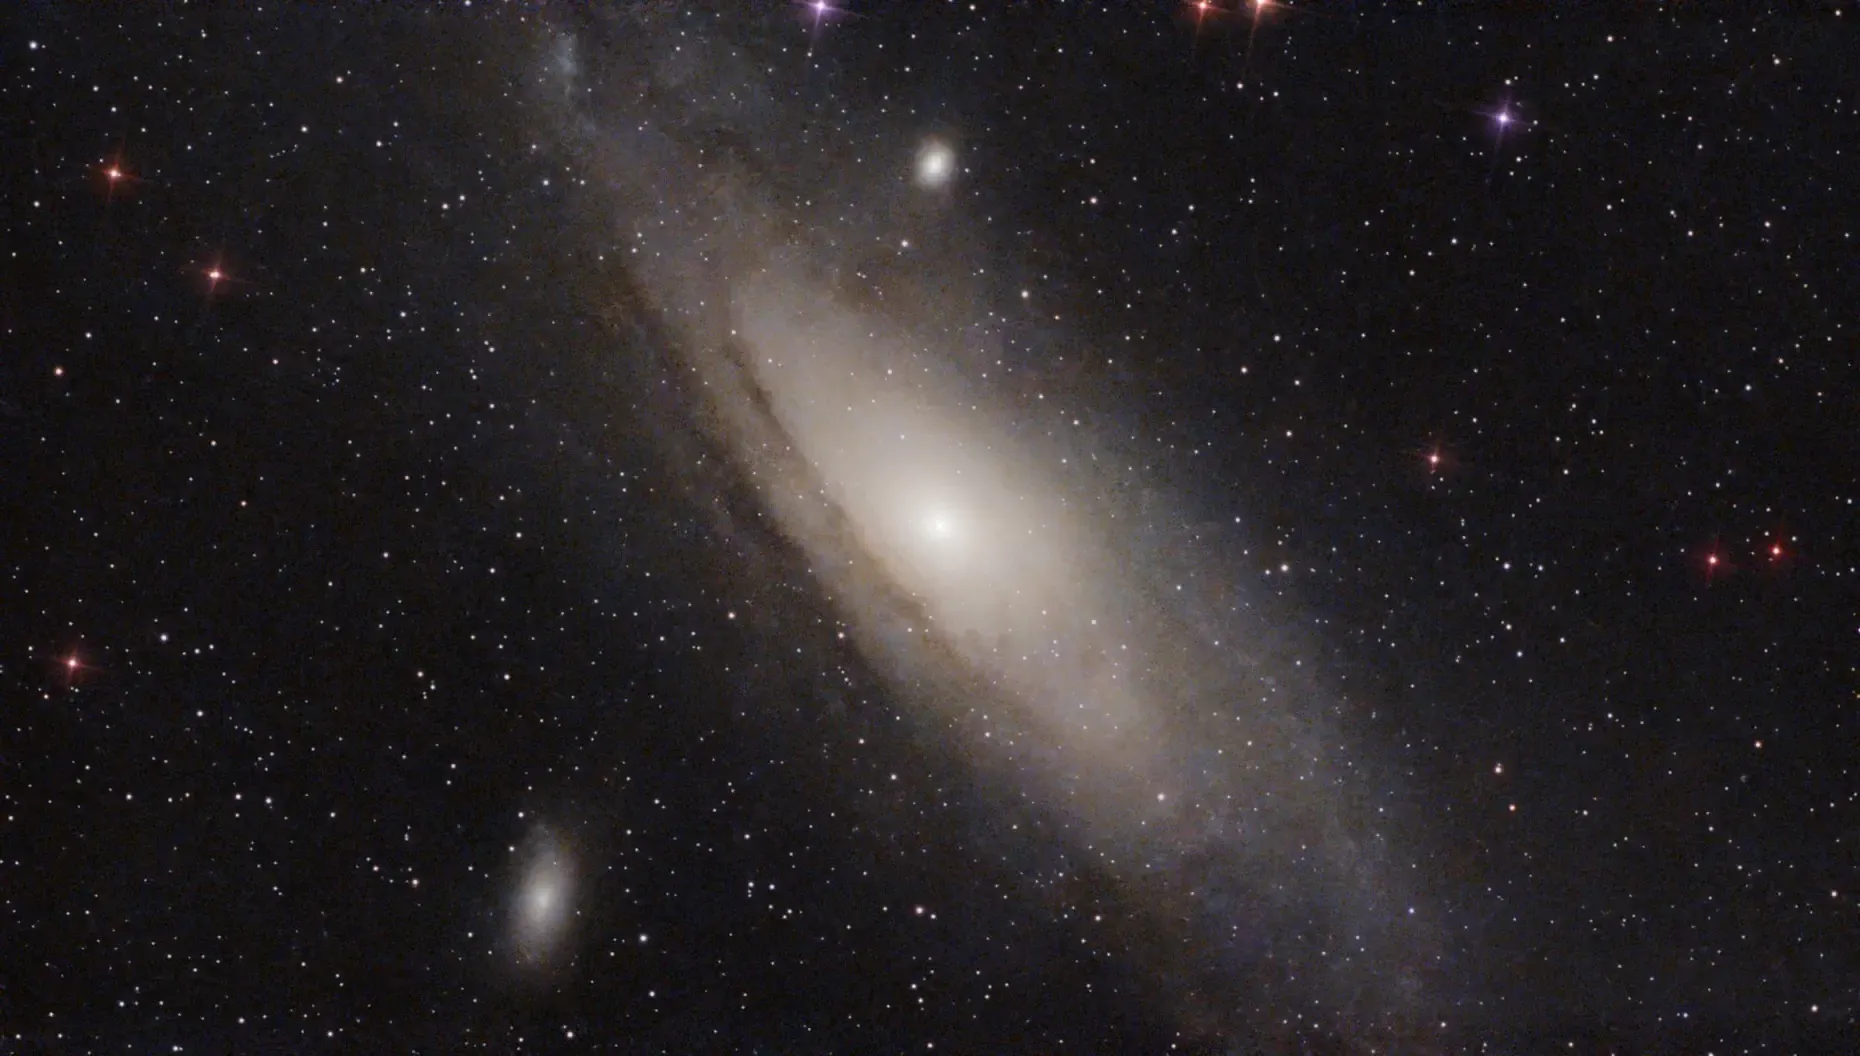
Some structure is becoming visible, like the dark lanes, and two of M31’s satellite galaxies: M101 at bottom left, and M32 directly above M31’s centre. I’ve rotated the image by 180° to agree with most views.
But this object really benefits from many exposures, so over the next few weeks I’ll be taking lots more and hopefully mega-stacking them all.
Details:
Target: M 31 (NGC 224), Andromeda Galaxy
Time: 2026-06-25 02:01..02:53
Equipment: Dwarf Mini, Astro filter
Integration: 38mins (76×30secs, +14 failures), gain 60
Conditions: Clear, Bortle 6
Processing: PhotoDesk equalisation, gamma
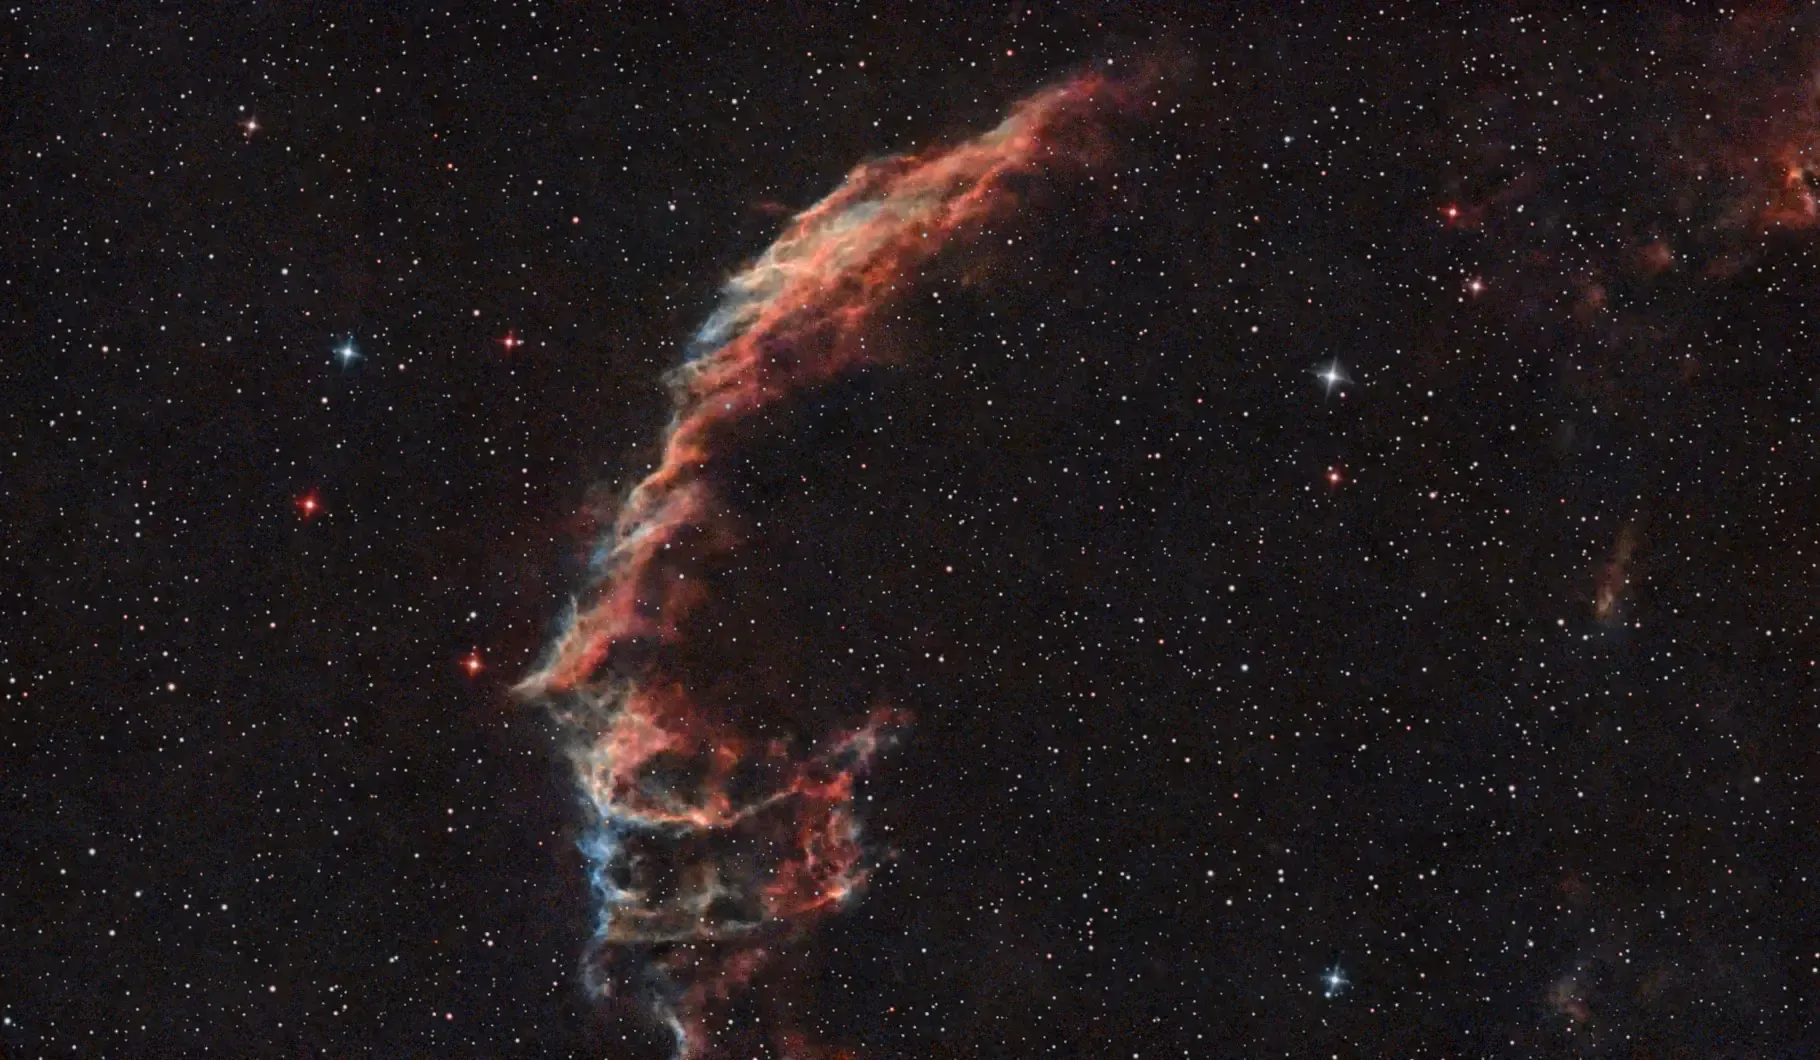
While waiting for M31 to appear, I had another go at the Eastern Veil, which is very pretty. I applied the “Star Reduction” filter this time, which brings out the nebula a bit more:
Details:
Target: C 33 (NGC 6992), Eastern Veil Nebula
Target position adjusted to:
DEC: 31.452777777777772
RA: 20.92944444444445
Time: 2026-06-24 23:00..01:56
Equipment: Dwarf Mini, Duo-Band filter
Integration: 2hrs 26mins (292×30secs, +11 failures), gain 60
Conditions: Clear, Bortle 6
Processing: PhotoDesk equalisation, gamma
And so to bed…
The Eastern Veil
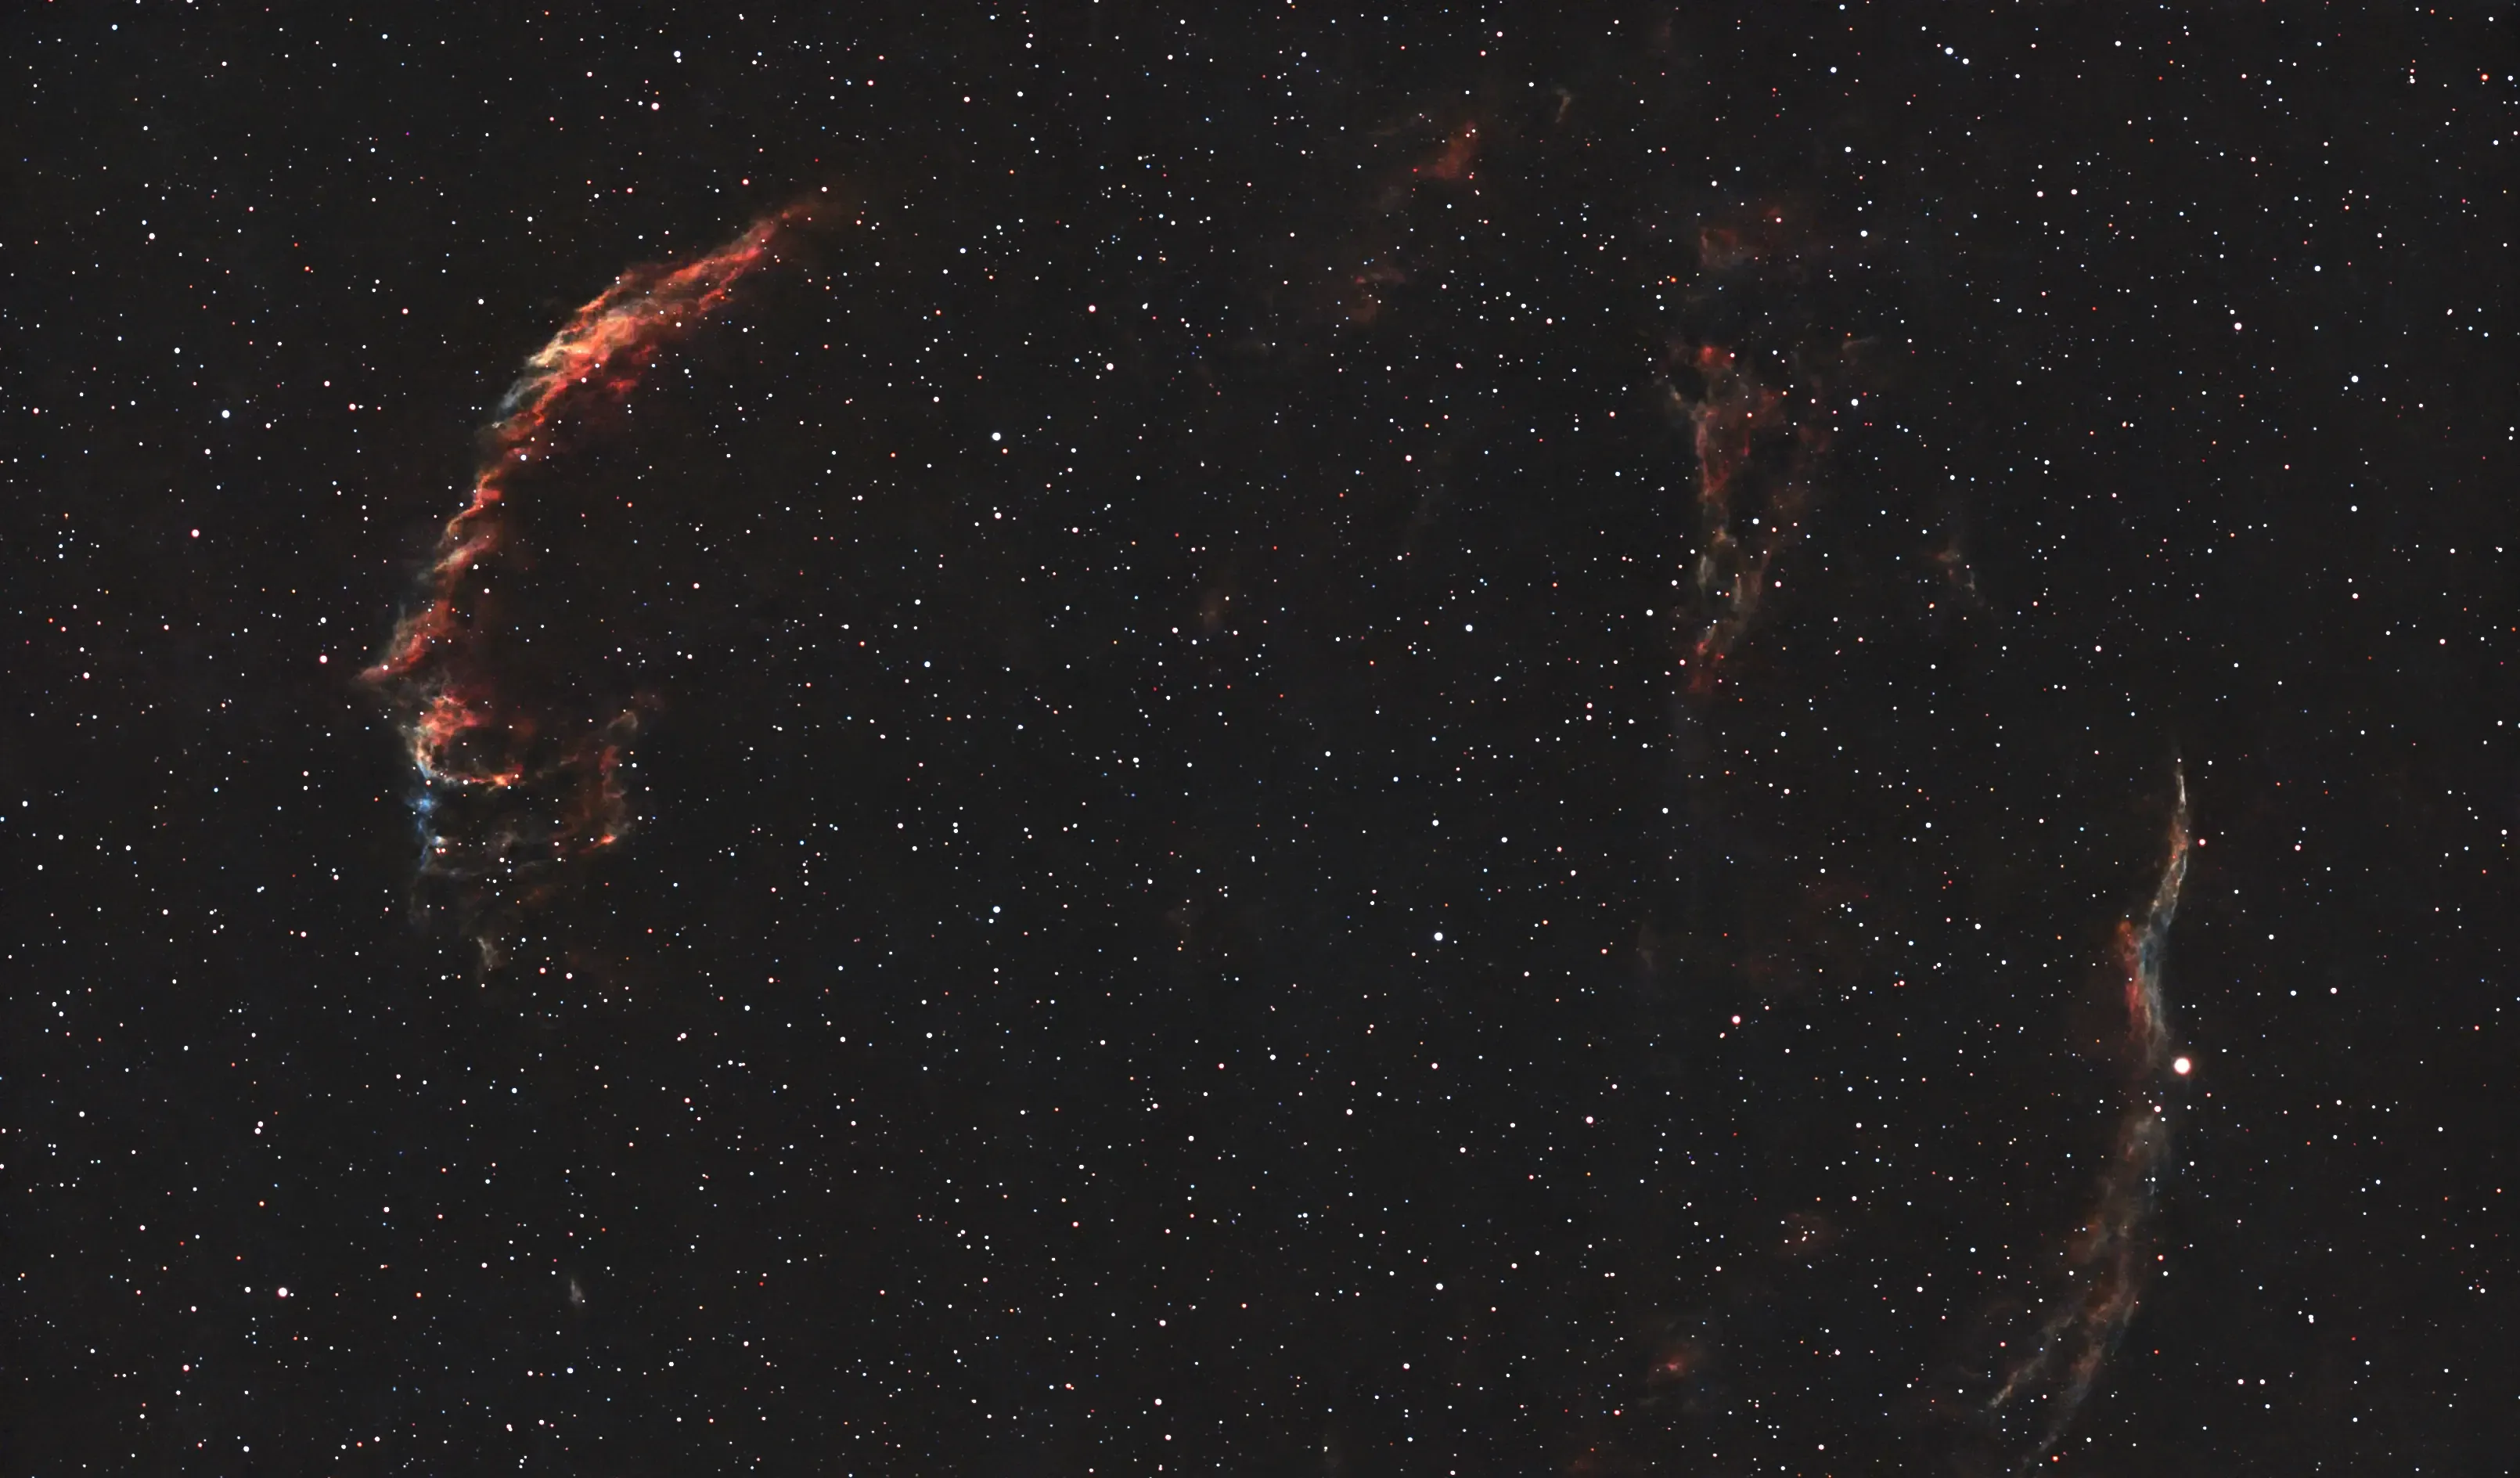
June 20/21. Approaching the shortest night now, and during a couple of hours of cloudless skies last night I continued the examination of the rich Cygnus area, this time looking at C 33, the Eastern Veil Nebula. Along with the Witch’s Broom, this forms part of the Cygnus Loop supernova remnant.
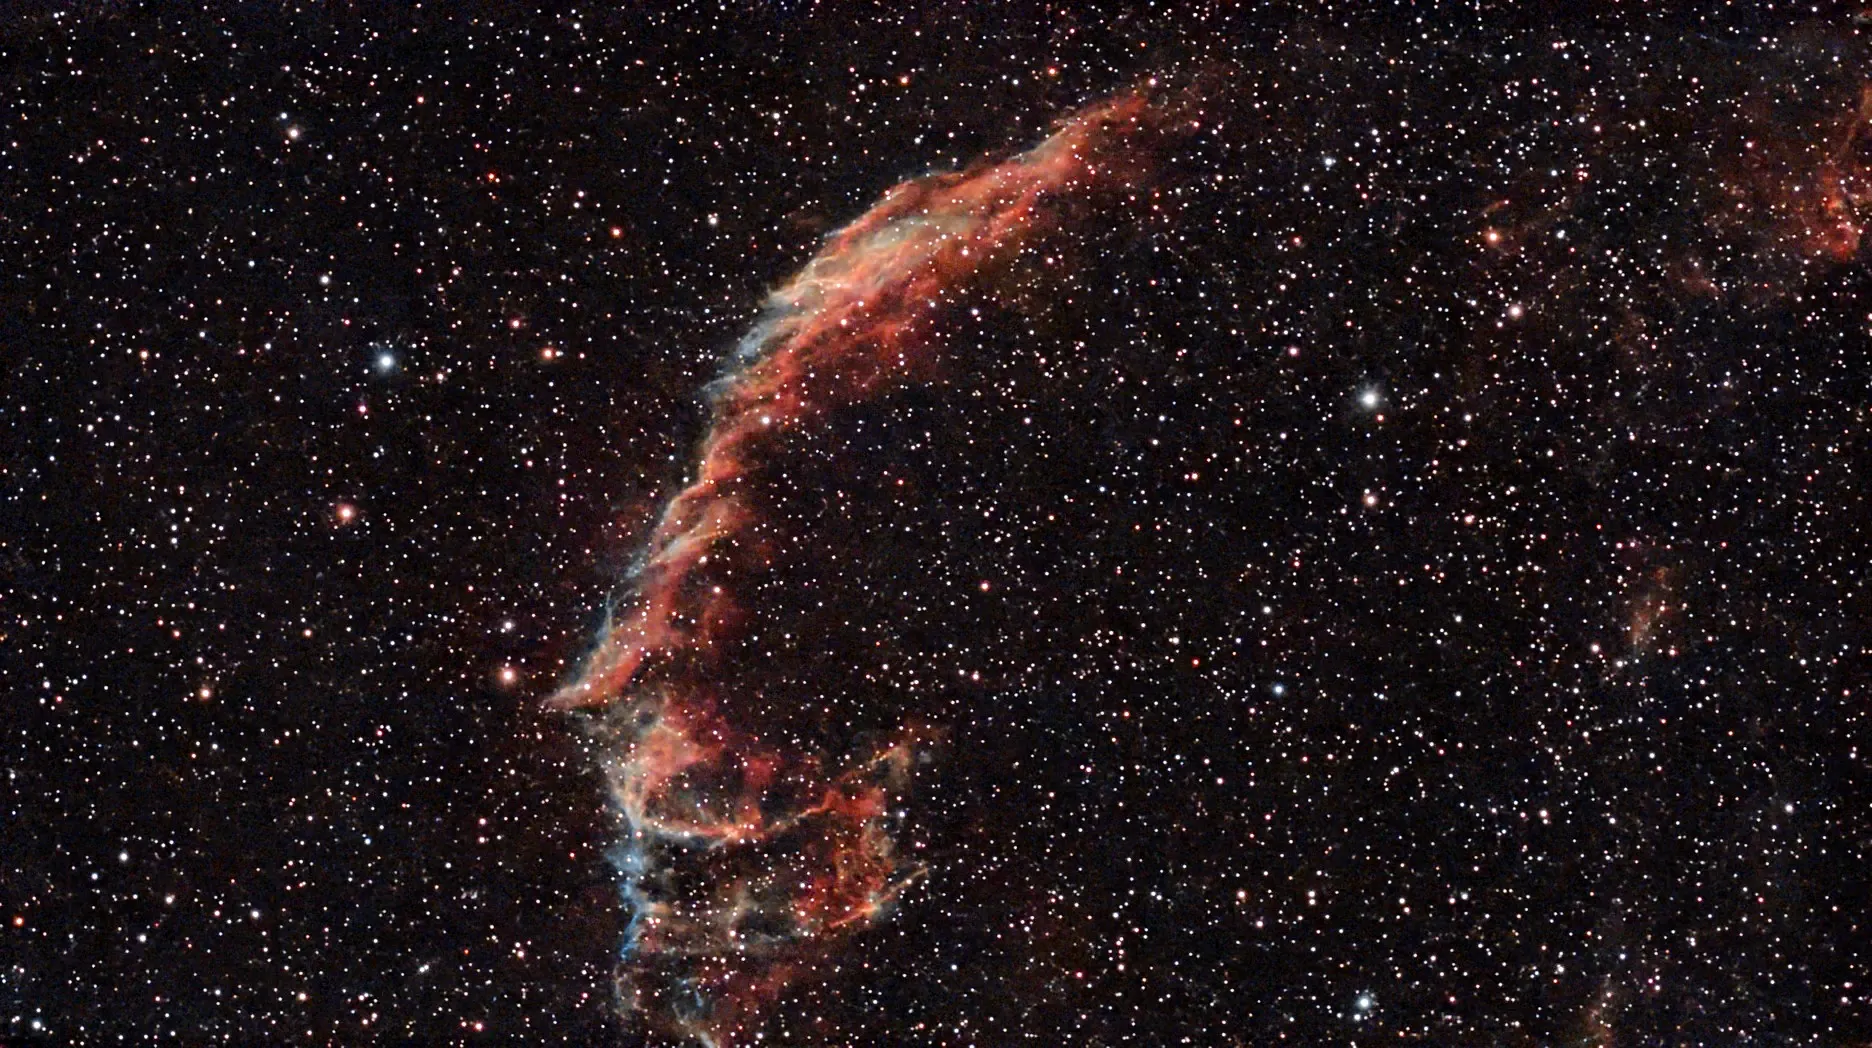
The blue areas are O III, doubly ionised oxygen, the red areas are ionised hydrogen. I would have given it longer but clouds rolled in.
Details:
Target: C 33 (NGC 6992), Eastern Veil Nebula
Target position adjusted to:
DEC: 31.452781858254376
RA: 20.929569042989925
Time: 2026-06-20 22:58..00:47
Equipment: Dwarf Mini, Duo-Band filter
Integration: 1hr 31mins (182×30secs, +2 failures), gain 60
Conditions: Clear, Bortle 7
Processing: PhotoDesk equalisation, gamma
And so to bed…
A Pelican in a Swan
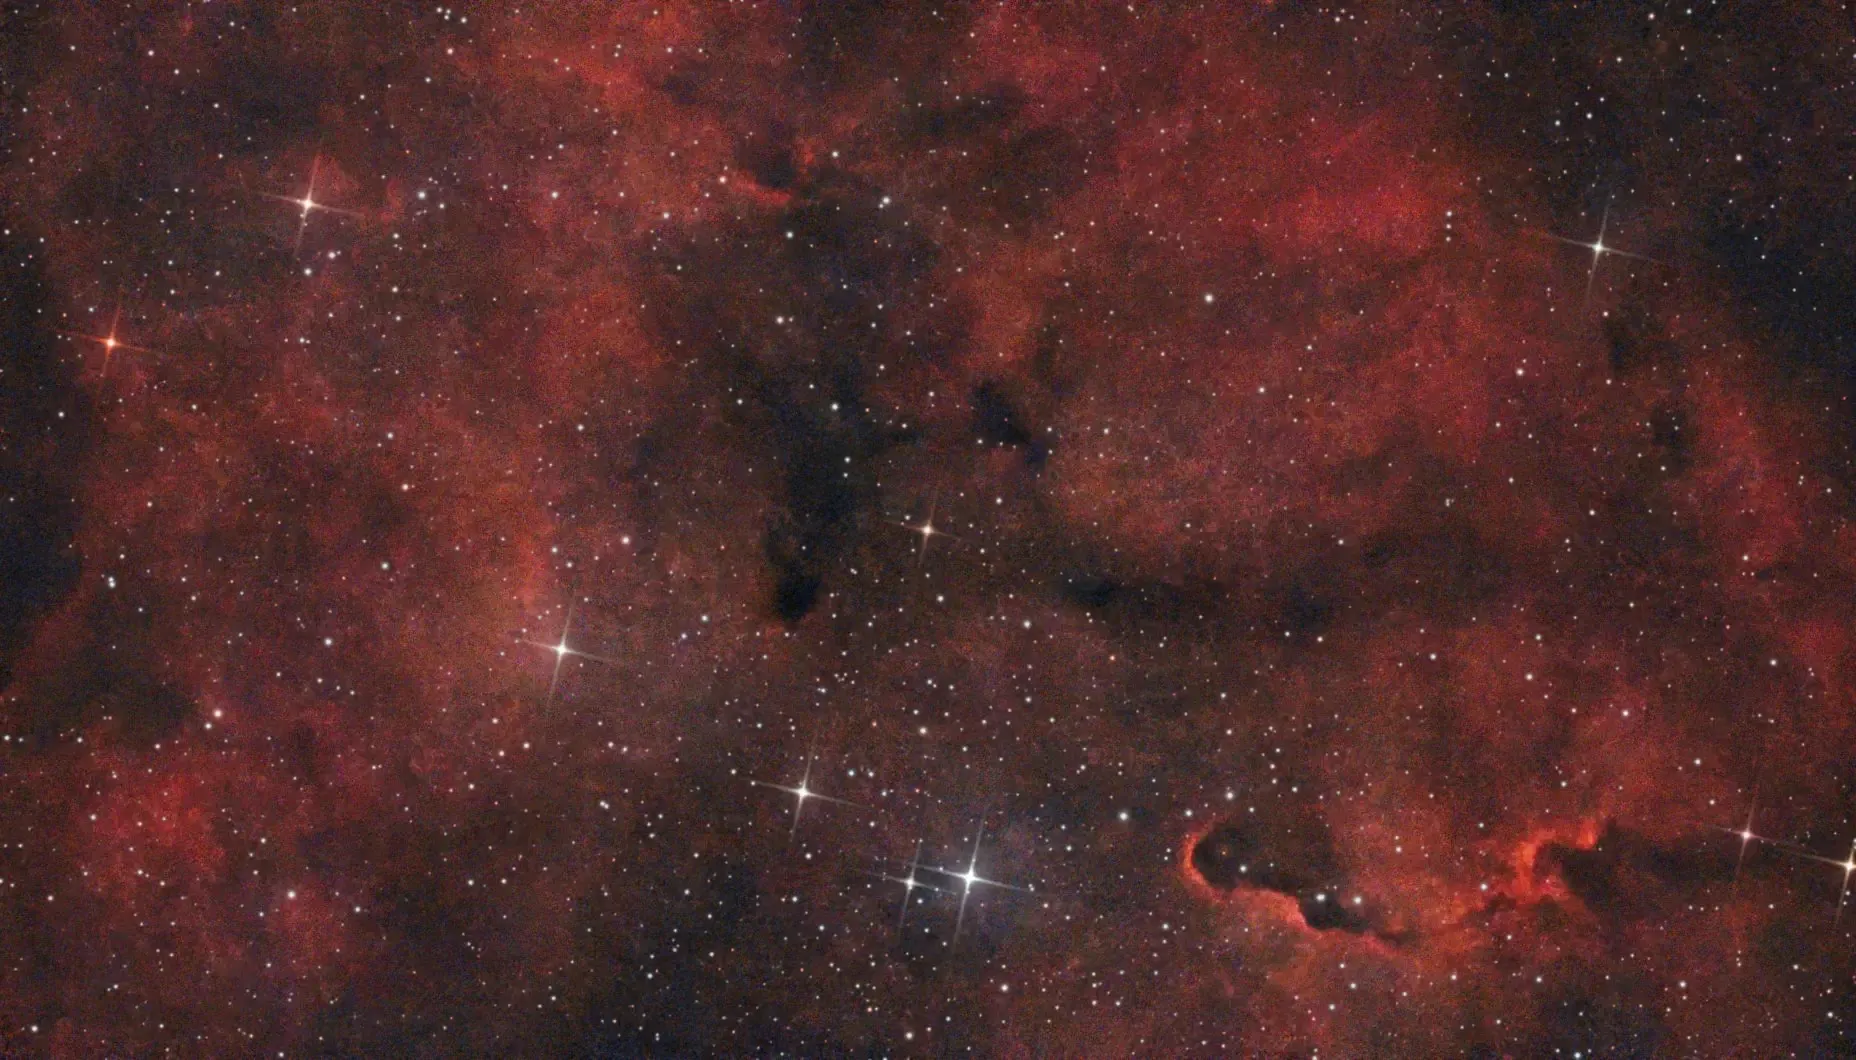
June 18/19. This is IC 5070 in Cygnus, near the star Deneb and the North American Nebula:


It’s an emission nebula associated with star formation, and is also known as the Pelican Nebula. Once the image was processed it became clearer why — on the right is a poorly drawn animation which perhaps explains it.
And here’s a striking coincidence: Pelicans hatch in St James’s Park.
Just visible at the top, emanating from the bright crescent shape (itself catalogued as IC 5067), is the dark jet known as Herbig-Haro 555. More exposures would hopefully bring out more of the dark lanes, and the oxygen colouration.
Details:
Target: IC 5070, Pelican Nebula (centred on the star HIP 102843)
Time: 2026-06-18 23:31..01:55
Equipment: Dwarf Mini, Duo-Band filter
Integration: 2hrs (239×30secs, +3 failures), gain 60
Conditions: Clear, Bortle 7
Processing: PhotoDesk equalisation, gamma
And so to bed…
The Witch’s Broom
Update, June 13/14
Another go last night, and here’s a mega stack of the two sessions:
Some more detail, and the surrounding nebulosity has been brought out a bit more. I tried raising the gain to 70 and reducing exposure time to 15 seconds, mainly to see what diference it made; the increased noise is probably due to the extra gain, so I won’t be trying that again. There were 36 failed shots this time, some satellites but mostly because it was very windy resulting in smeared stars.
Details:
Target: C34, Witch’s Broom nebula
Time:
A: 2026-06-11 00:17..01:23
B: 2026-06-14 00:11..01:39
Equipment: Dwarf Mini, Duo-Band filter
Integration:
A: 49mins (98×30secs, +7 failures), gain 60
B: 66mins (264×15 secs, +36 failures), gain 70
Total: 1hr 55mins
Conditions: Clear but windy, Bortle 7
Processing: PhotoDesk equalisation, gamma (blue and rgb), balance
Original post
June 10/11, another few hours of clear skies. After doing the wide mosaic of the Veil Nebulae recently, we were intrigued by the colours in the Witch’s Broom part. They weren’t very prominent so here’s another go, this time concentrating on the Broom, Caldwell 34.
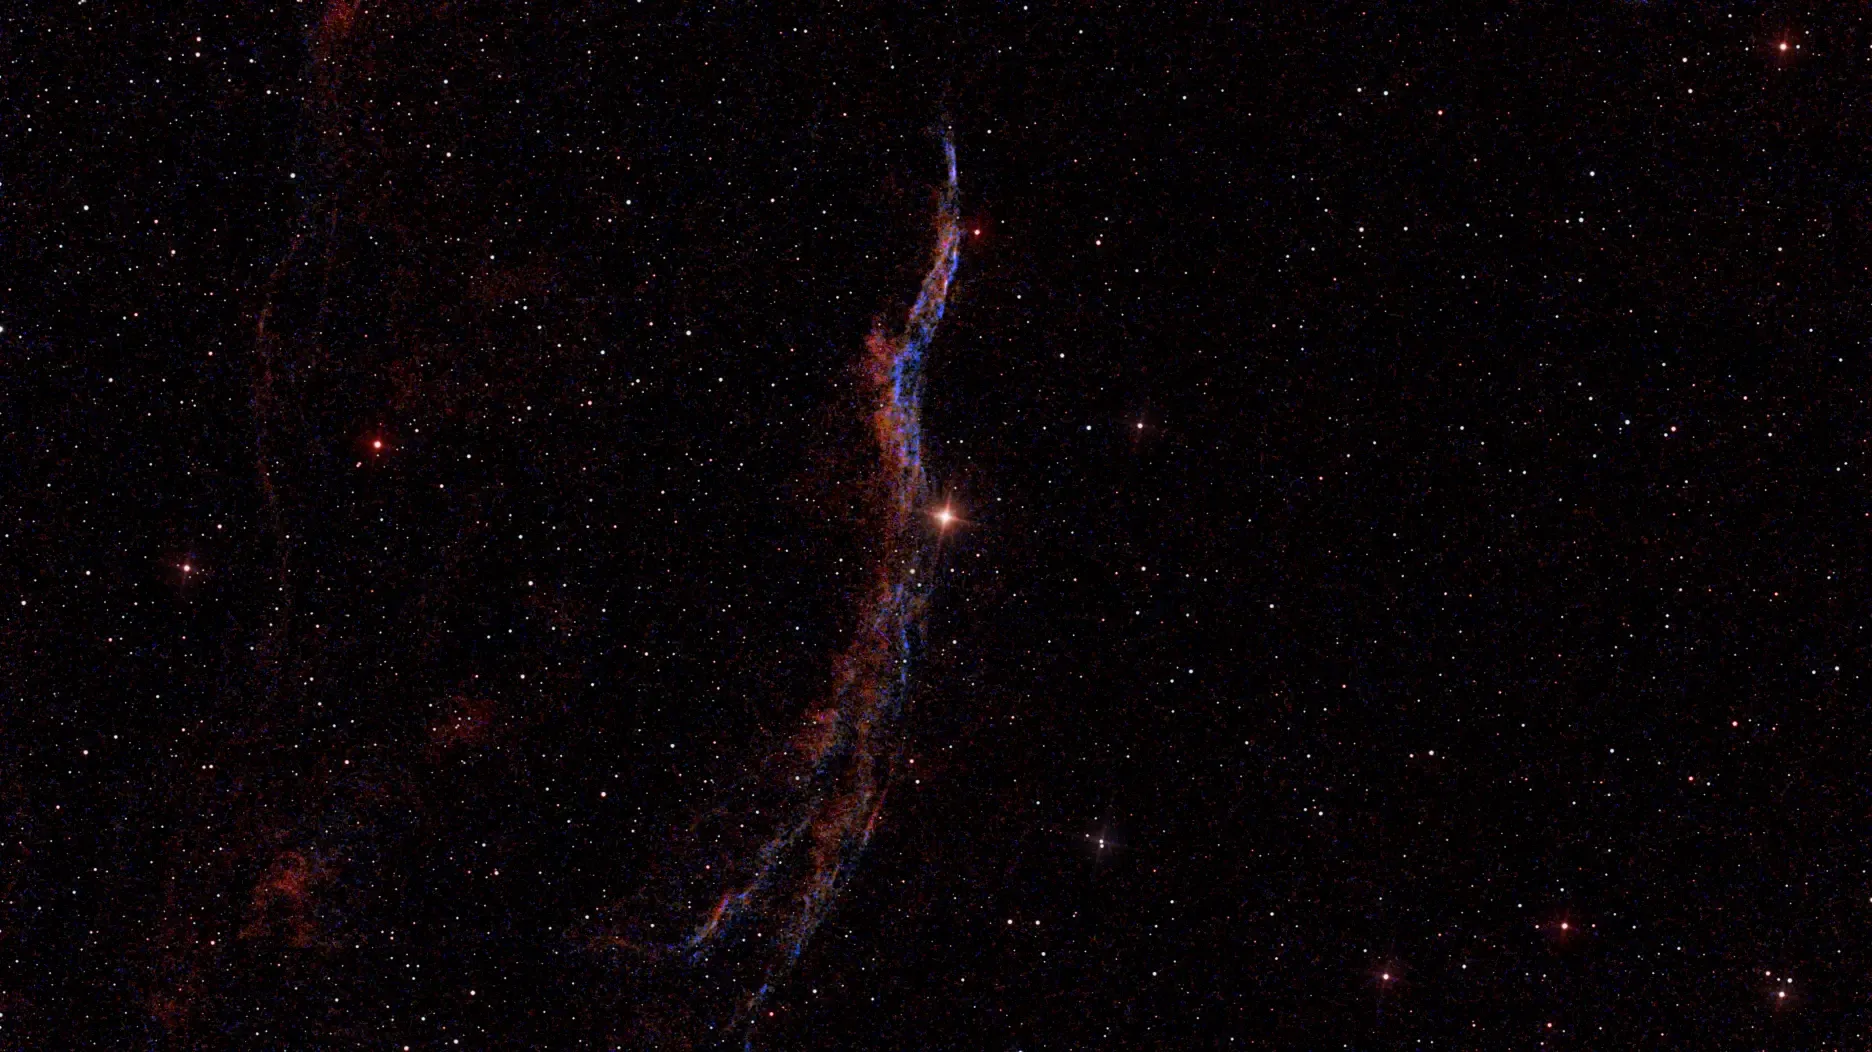
The Dwarf Mini has two main filters available: Astro, which enhances infrared and is mainly used for galaxies and solar system objects, and Duo-Band, which is designed to emphasise the Hα and O III parts of the spectrum — that is, ionised hydrogen at 656.3nm and oxygen at 500.7nm. These emissions are prominent in nebulae and are shown as reddish and bluish colours respectively. This filter also reduces glow from moonlight and general light pollution (street lighting and so forth), so is pretty useful.
I didn’t have time for many exposures, so this is intended as the first tranche of a mega-stack. It’s a fairly faint object and needs hundreds of shots — perhaps 3 or 4 hours of integration — to really bring it out. I’m also not too happy with the processing, but it’s a start.
Details:
Target: C34, Witch’s Broom nebula
Time: 2026-06-11 00:17..01:23
Equipment: Dwarf Mini, Duo-Band filter
Integration: 49mins (98×30secs, +7 failures), gain 60
Conditions: Clear, Bortle 7
Processing: PhotoDesk equalisation, gamma (blue and rgb), balance
And so to bed…
Sadr area, and an Elephant’s Trunk
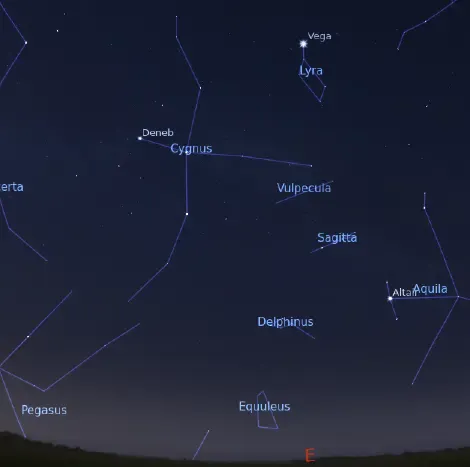
June 8/9, and at last a couple of hours of clear sky. We’re approaching the solstice now, and observing is limited to between 11pm and 3am or so.
I started with a perfect EQ alignment just before 11pm, and aimed the scope at the star Sadr, the central star in Cygnus, when it finally moved out from behind a tree. On the right is the view to the east at about 11:00 pm; Sadr is the star under the “g” of “Cygnus”, and it’s in the centre of a large area of nebulosity known as the Gamma Cygni Nebula, the Sadr Region, or IC 1318.
Below is the result of the session. Sadr itself is the fairly bright (magnitude 2.2) star in the centre of the image.
The small group of stars at top centre is the Inchworm Cluster, NGC 6910.
The long dark lane at lower left is the “body” of the Butterfly Nebula (the Cygnus one — there are a number of similarly named features elsewhere in the sky). The large “wings” are at centre left and (off-screen mostly) bottom left. This area is so large it really needs a mosaic!
It’s interesting to compare my effort with this image, taken with much more expensive equipment.
Details:
Target: Sadr, HD 194093
Time: 2026-06-08 22:50..00:18
Equipment: Dwarf Mini, Duo-Band filter
Integration: 1hr 15mins (150×30secs, 1 failure), gain 60
Conditions: Clear, Bortle 7
Processing: PhotoDesk equalisation, gamma
Just after midnight the Elephant’s Trunk nebula also became visible (that damned tree!); it’s halfway between Cygnus and Cepheus but is technically in Cepheus. I aimed the scope slightly off to get a bit more of the surrounding nebulosity in the picture.
The “Trunk”, or IC 1396A, or Sh2-131 — there are a hell of a lot of these sky catalogues, aren’t there? — is the curly bit at lower right. It’s embedded in the large nebula known as IC 1396, and is being illuminated by the brightest star at centre bottom, HD 206267.
Details:
Target: Elephant’s Trunk Nebula, IC 1396A
Time: 2026-06-09 00:23..01:32
Equipment: Dwarf Mini, Duo-Band filter
Integration: 1hr (120×30secs, 5 failures), gain 60
Conditions: Clear, Bortle 7
Processing: PhotoDesk equalisation, gamma
This is a bit noisy, and would benefit from more exposures. I’ll try it again (skies permitting) and stack them all together.
And so to bed…
Veils, Rings and Moons
May 25/26, and another lovely clear night. This time I didn’t stay up, but programmed a session with two targets: M57 again, the Ring Nebula in Lyra from 11pm to 1am, and a mosaic of the Veil Nebulas C33 and C34, which are parts of a large complex called the Cygnus Loop; 1am to 3:30am. This is the remnant of a supernova that exploded about 8,000 years ago. The parts shown here are the Eastern Veil on the left, aka NGC 6992, and the Western Veil on the right, aka the Witch’s Broom; collectively aka Filamentary Nebulae. The fainter bit at top right centre is Pickering’s Triangle. Click for enlarged view.
Details:
Target: C33,C34; 4-frame mosaic
Equipment: Dwarf Mini, Duo-Band filter
Integration: 39mins/frame (77×30secs, 3 failures; total 228 frames), gain 60
Conditions: Clear, Bortle 7
Processing: PhotoDesk equalisation, gamma
This ideally needs longer than 40 minutes per frame to get a better result, but it’s difficult at this time of year, with short nights.
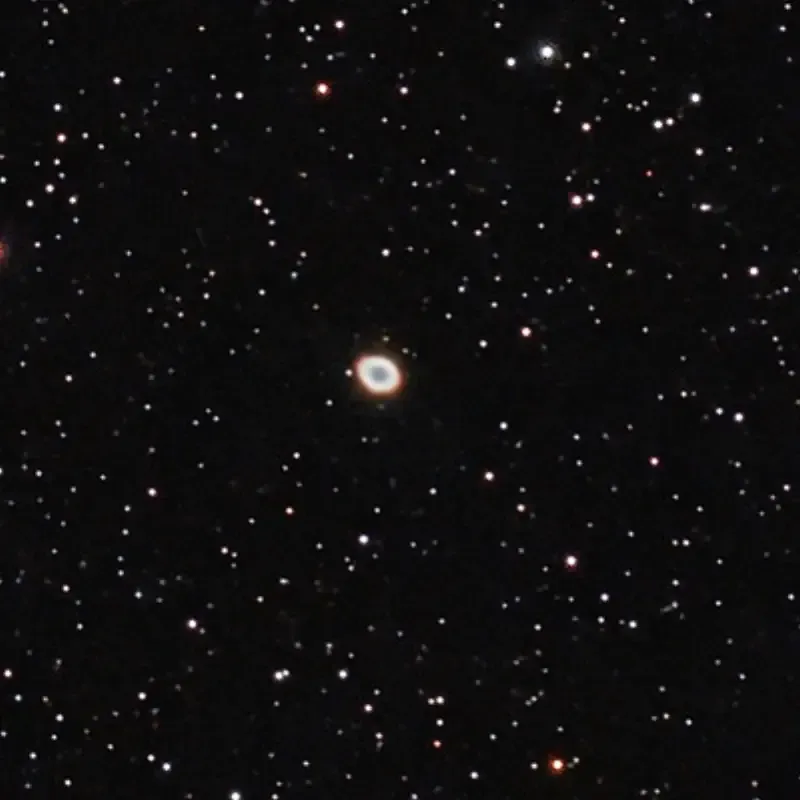
Here’s a megastack of the Ring Nebula, combining the shots taken last night with those from 25 April:
Details:
Target: M57 megastack
Equipment: Dwarf Mini, Duo-Band filter
Integration: 2hrs 30mins (300×30secs, 3 failures), gain 60
Conditions: Clear, Bortle 7
Processing: PhotoDesk equalisation, gamma, x2 scaling
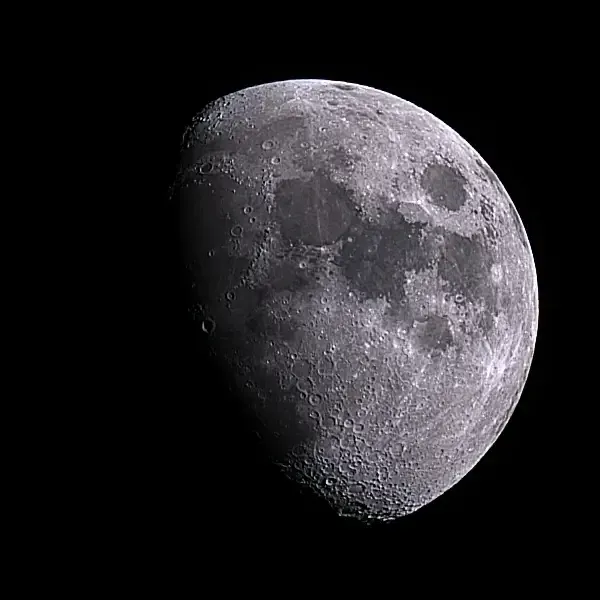
And finally, the Moon:
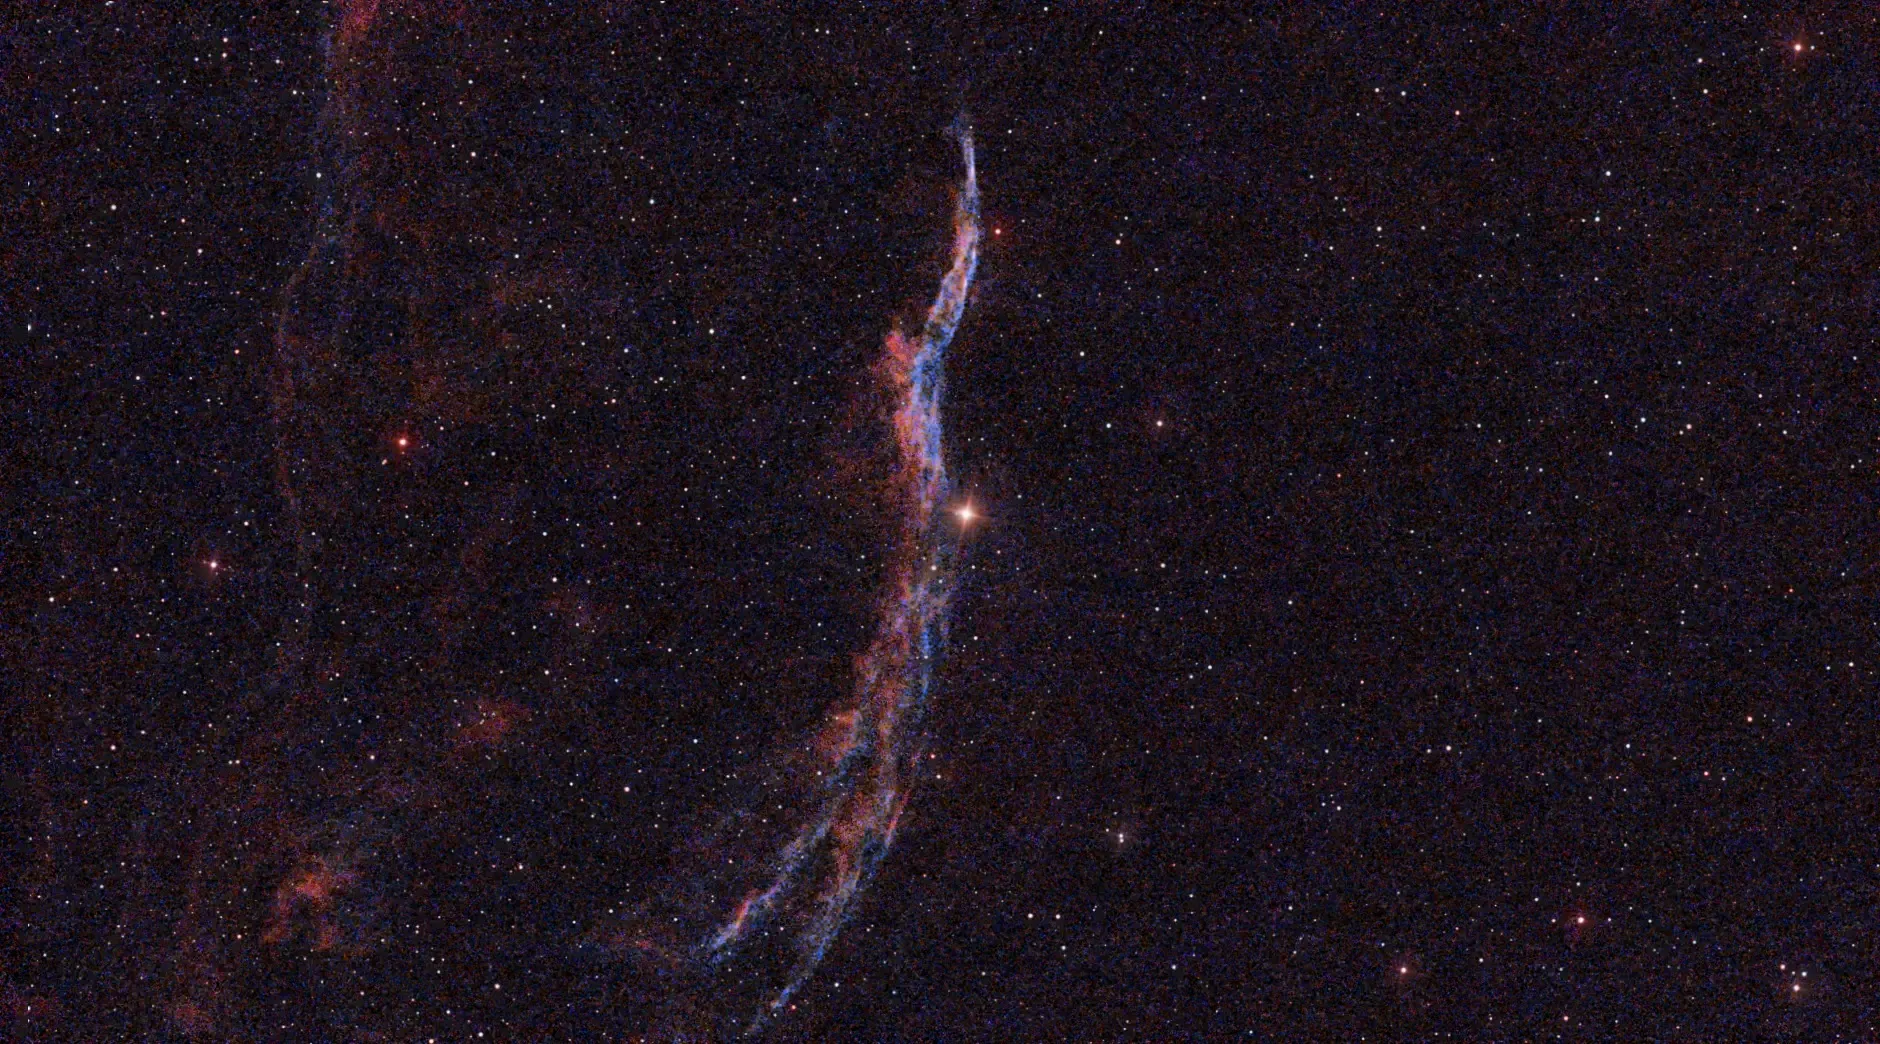
Crescent Nebula, and the Milky Way
May 24/25, and the first clear night for over three weeks — with a few more to come, hopefully.
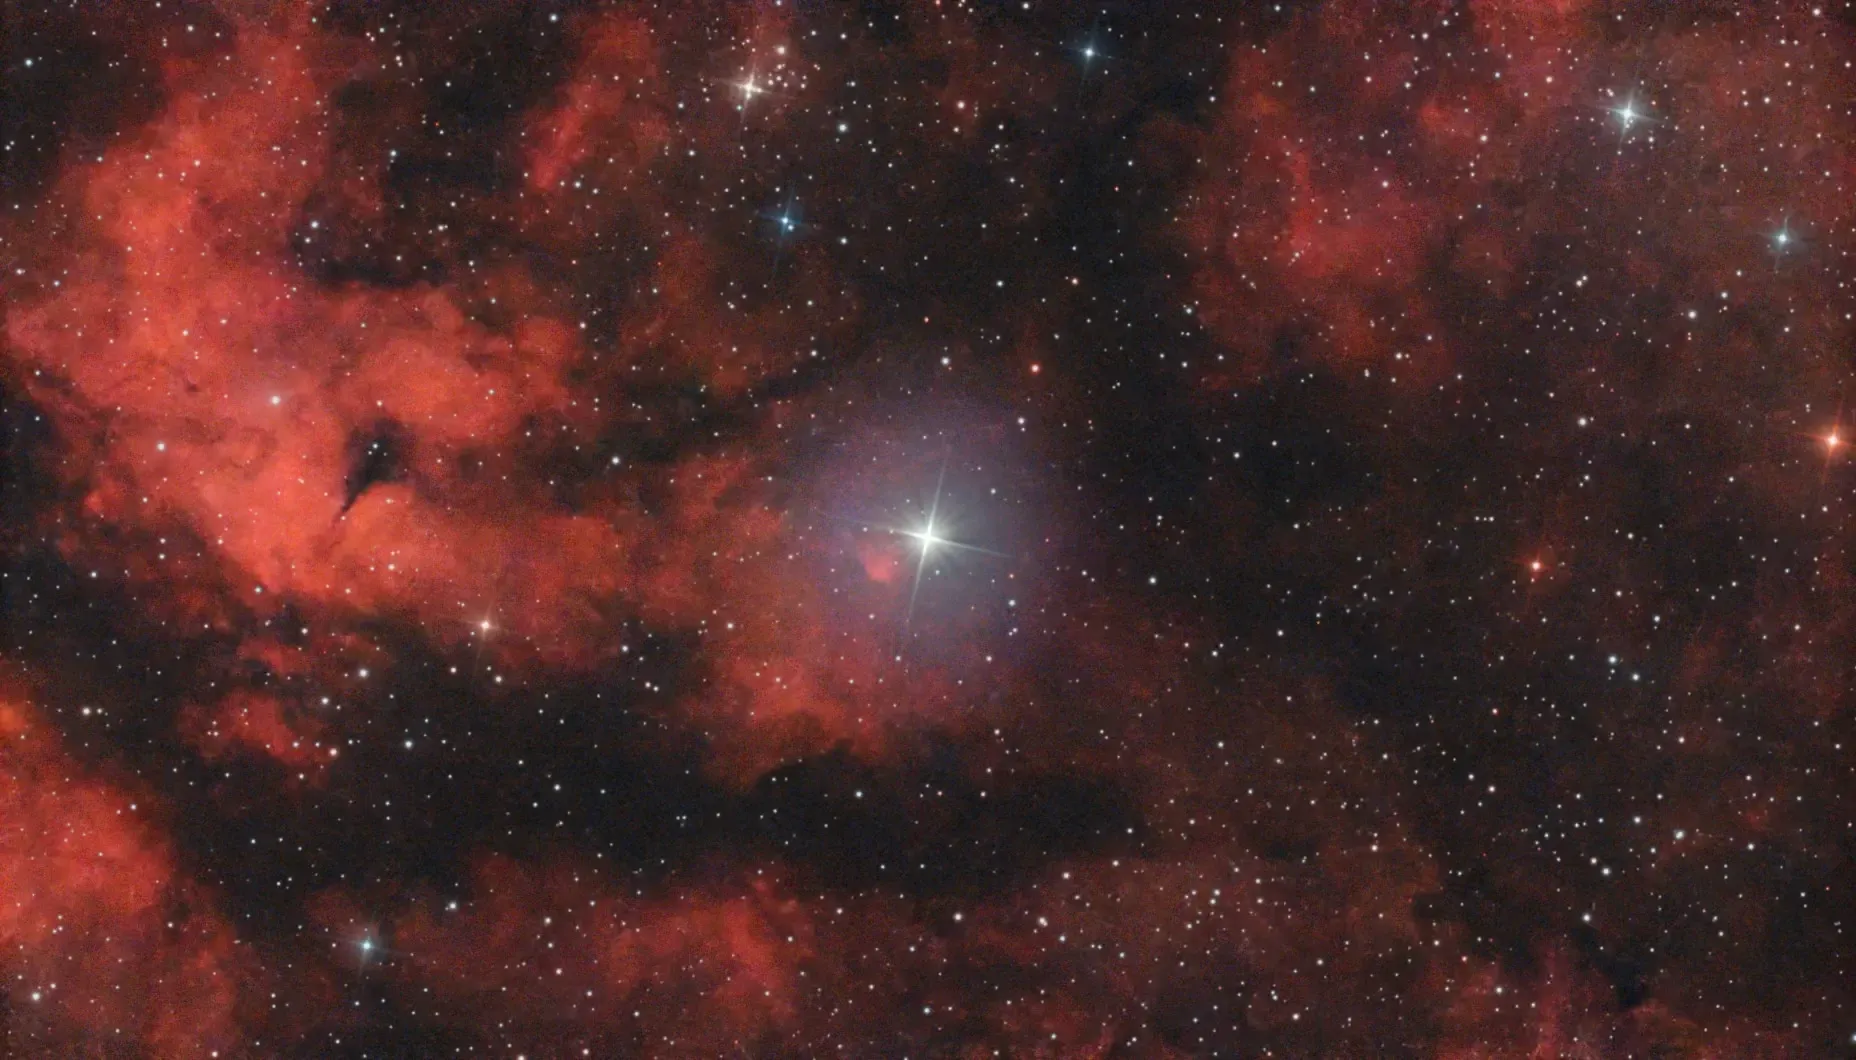
The summer is approaching, and with it comes the Summer Triangle of Deneb, Vega and Altair, the three brightest stars in Cygnus, Lyra and Aquila respectively. Cygnus is especially interesting due to the number of nebulae in the area and a fairly bright section of the Milky Way. So here’s Caldwell 27, aka NGC 6888, aka the Crescent Nebula:
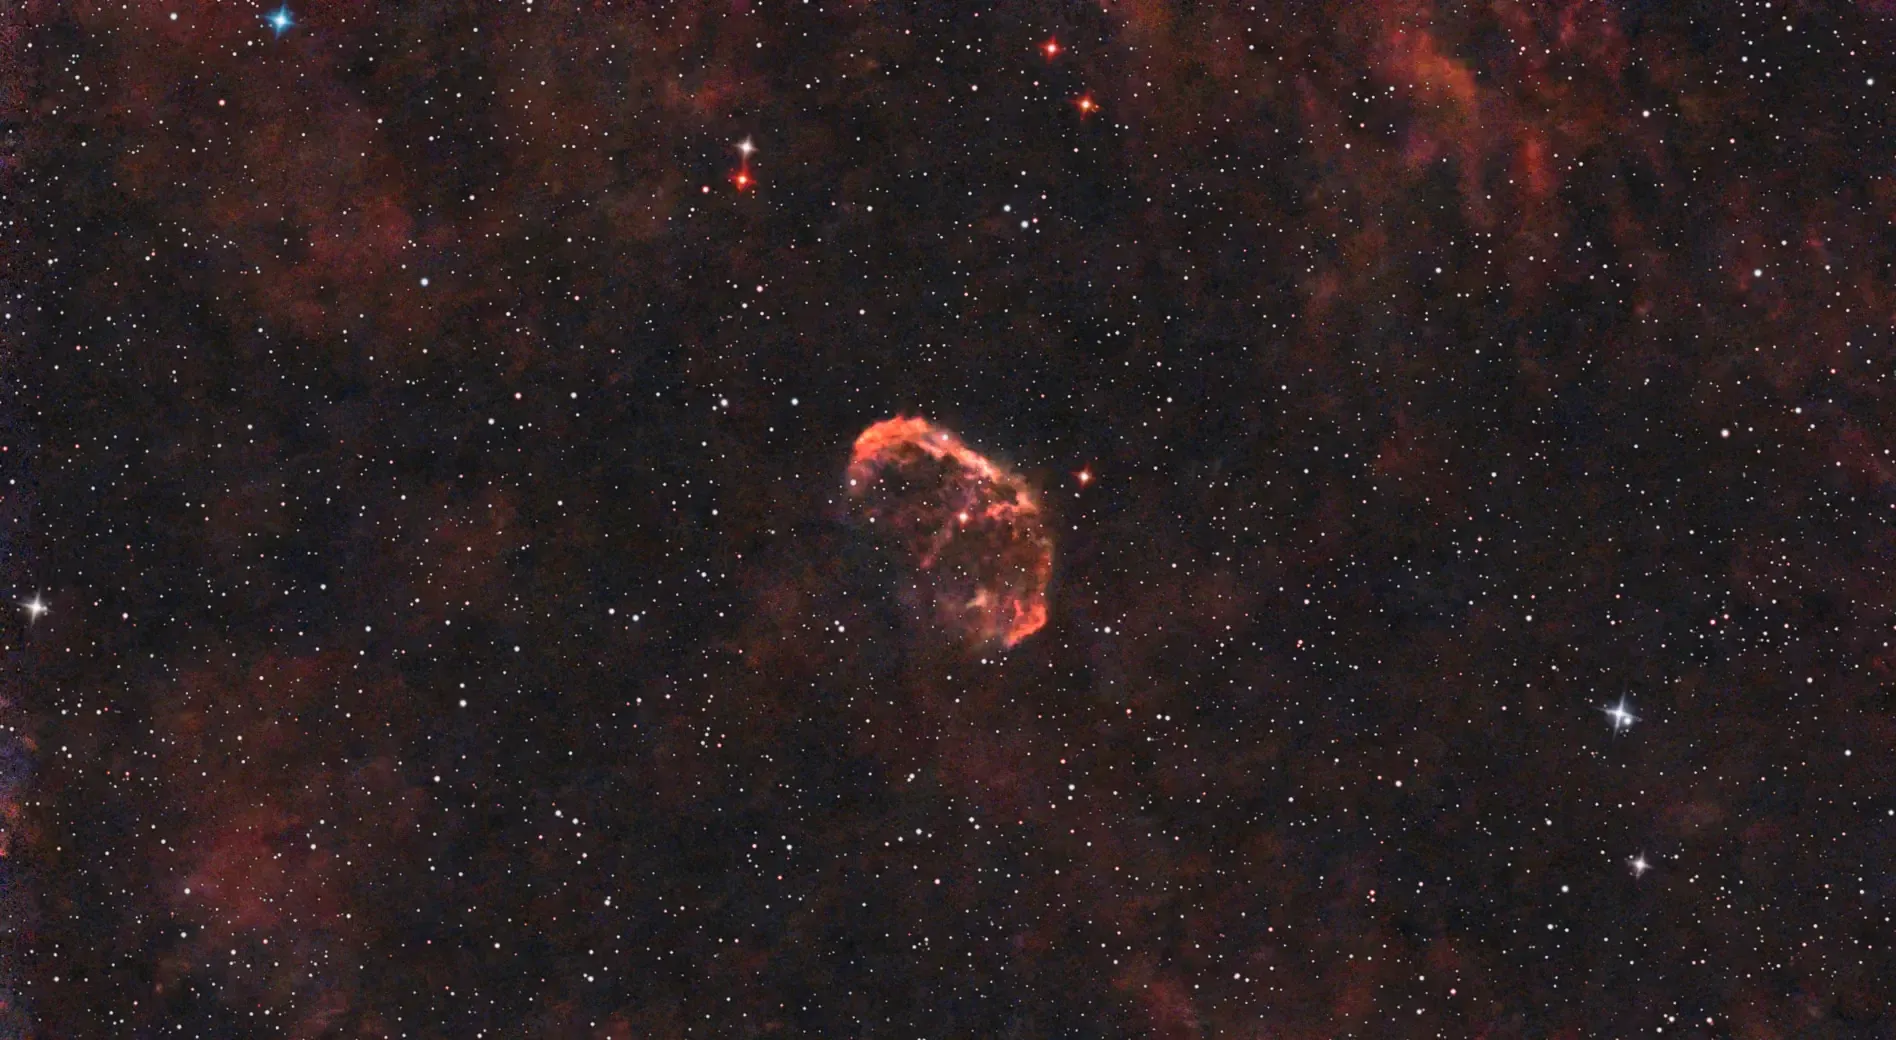
This emission nebula is just below Sadr, the central star of Cygnus. The star in the centre is WR 136, which about 120,000-240,000 years ago became a red supergiant and threw off the material that became the nebula. It’s expected to explode in a supernova at some point.
The area around Cygnus is rich in nebulosity, some of which can be seen here.
Details:
Target: C27
Equipment: Dwarf Mini, Duo-Band filter
Integration: 1hr 9mins (69×60secs, 1 failure), gain 60
Conditions: Clear, Bortle 7
Processing: PhotoDesk equalisation, gamma
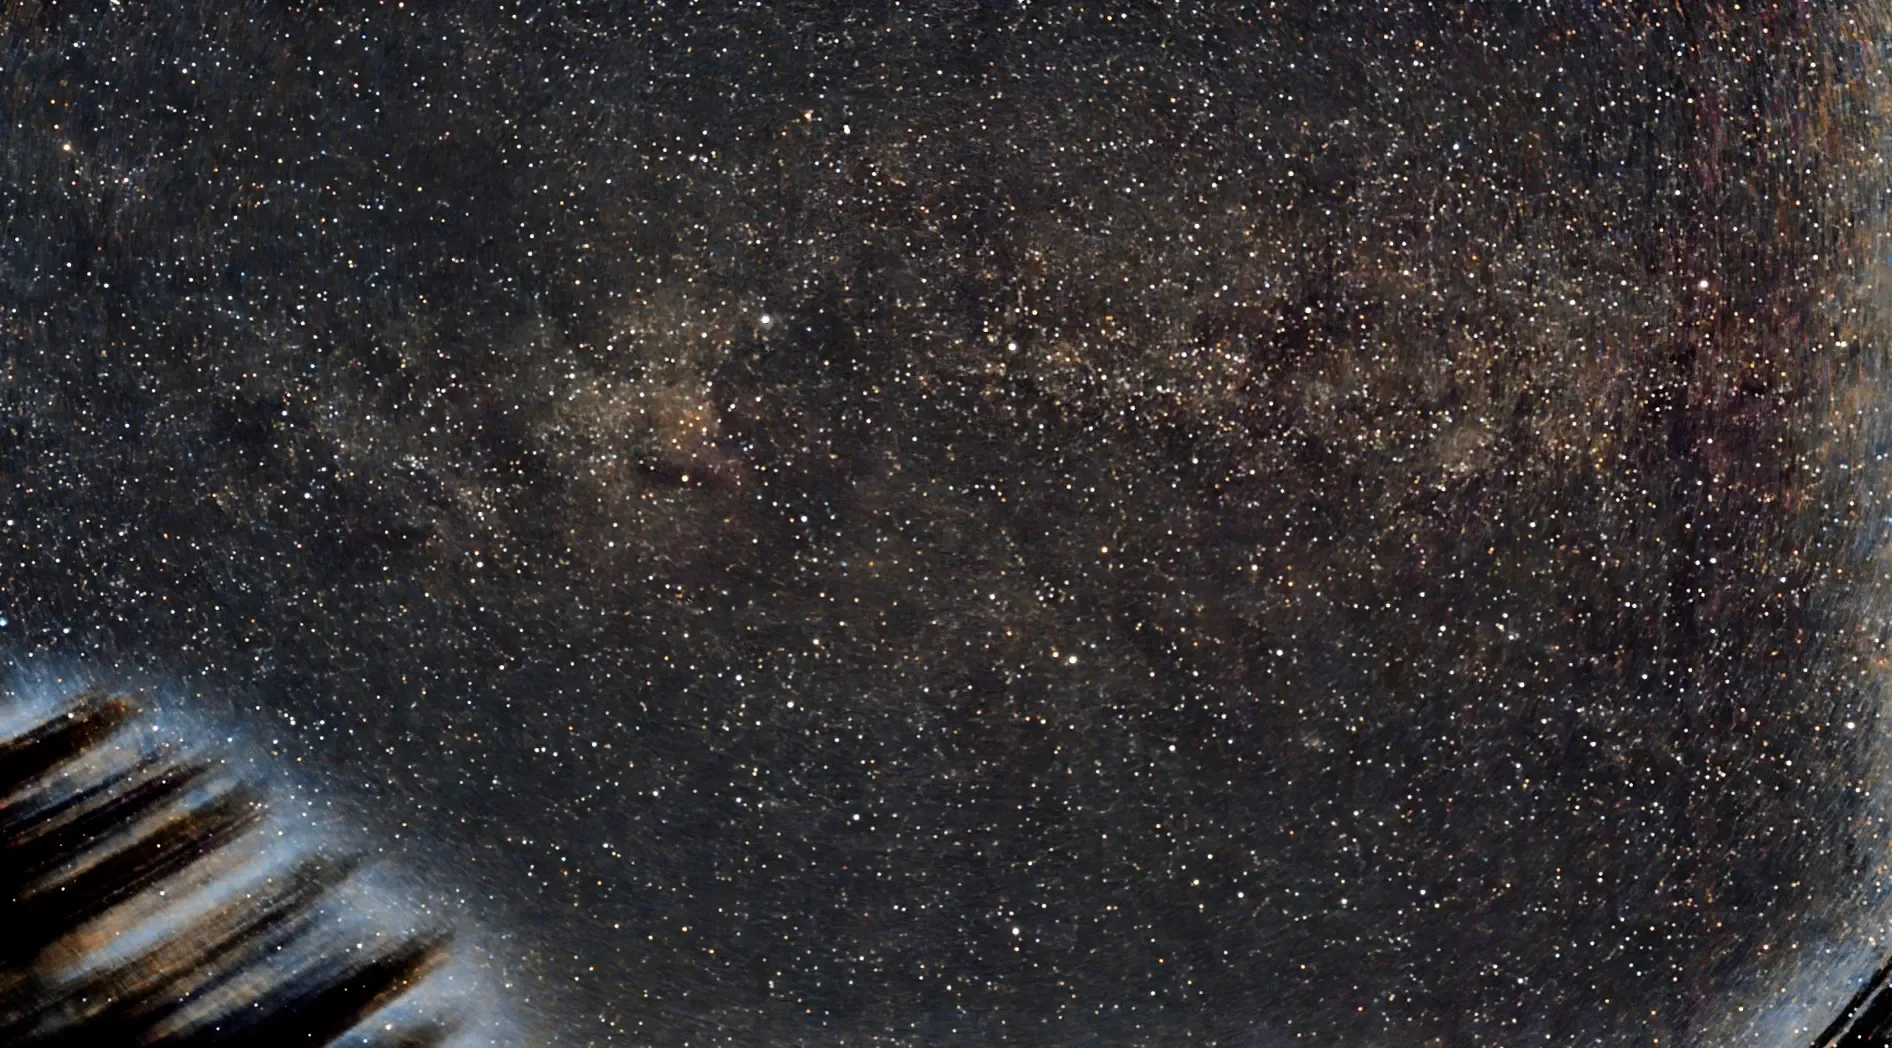
I also tried out the new Milky Way setting on the Mini, with rather poor results. It seems you need properly dark skies for this to work well. And I clearly didn’t give it long enough.
Details:
Target: Milky Way, Cygnus area
Equipment: Dwarf Mini
Integration: 33mins (201×10secs, no failures), gain 40
Conditions: Clear, Bortle 7
Processing: PhotoDesk equalisation, gamma
The smear on the left is a tree, and there’s obvious light pollution on the right.