Chasing variable stars
The globular cluster M13 has a number of variable stars, which change in brightness by various amounts over time. Some, like Cepheid variables, are very predictable and can be used to estimate the distance of objects.
I surmised it might be possible to catch the variations with the Dwarf Mini, so after taking the 27 March image, I took another the next night in a brief cloudless spell and tried comparing them. Spoiler: this hasn’t worked very well!
The image on the left is an animation of the two images. Both were taken with the same settings: 50 30-second exposures, 60 gain, Astro filter.
First of all the images had to be aligned. Because they were taken at different times the second had to be rotated by a small amount (about 2.1°), which was done in ArtWorks — it’s a bit easier than in PhotoDesk. The images were then imported into PhotoDesk and aligned using a layer for each image.
There are some obvious problems here. First, the images should have been taken at similar times. The second was taken earlier in the evening, so M13 was lower in the sky resulting in greater atmospheric attenuation, which alters the colours slightly — that’s why they’ve been converted to greyscale — and dims the image a bit. This would also reduce or eliminate any need for rotation.
Second, the weather for the second image was worse, with occasional cloud and some high haze.
Third, it turns out that most of the variables have fairly long cycles, between five days and three months, so the two photos should be separated by more than a day. And the amount of variation isn’t that much, so the two images do need to be as identical as possible.
So although it looks like some stars are varying, mostly fainter ones, this is an artefact. And they’re not quite aligned perfectly either.
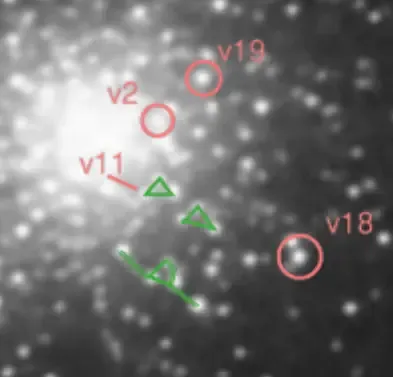
This Sky and Telescope article has a useful guide to M13 variable stars. About halfway down the page there’s an annotated image with the variable stars labelled and some asterisms — star patterns — outlined as guide aids. My image is on the right, and I’ve matched the asterisms, shown in green — an encouraging start — and marked a few of the variable stars, in red. It’s been zoomed in and cropped.
So my first attempt was, basically, rubbish. But I’ve learned a lot here…
M13, and M81 again
Another Dwarf Mini session last night. I plugged in a power bank for an extended session, but I stupidly forgot to turn it on 😢 so halted things when the Mini’s battery was down to 25%, after about 3 hours. Doh.
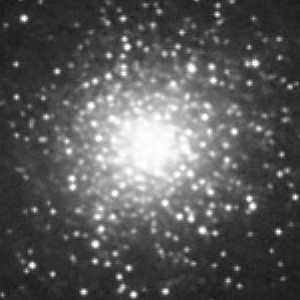
Anyway, this is M13, the globular cluster in Hercules:

As always, click for a bigger version. M13 is a small satellite galaxy of our own, and contains perhaps half a milliion stars. Stars are packed about 100 times closer together than in our neighbourhood, so the night-time sky of a planet in the cluster must be spectacular.
Here I took 50 30-second shots with 5 failures, gain 60, Astro filter. Slight sharpening and saturation in PhotoDesk.
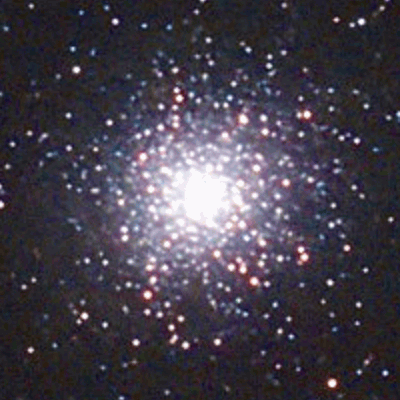
There’s a feature called the propeller in this cluster, which the Mini has managed to resolve — see right. It’s just a chance arrangement of dust lanes in the cluster and our viewpoint.
And below is another attempt at Bode’s Galaxy, M81:
This time I was more conservative with the settings, which has significantly improved the result. 200 images with no failures, 30 seconds each, gain 60 and Astro filter. No processing!
Pleiades, a first attempt
Today started off with thick fog, which gradually cleared to hazy sunshine and milky skies. Not the best conditions for astrophotography, but I decided try shooting the Pleiades, or Seven Sisters, a prominent star cluster in Taurus.
It’s not well positioned from our location at this time of year, being lowish in the western sky. And it’s only visible from our front garden, with a bright street light just outside. Nevertheless I had a go, and set up a Heath Robinson affair of a towel — life’s essential — draped over another tripod to shade the Dwarf Mini from the glare of the street lamp.
Here’s how it went:
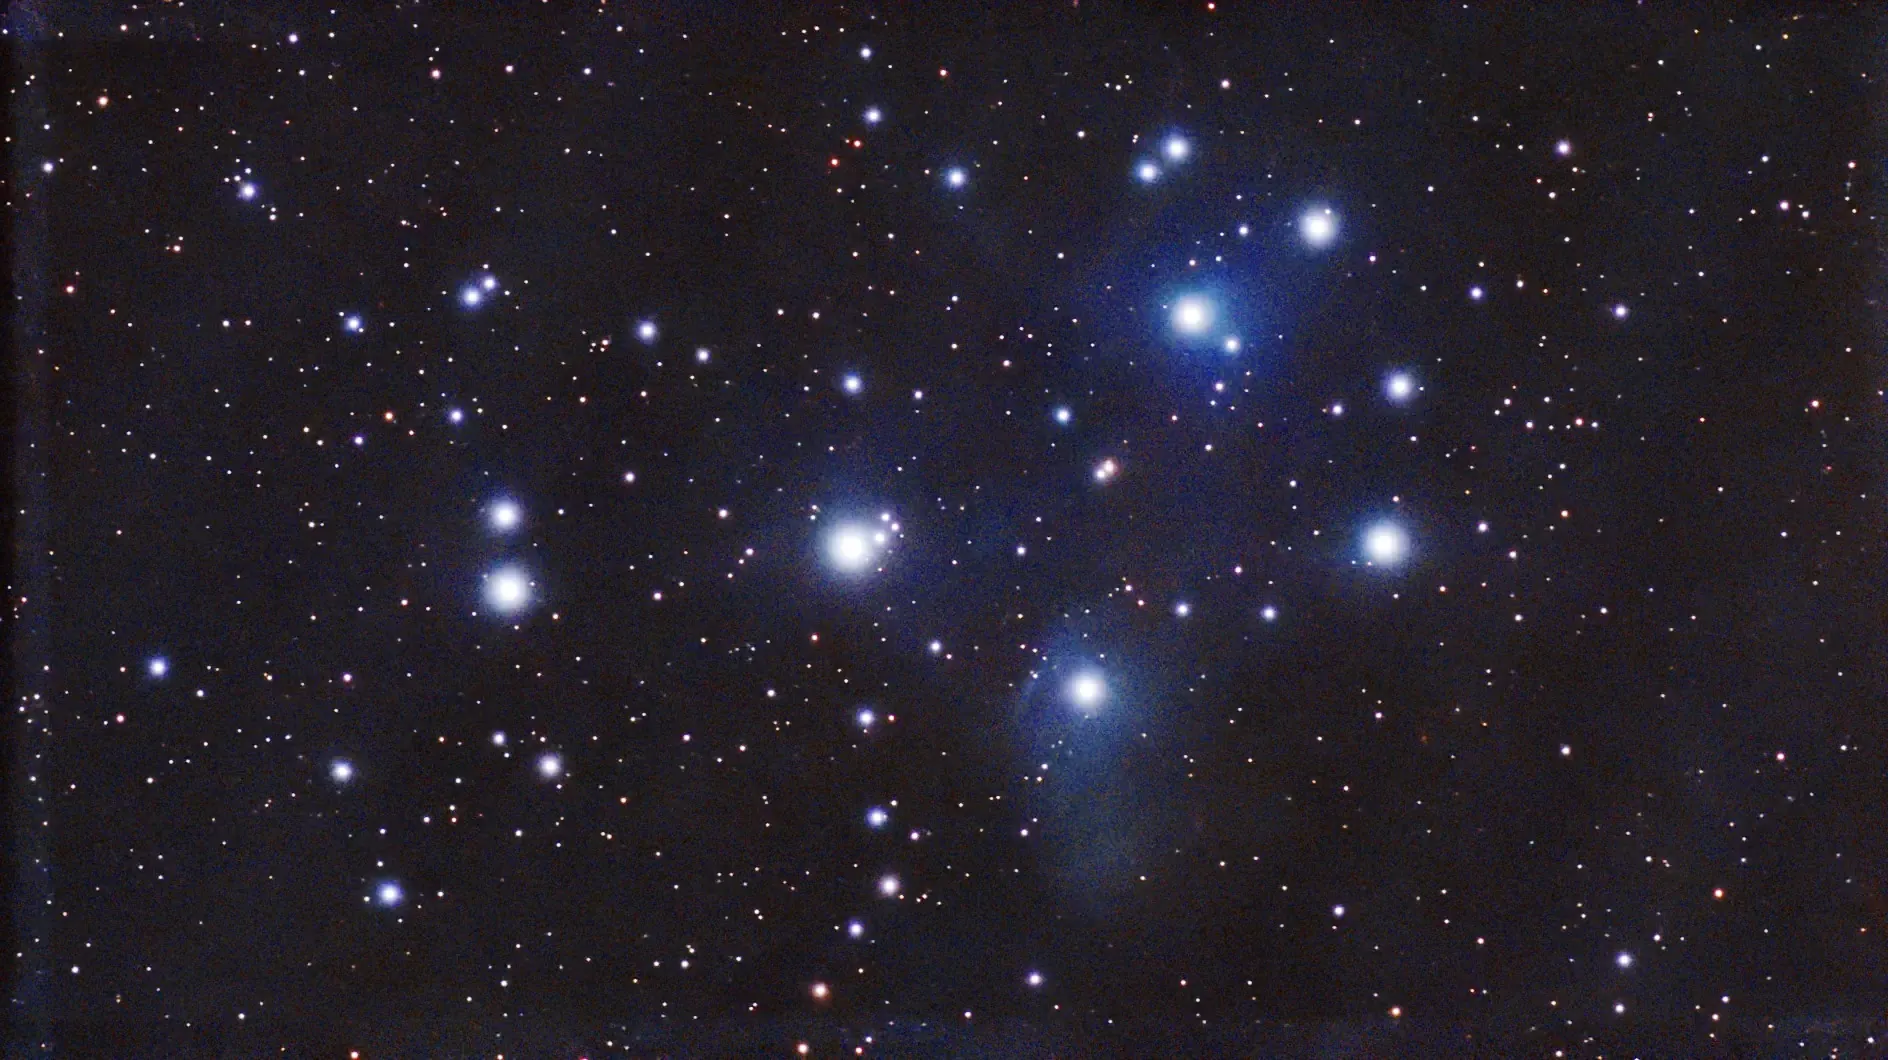
Not bad at all, considering the conditions! I set up the Mini to take 100 shots, with 60-second exposure and gain 60. But as you can see from the screenshot below, by 75 shots the hedge was getting in the way so I stopped the session. Unsurprisingly there were 12 failed shots, so this is a stack of 63. It’s been processed in PhotoDesk with equalisation and quite a strong gamma adjustment to bring out some of the faint blue nebulosity. This target really needs dark skies and long exposures, so we’ll have to wait until later in the year for a better result.
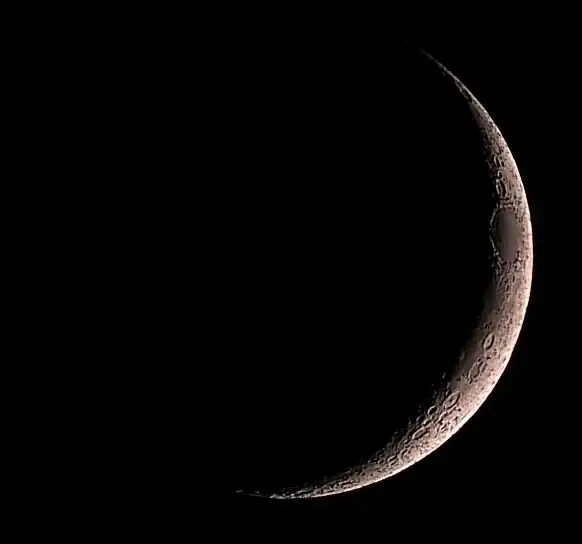
I also took a quick shot of the 3-day-old Moon:
Galaxies Update
A very clear night, and an opportunity to attempt some better shots of the galaxies I looked at last time.
I set up an equatorial mount, not “Perfect” but within 1°. I upped the exposure time to 60 seconds, and used a gain of 100. Click on the pictures for bigger versions. All have minimal PhotoDesk processing after passing through Stellar Studio — just small gamma and equalisation adjustments, and cropping.
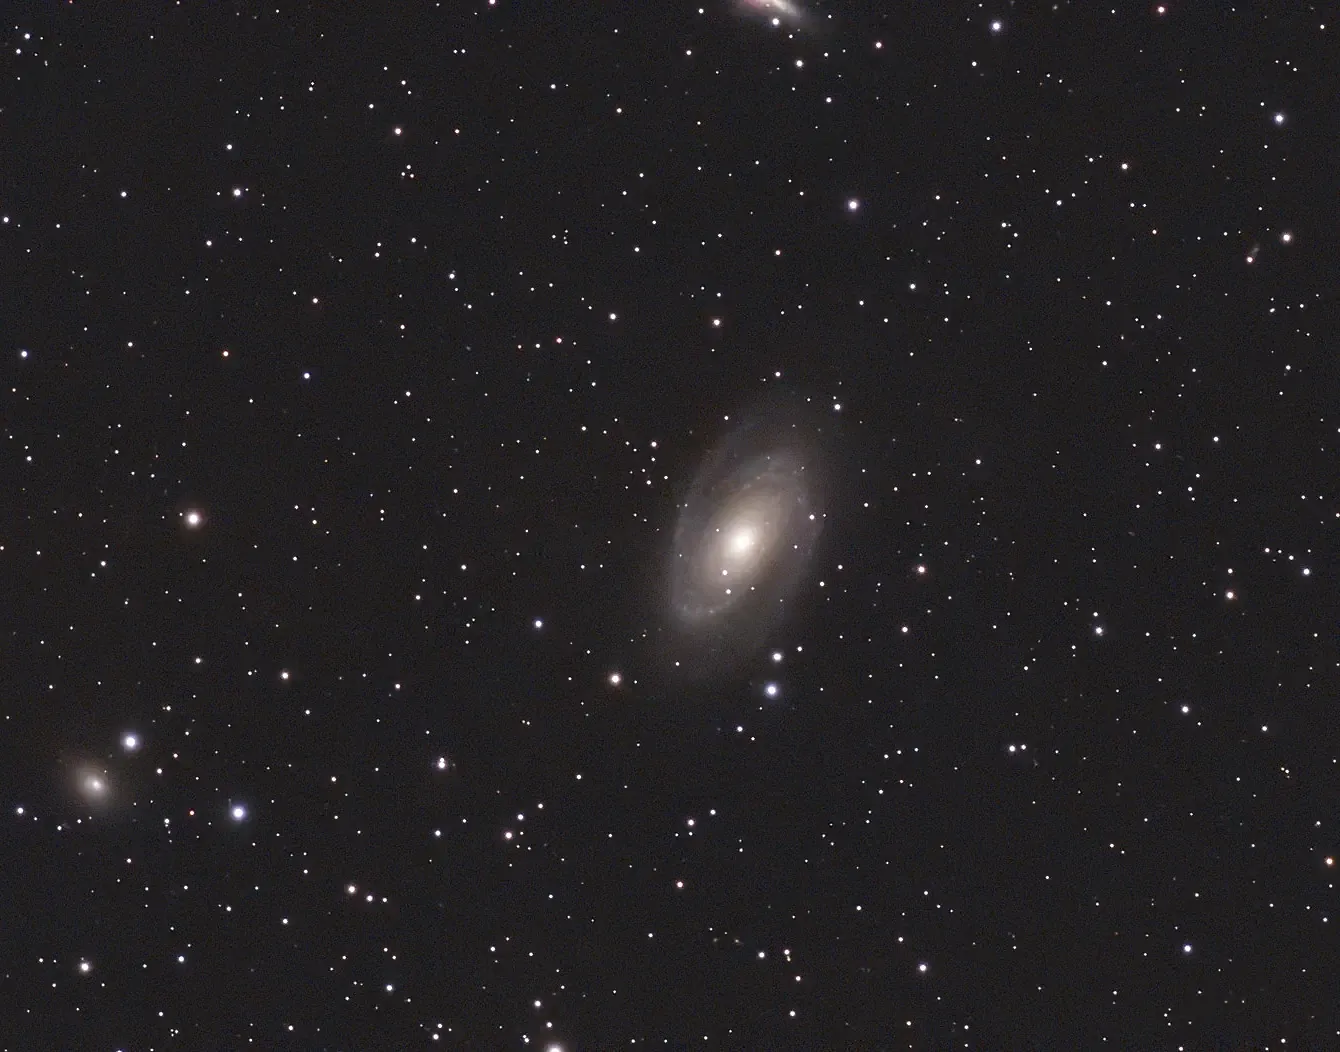
So here’s M81, Bode’s galaxy, again. 50 exposures, two failures:
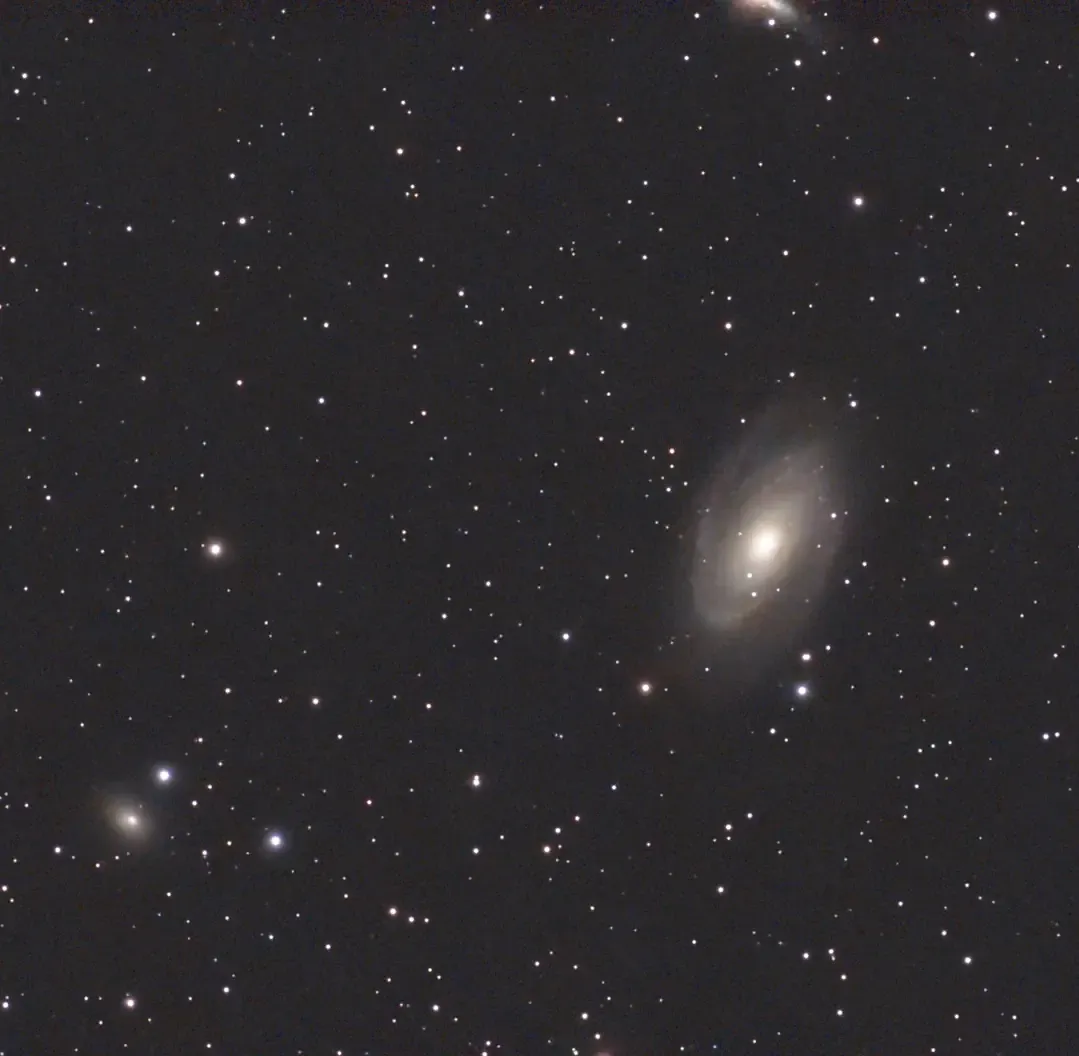
The thing at the top is the Cigar galaxy, which I didn’t realise was there.
This is M101, the Pinwheel galaxy. 50 exposures, no failures:
And a new one, the small but pretty M51, the Whirlpool galaxy. 50 exposures, no failures again:
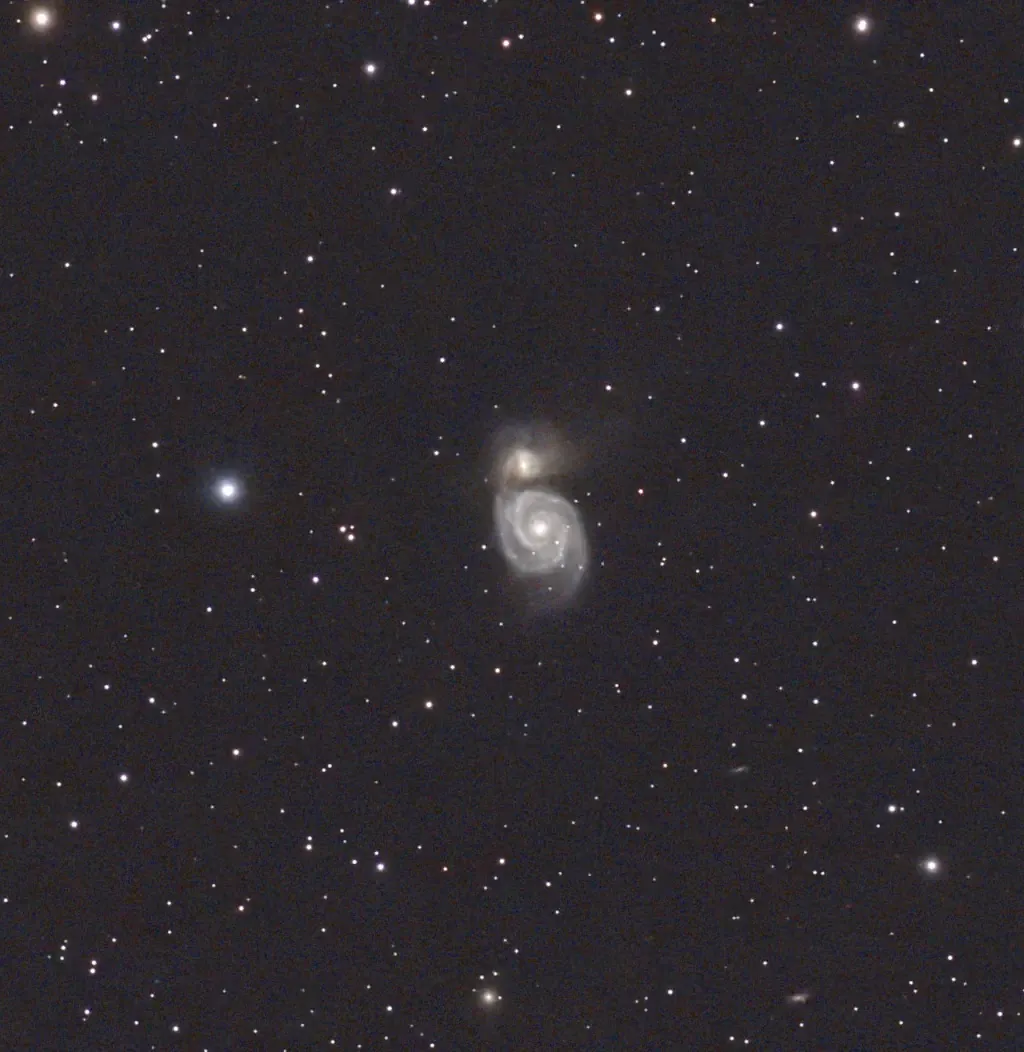
This has a companion galaxy, NGC5195, which is pulling out one of the spiral arms. Look carefully and you can see several smaller, more distant galaxies at lower right.
I also did the Hamburger galaxy, but I was jinxed again, this time by light pollution from our bathroom window.
[Update 20 Mar 2026]
Managed to get the Hamburger last night, although there was a lot of high cloud/haze. 100 shots, 30sec, gain 60:
Gradgrind Update
Gradgrind has been updated to 0.93beta. Changes:
- GIMP palettes changes:
- Doesn’t now ignore duplicates
- Added paged display for large palettes (uses left/right arrows)
- Description for these shows currently displayed colour numbers
- Includes (commented) description when saving as gpl file
- Added some sample GIMP palettes
- Sprite save icon removed. Can now drag the gradient/swatches displays to save them as sprites. Filename has “S” or “G” appended.
- Tidied up swatches display, and added option for outlines (toggle with ADJUST)
Galaxy Quest
Yesterday was Pi Day (March 14, 3.14), and at last we had a reasonably clear sky giving me a chance to try out an equatorial mount for the Dwarf Mini and so use slightly longer exposures. The seeing was marred somewhat by occasional bands of high cirrus, but I did manage to image some galaxies and a star cluster. But first, some notes on mounts.
The Dwarf Mini is motorised on two axes: it can spin round arbitrarily through the vertical axis, and modify the elevation by up to 225°. Placing the scope on a flat surface gives you an alt-azimuth mount, where, to compensate for the Earth’s rotation, it will have to slowly rotate through both axes. The disadvantage here is field rotation — objects at the edges of the image will slowly rotate, resulting in ‘trails’ for any stars. The Mini can compensate for this to some degree (hah!), but it does limit the length of single exposures to 15 seconds.
Alternatively, you can set up the scope on a tripod and set the vertical axis so it’s parallel to the Earth’s axis of rotation — this is an equatorial mount. In other words, point it at Polaris, the pole star (or just offset, to be accurate). This means that only one axis needs to rotate to match the Earth’s spin, and avoids any problem with field rotation. The maximum single exposure then goes up to 180 seconds.
To set up for an eq mount, attach the Mini (securely!) to the tripod — it has a standard screw fitting on the bottom — and ensure the tripod’s mounting plate is level; fortunately, our tripod (a Manfrotto) has a built-in spirit level.
Next, power up the Mini and connect to the app. Select Deep Sky, and use the 3-dot menu icon on the left to select EQ Mode. The scope will then walk you through the steps needed to align it correctly. Note that the pole star doesn’t have to be actually visible for this to work! It will examine the star pattern and work out where it’s pointing, then give instructions like “rotate the tripod head clockwise by about 9°” and “tilt it downward by 3°”, with helpful illustrations. It’s very easy to do, and only takes a few minutes.
I started the session with a look at the colourful Praesepe or Beehive star cluster in Cancer, aka M42:
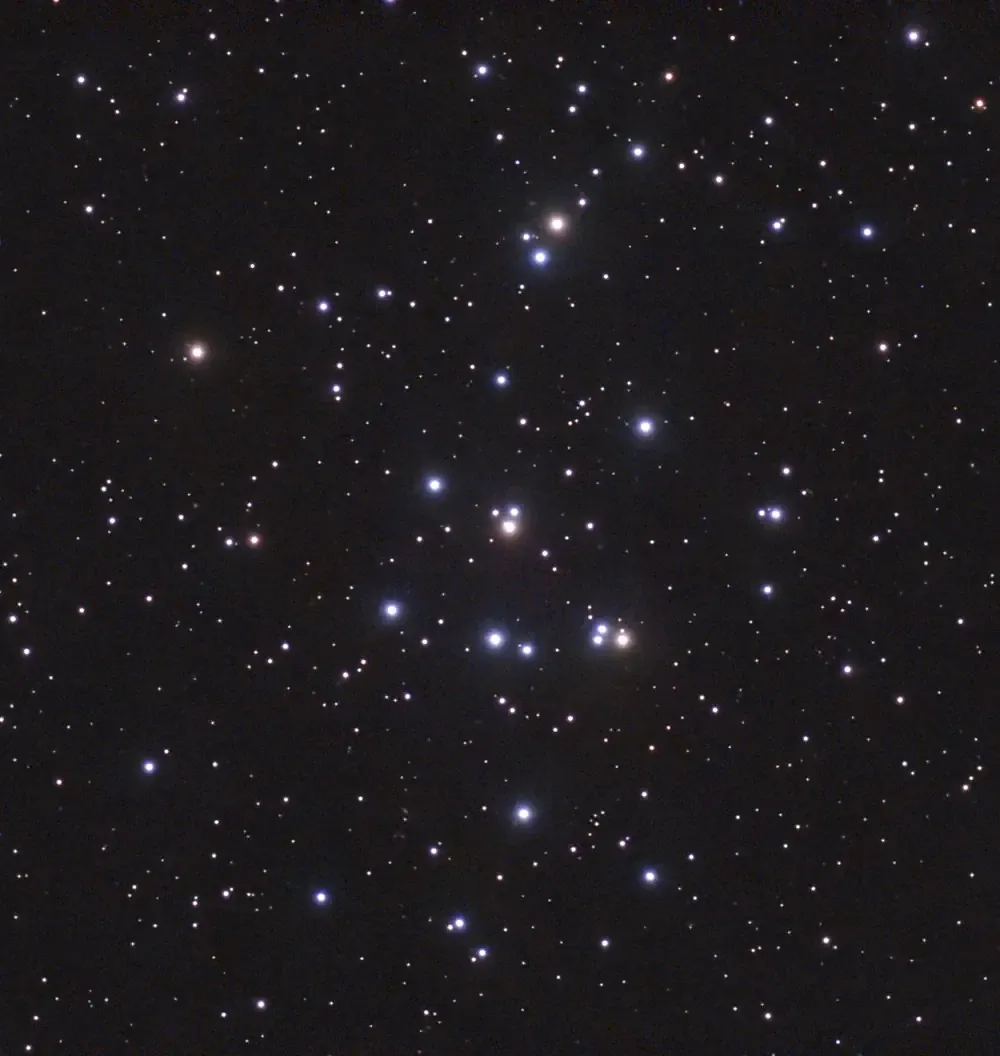
I took 50 images, with only one failure. They were 30-second exposures with gain 90. No processing here, but it’s been cropped (all image adjustments were done in PhotoDesk).
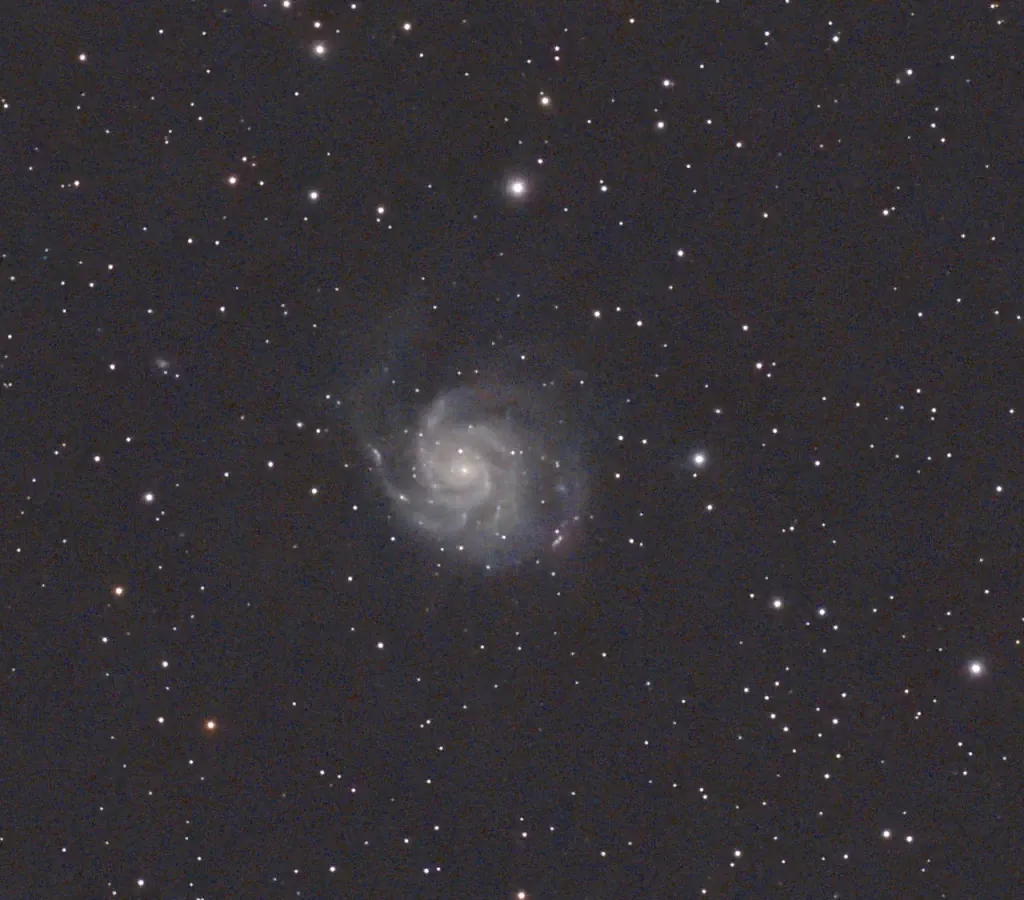
Next up, the Pinwheel galaxy in Ursa Major, aka M101:
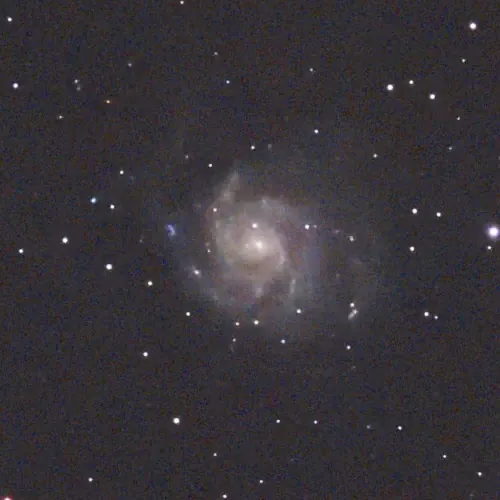
50 30-second exposures again. Cropped, and equalised and gamma boosted a bit. This suffered from the high cirrus problem (hence the noisy image and the slightly blurred stars), and would benefit a lot from more exposures.
Here’s Bode’s galaxy, M81 in Ursa Major, with M82 at lower left:
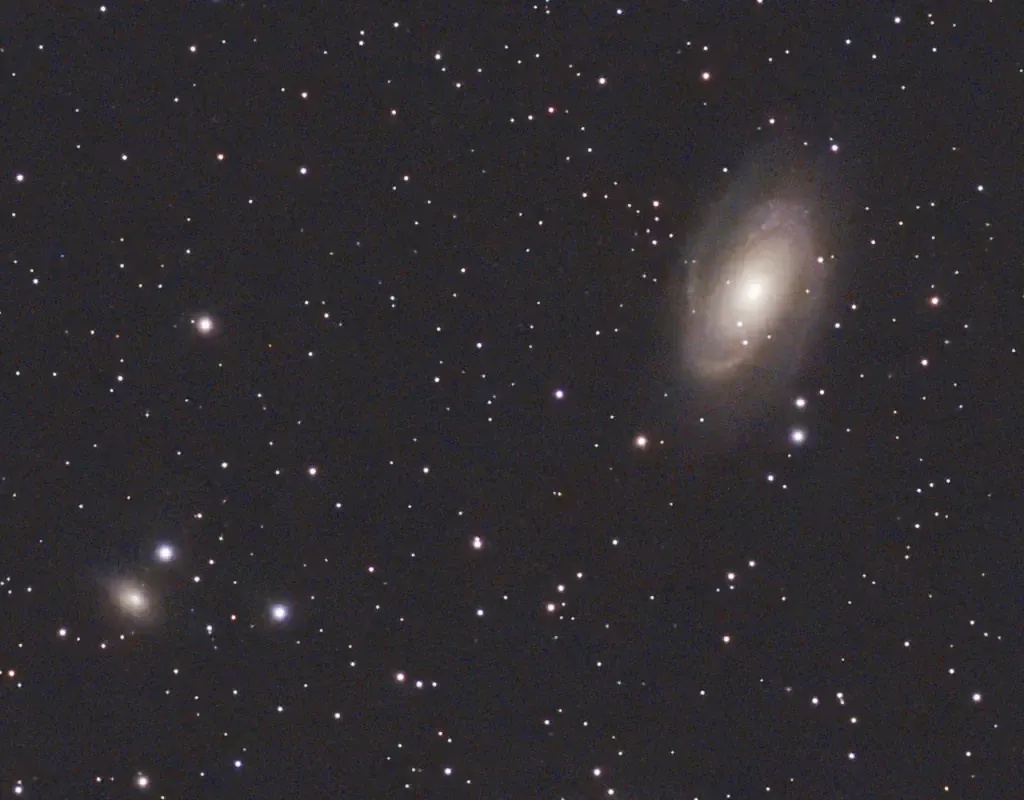
50 30-second exposures with one failure. Cropped, and a small equalisation.
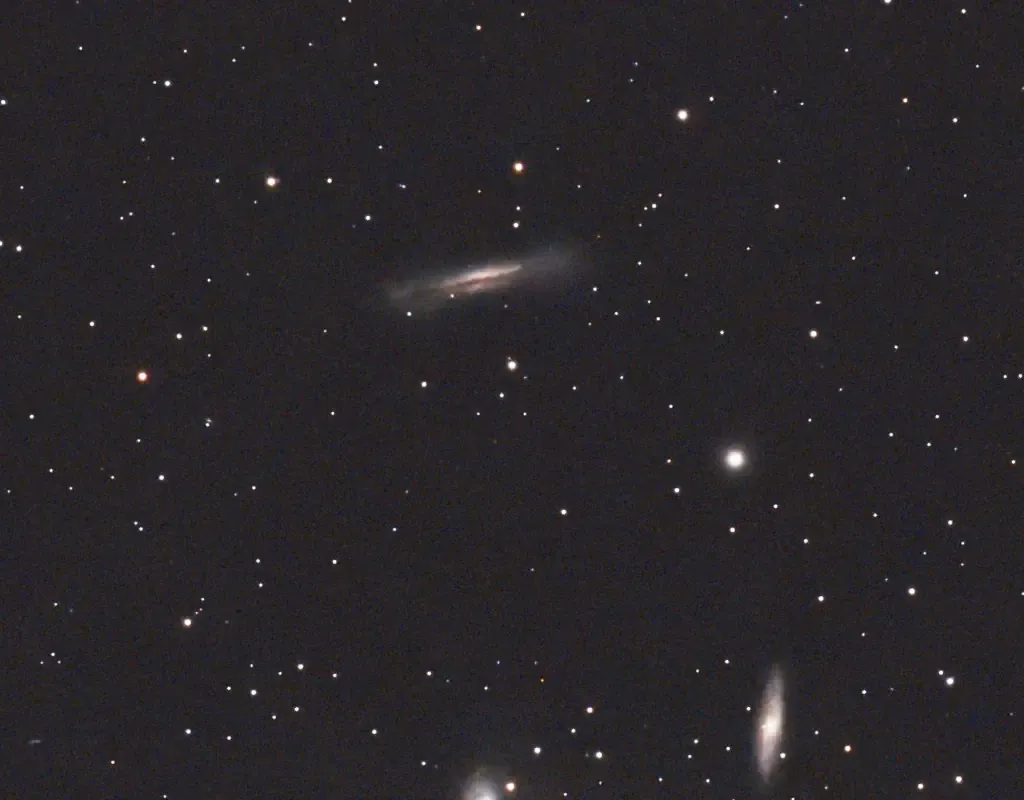
Lastly, a bit of a failure due to cloud cover — I had to abort this one after only 18 shots. It’s NGC 3628, aka the Hamburger galaxy in Leo (at the top):
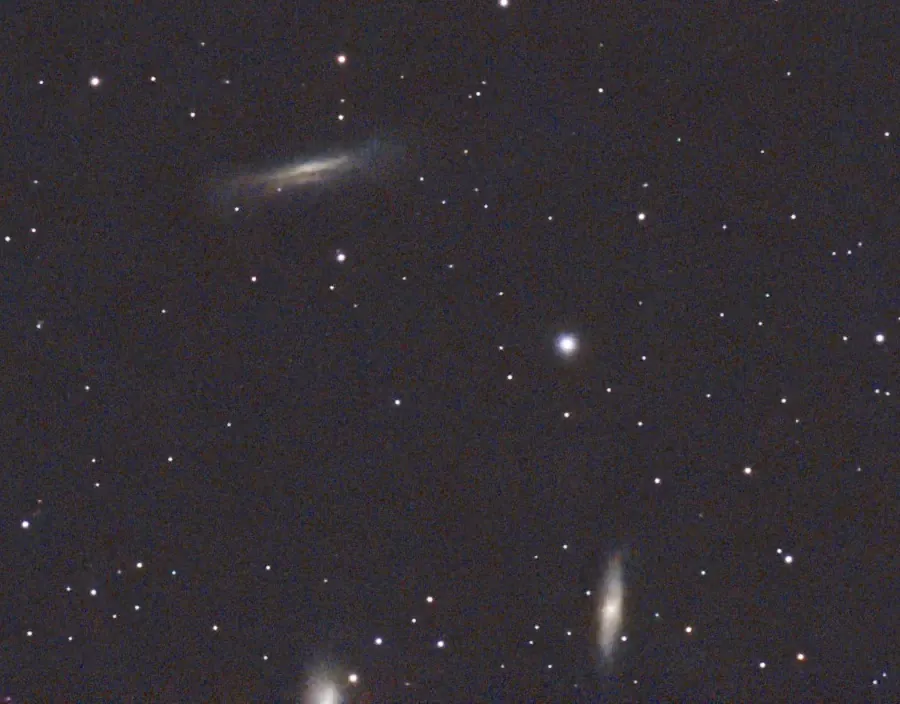
Cropped, and some gamma adjustment to bring out the colour. If I’d realised there were some other galaxies nearby (they’re the Leo Triplet) I would have re-centred to include them. Next time…
More on the Dwarf Mini and RISC OS
The weather continues very poor, with very few clear skies for astronomy. But I have managed to take a few pictures with the Dwarf Mini, and investigate some simple processing with PhotoDesk.
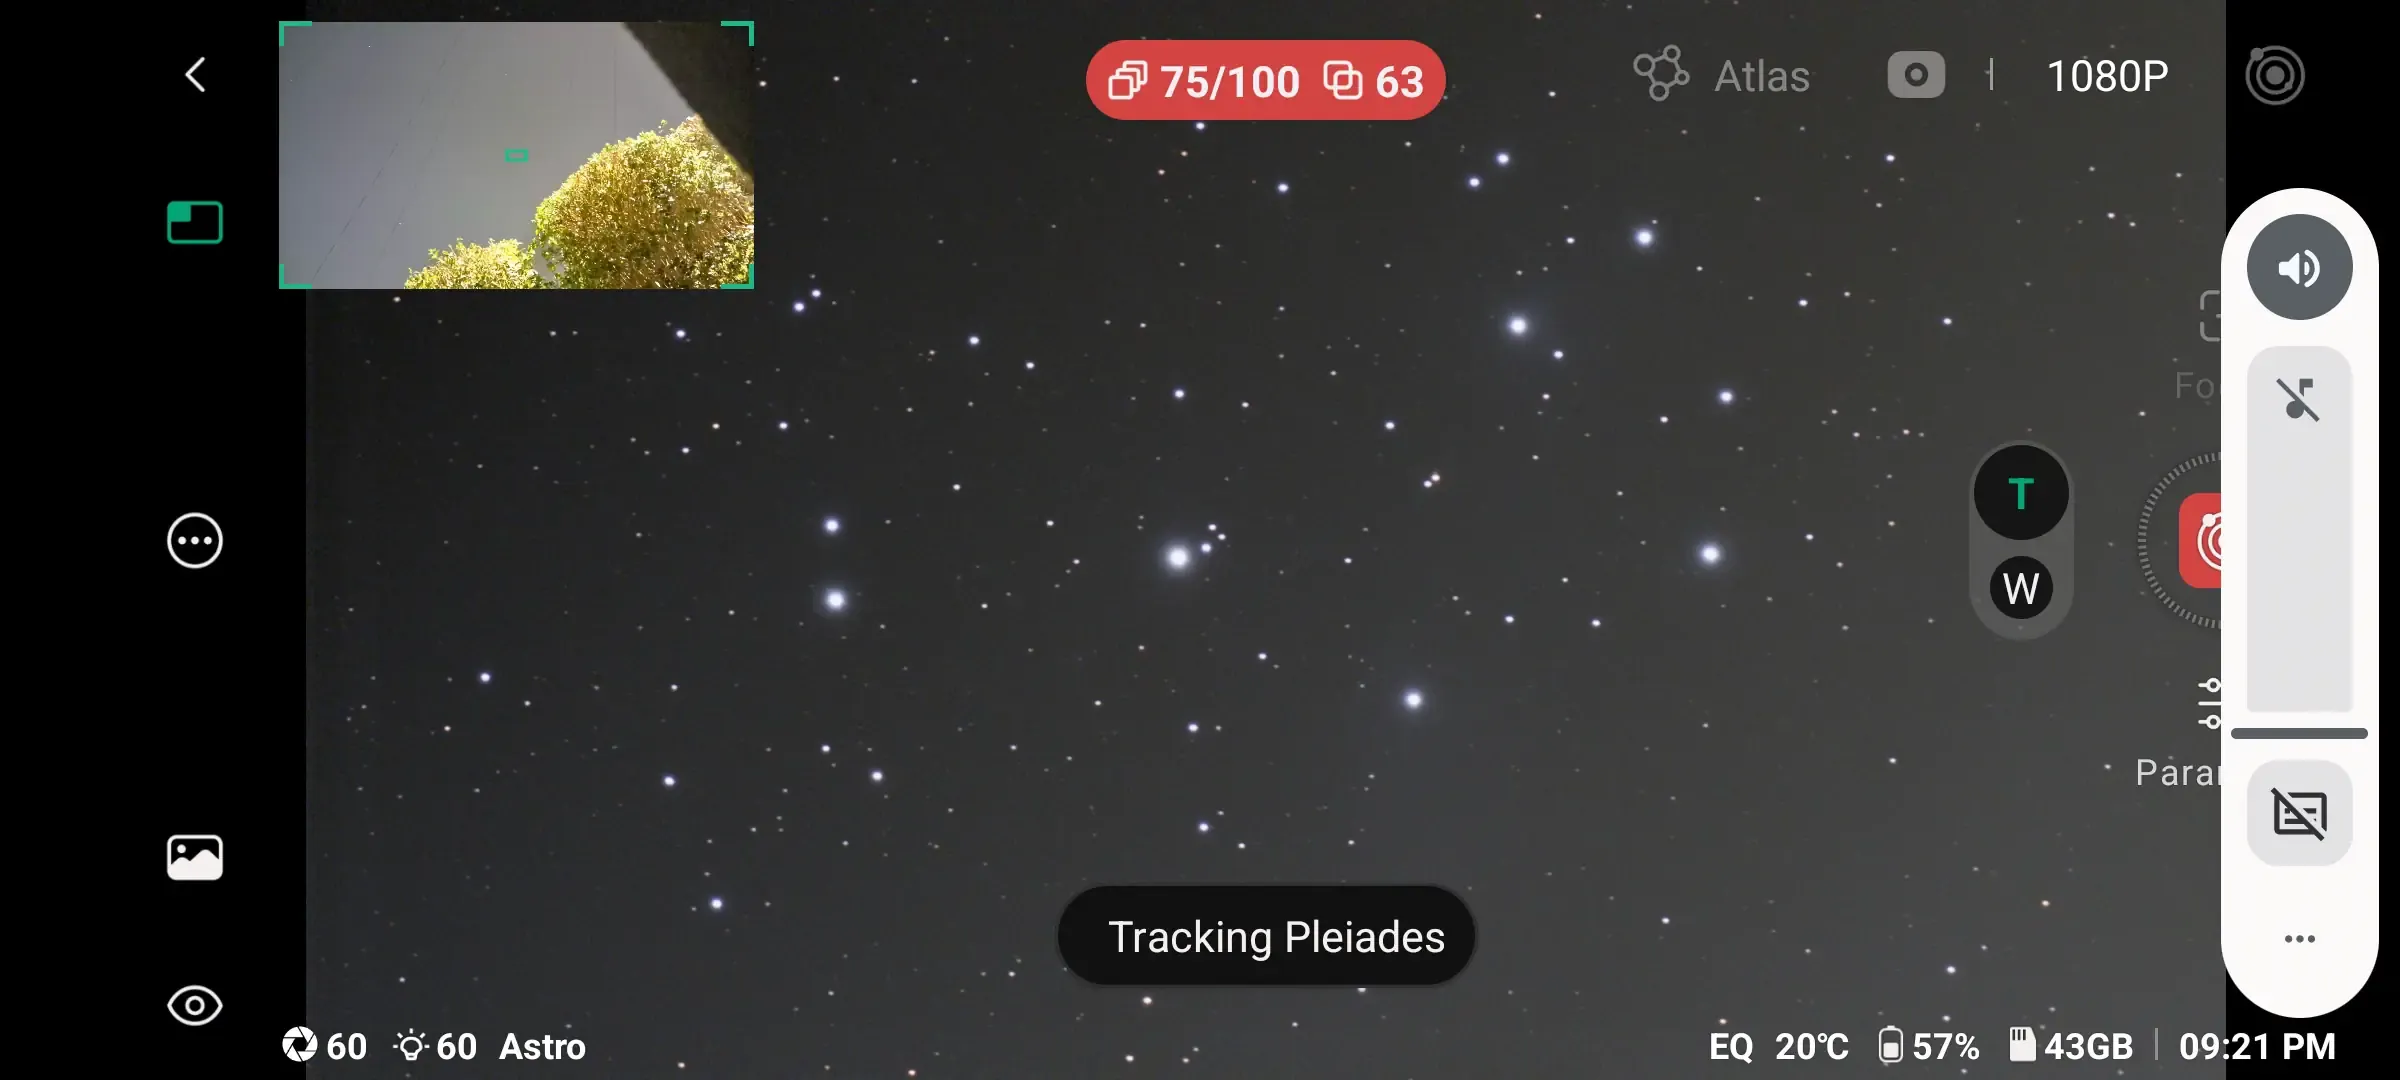
First though, a few more details on the scope and its usage. It’s controlled from a smartphone or tablet, and when it’s connected the display looks like this:
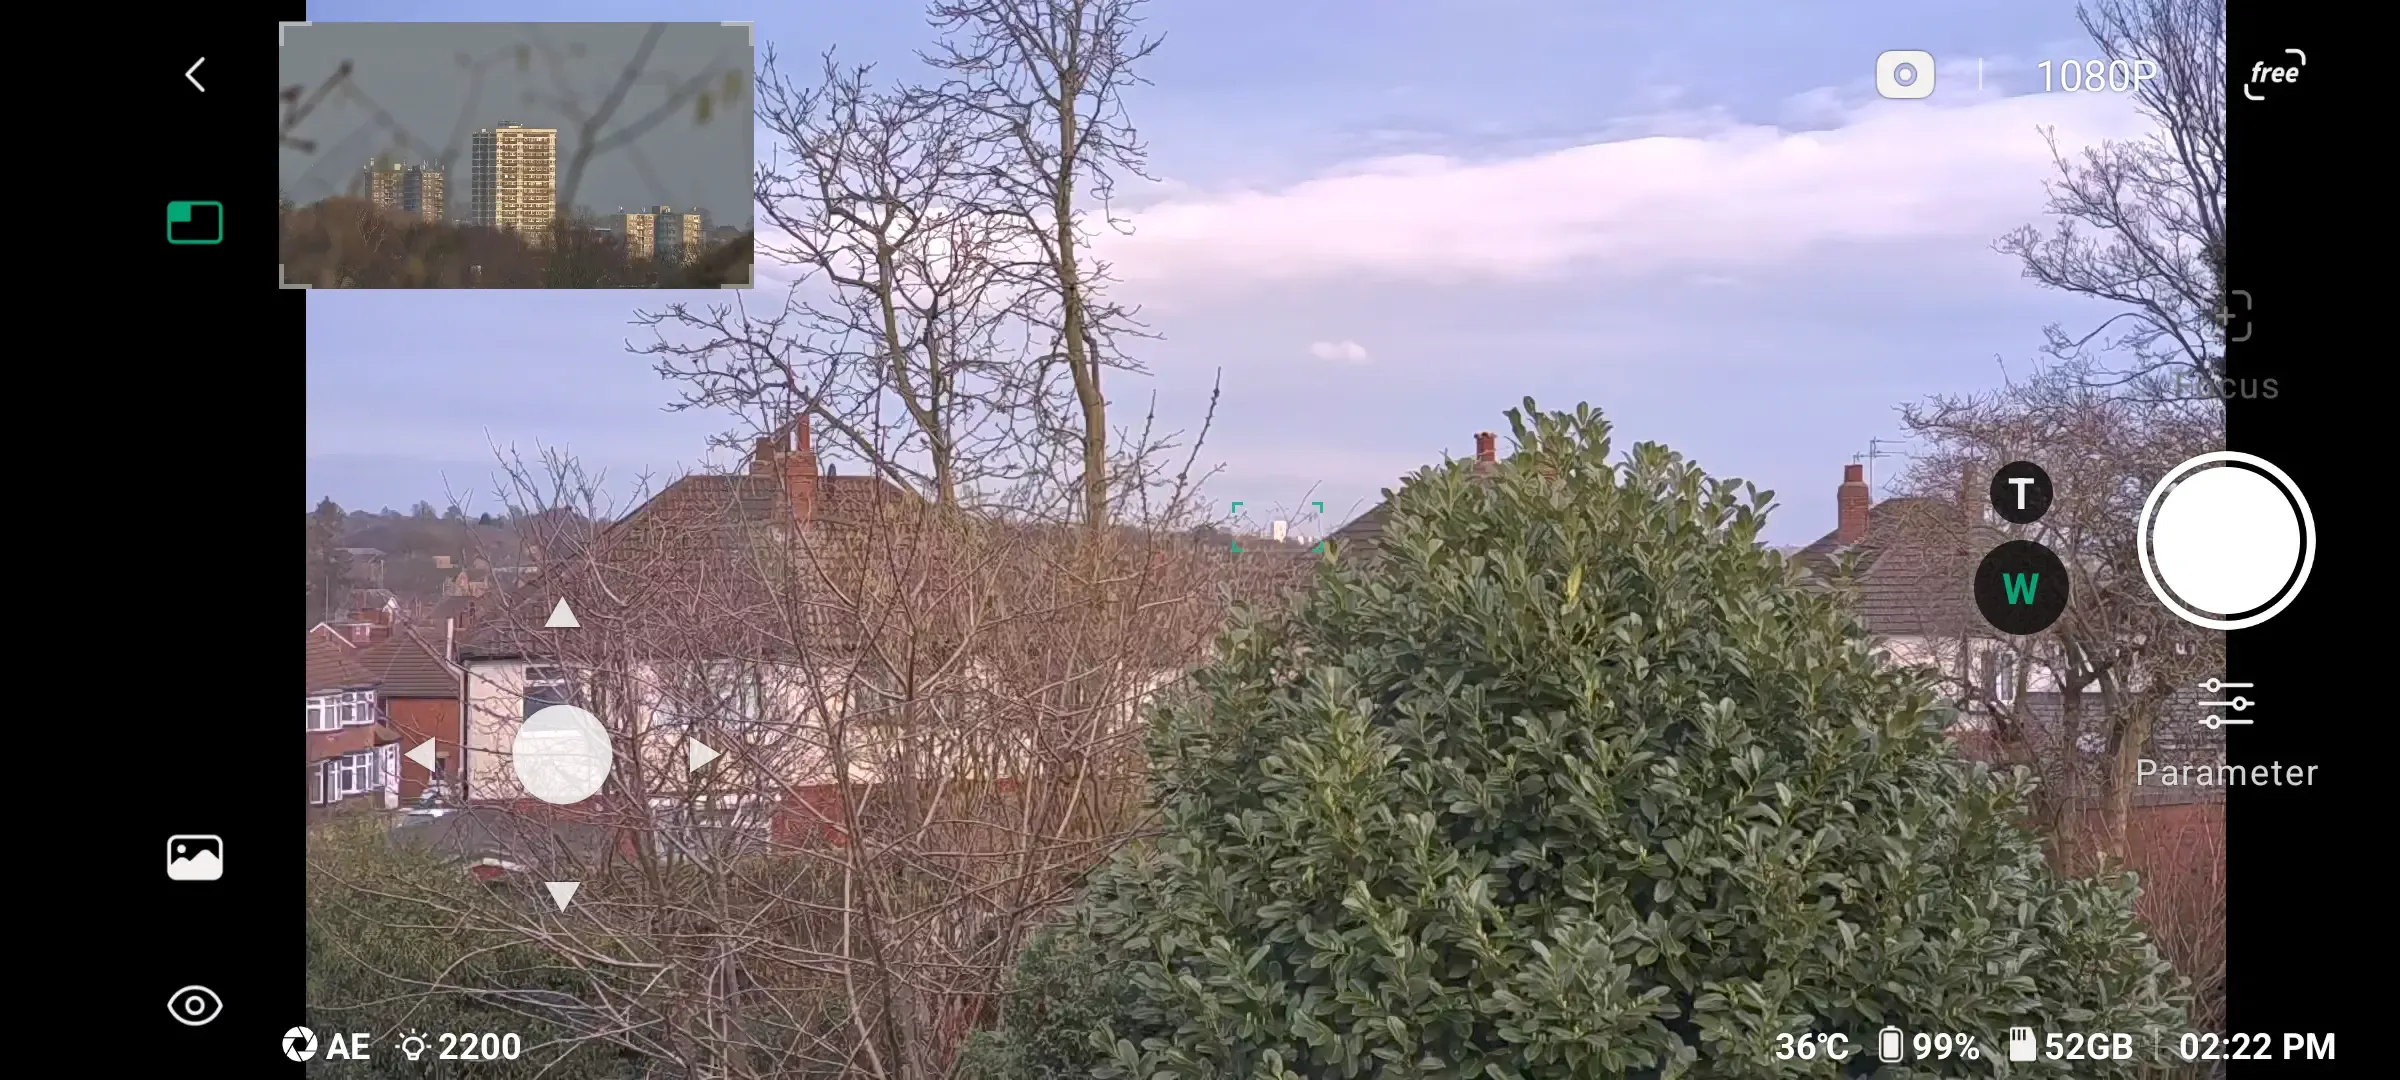
This is just a view out of our office window, to show the features. At top left, the inset image is the view through the telephoto lens, which shows the area outlined in green in the centre of the main display — here looking at a distant tower block. You can turn off this inset image by touching the green rectangle next to it.
[Read more…]