More on the Dwarf Mini and RISC OS
The weather continues very poor, with very few clear skies for astronomy. But I have managed to take a few pictures with the Dwarf Mini, and investigate some simple processing with PhotoDesk.
First though, a few more details on the scope and its usage. It’s controlled from a smartphone or tablet, and when it’s connected the display looks like this:
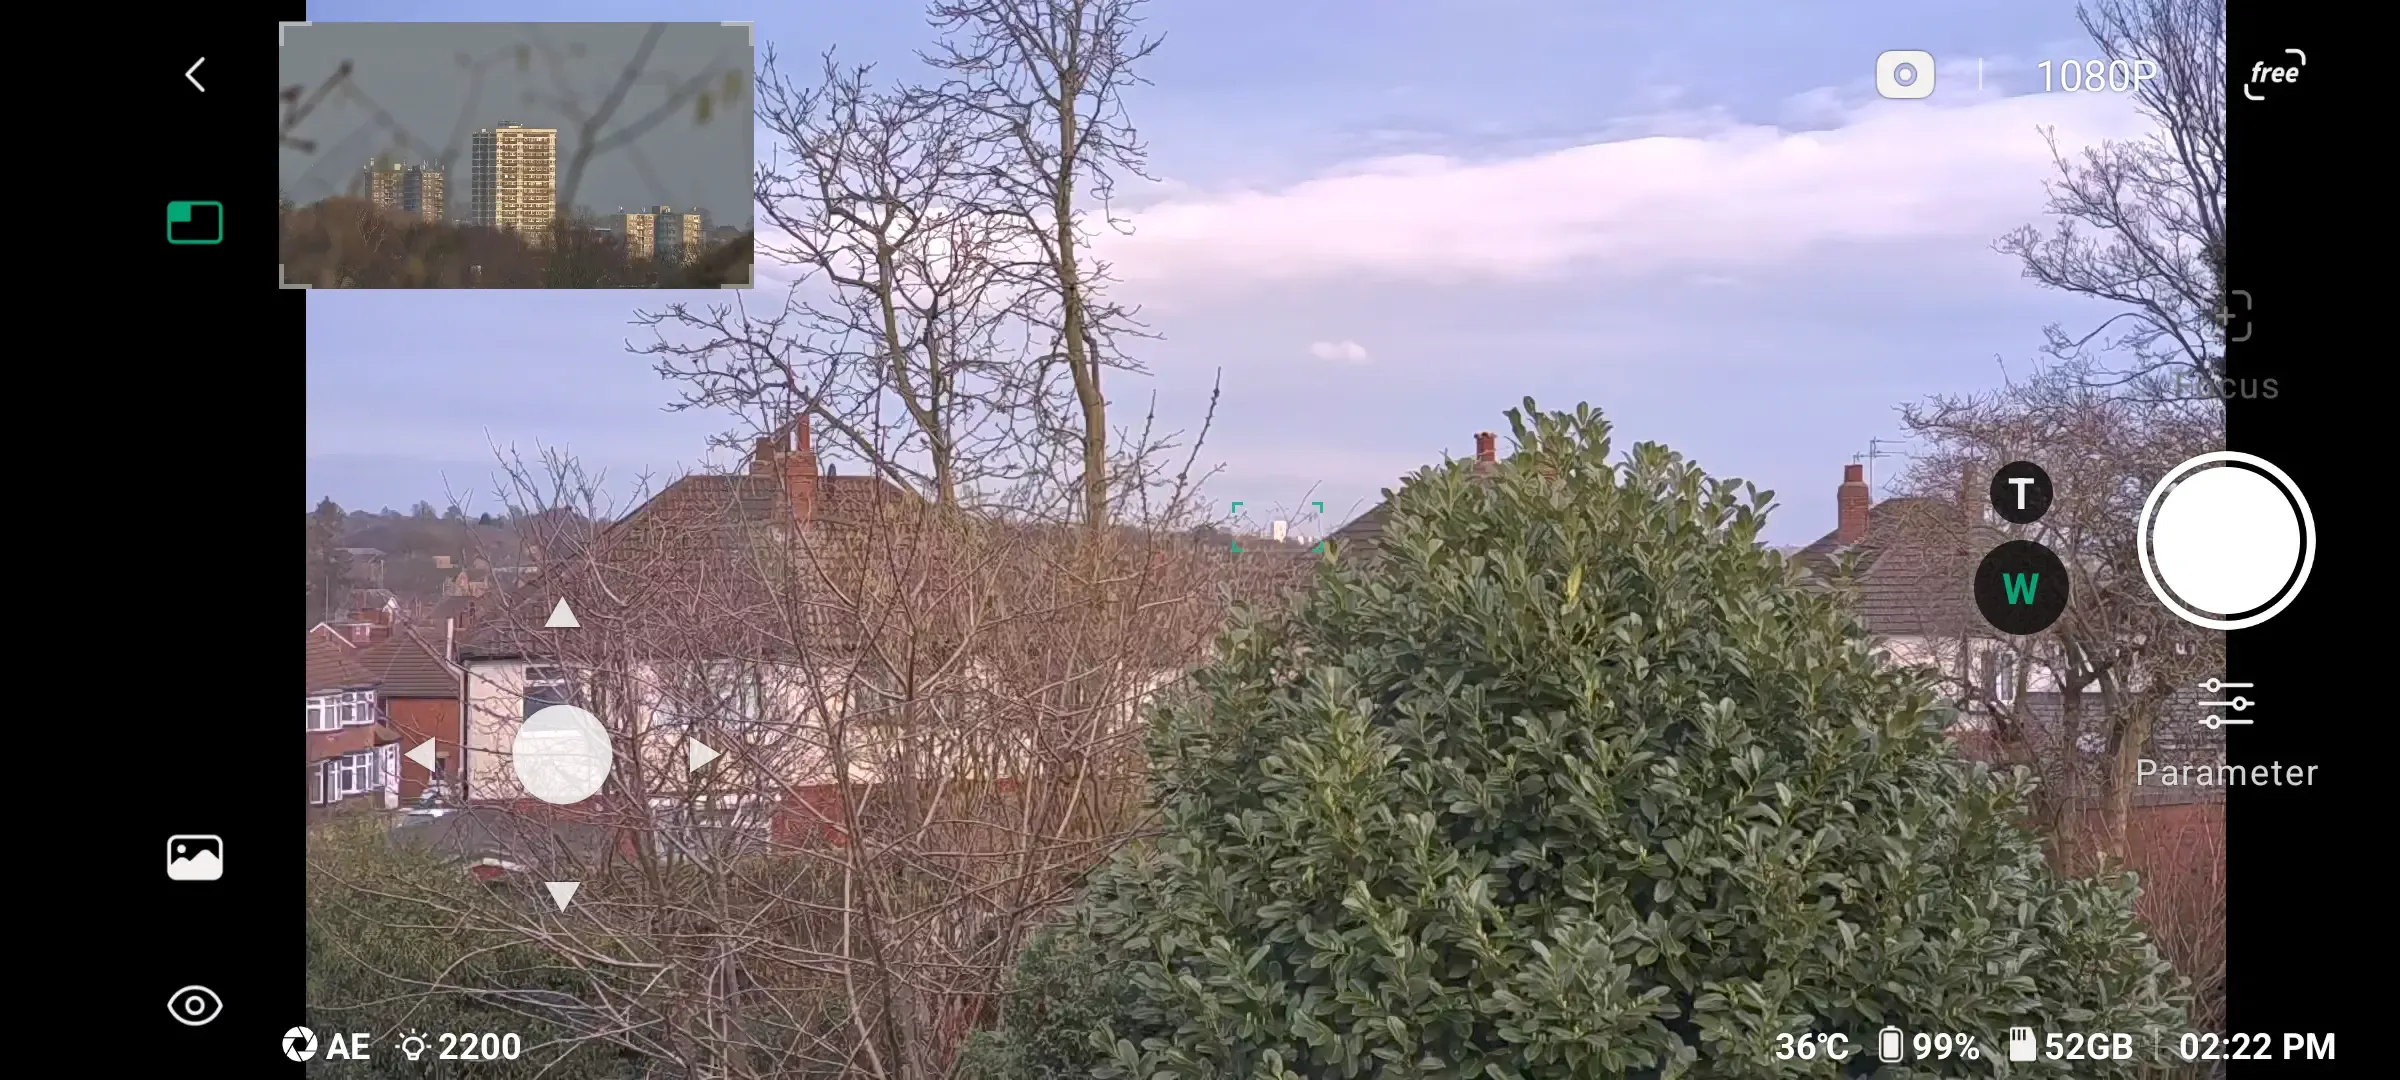
This is just a view out of our office window, to show the features. At top left, the inset image is the view through the telephoto lens, which shows the area outlined in green in the centre of the main display — here looking at a distant tower block. You can turn off this inset image by touching the green rectangle next to it.
If you touch the inset image itself (or the circled T), the displays will swap:
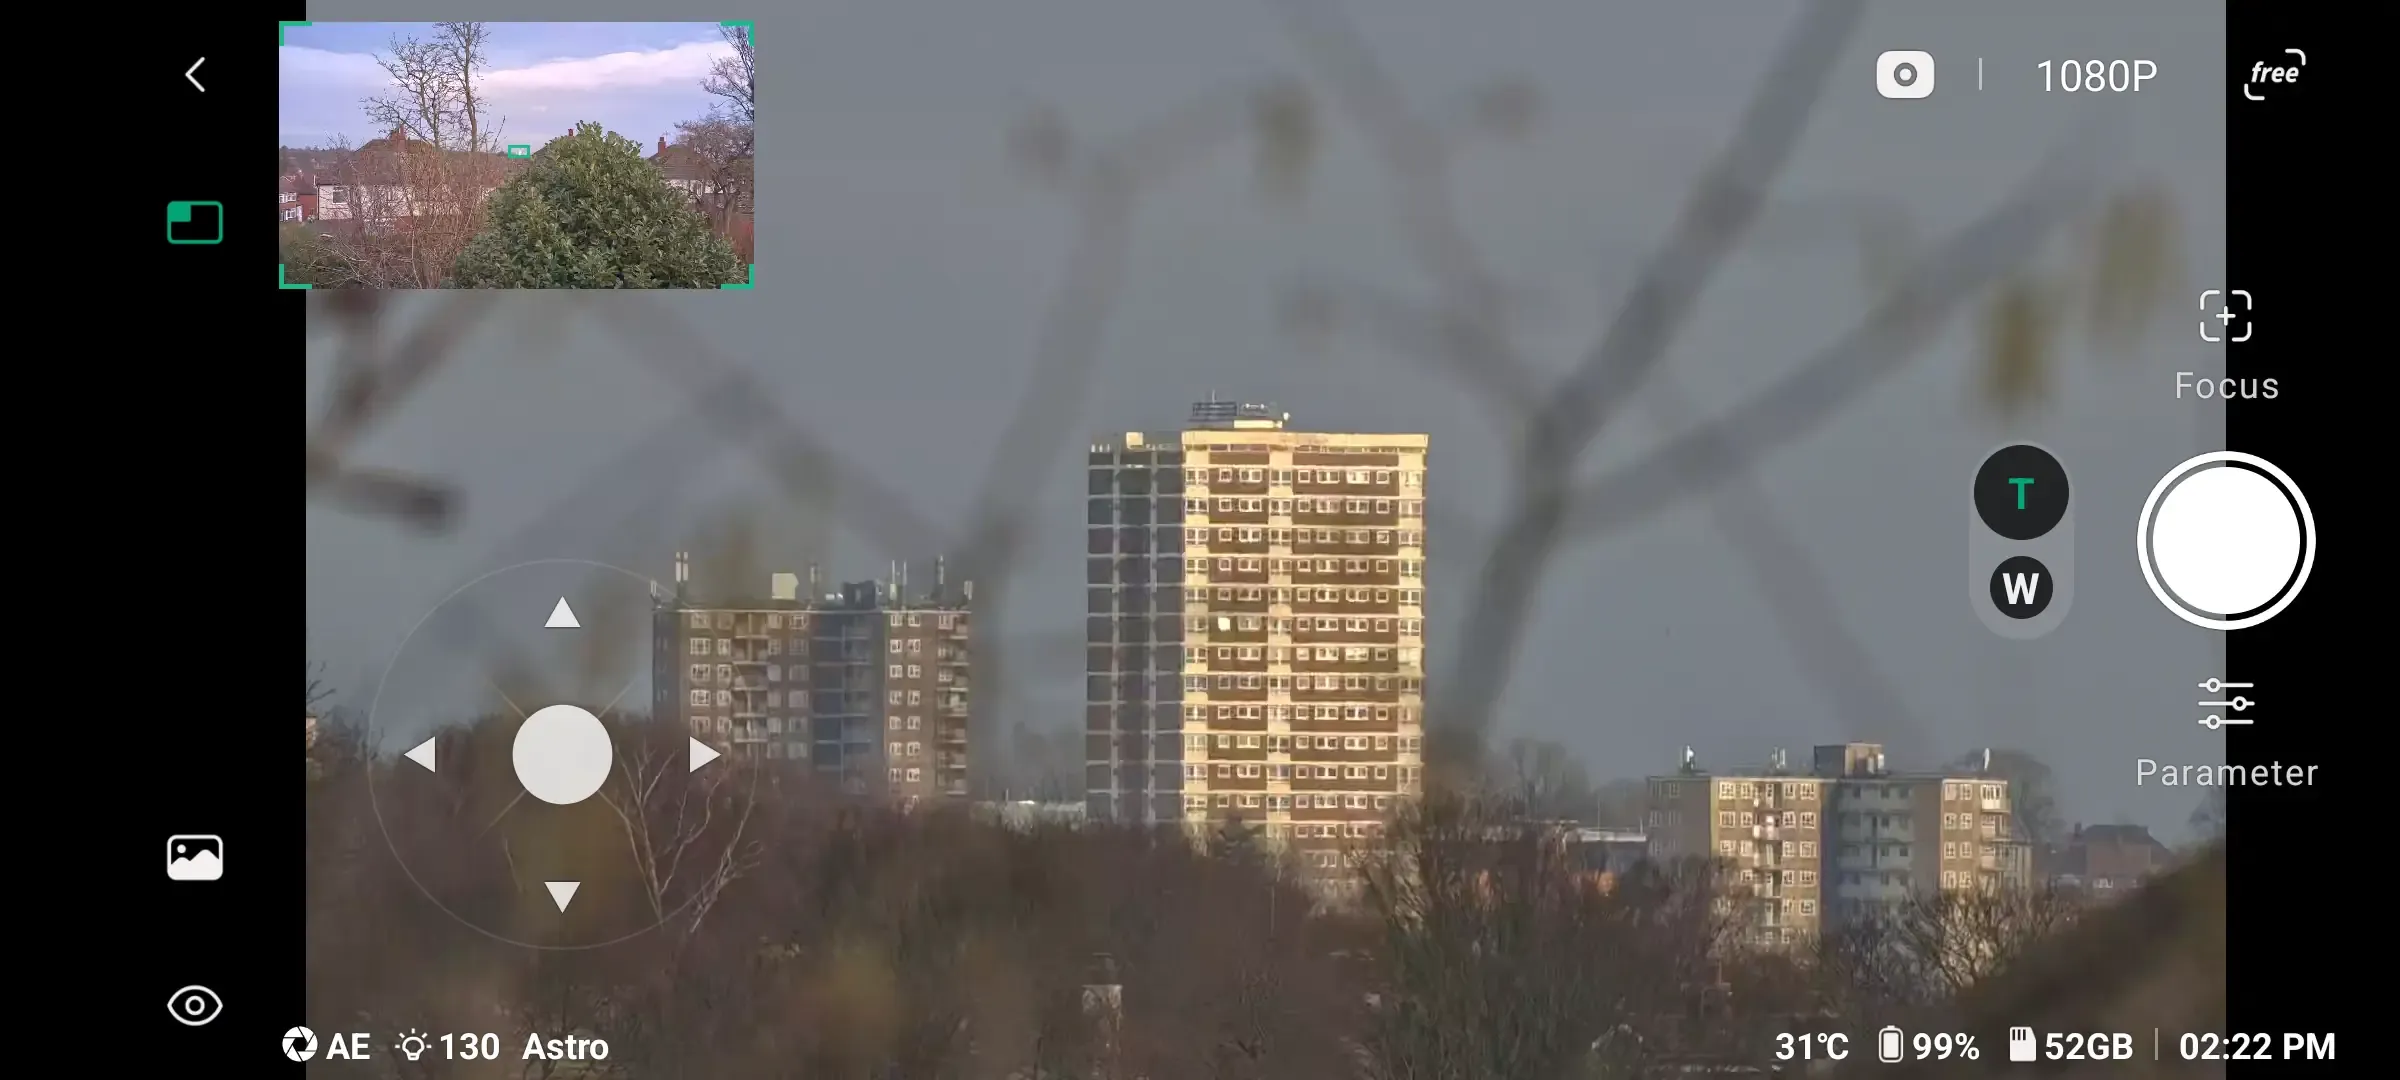
Click on any of these pictures for a larger version, which will give you an idea of the telephoto lens’s capability and optical quality.
The ability to display both views isn’t just a neat trick — it’s actually really useful. If you’re sat indoors on a cold night controlling the scope over wifi, it means you can see if there’s any approaching cloud cover in advance, and halt the exposures. And it really helps when you’re aiming the scope.
It’s worth noting that the standard pinch action can be used on the main image at any time, to zoom in or out.
On the left side are some icons. From the top, < exits back to the main screen, and the green square toggles the dual display. Next there may be a three-dot menu indicator, for various settings; this depends on the mode the scope is in. The landscape icon enters the photo album. And finally, the eye toggles the display of all the controls, so you’ll just see what the scope is seeing.
Along the bottom is some general information. From the left: AE is auto-exposure, 130 is the gain (like the ISO setting on a camera), and Astro is the current filter. On the right is the sensor temperature, the battery level (it will last between 3 and 4 hours), the memory remaining (the scope has 64GB of memory, reduced to about 56GB by overheads), and the current time.
At top right, the camera icon sets the shooting mode: photo, video, burst or time-lapse. 1080p is the resolution (it changes to 720p for sun and moon shooting). And free signifies the mode the scope is in. Here it’s in free, or general, mode, which is used for daylight photography. The other modes are deep sky, solar system and star trails.
The scope is motorised, and can be pointed in any direction with the large white circle at lower left. Drag the circle in any direction, and the scope will move; the further you drag it away from the centre, the faster the movement.
On the right you can adjust the telephoto focus (the wide angle lens is fixed focus). It can auto-focus, or you can control it manually to a very fine degree — the ability to zoom in on the image can help here. It also has an infinity setting (which can be corrected if it drifts).
Under that is the large white circle, which starts imaging using the chosen method; the view recorded is that of the main display. Long-press to halt the session.
And under that is parameter, which lets you modify nearly every aspect of the camera: exposure, white balance, filter, gain, and so on. Or it can fairly safely be put on auto, which nearly always gives excellent results. You can also set the number of exposures to take for astronomical objects, up to 999.
Orion Nebula
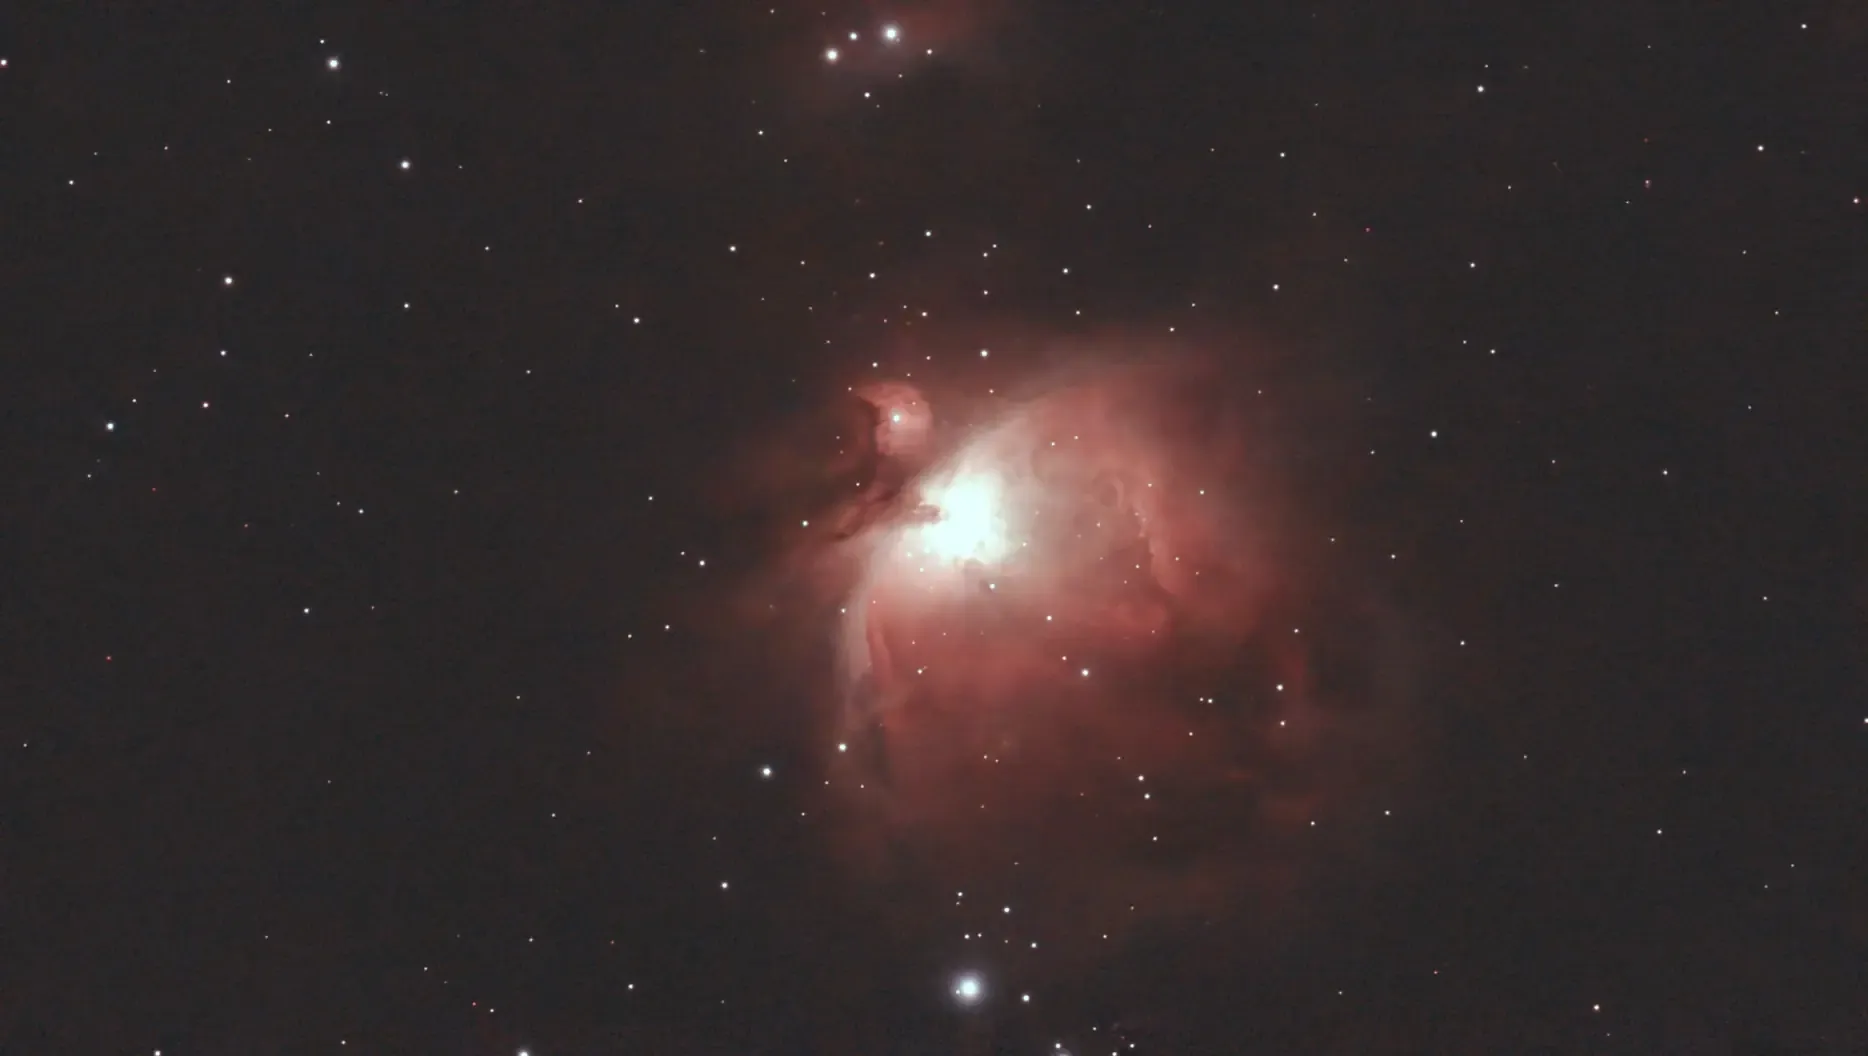
On 24 February there was a short period of clear skies, long enough to image M42, aka the Orion Nebula. Here’s the initial result:
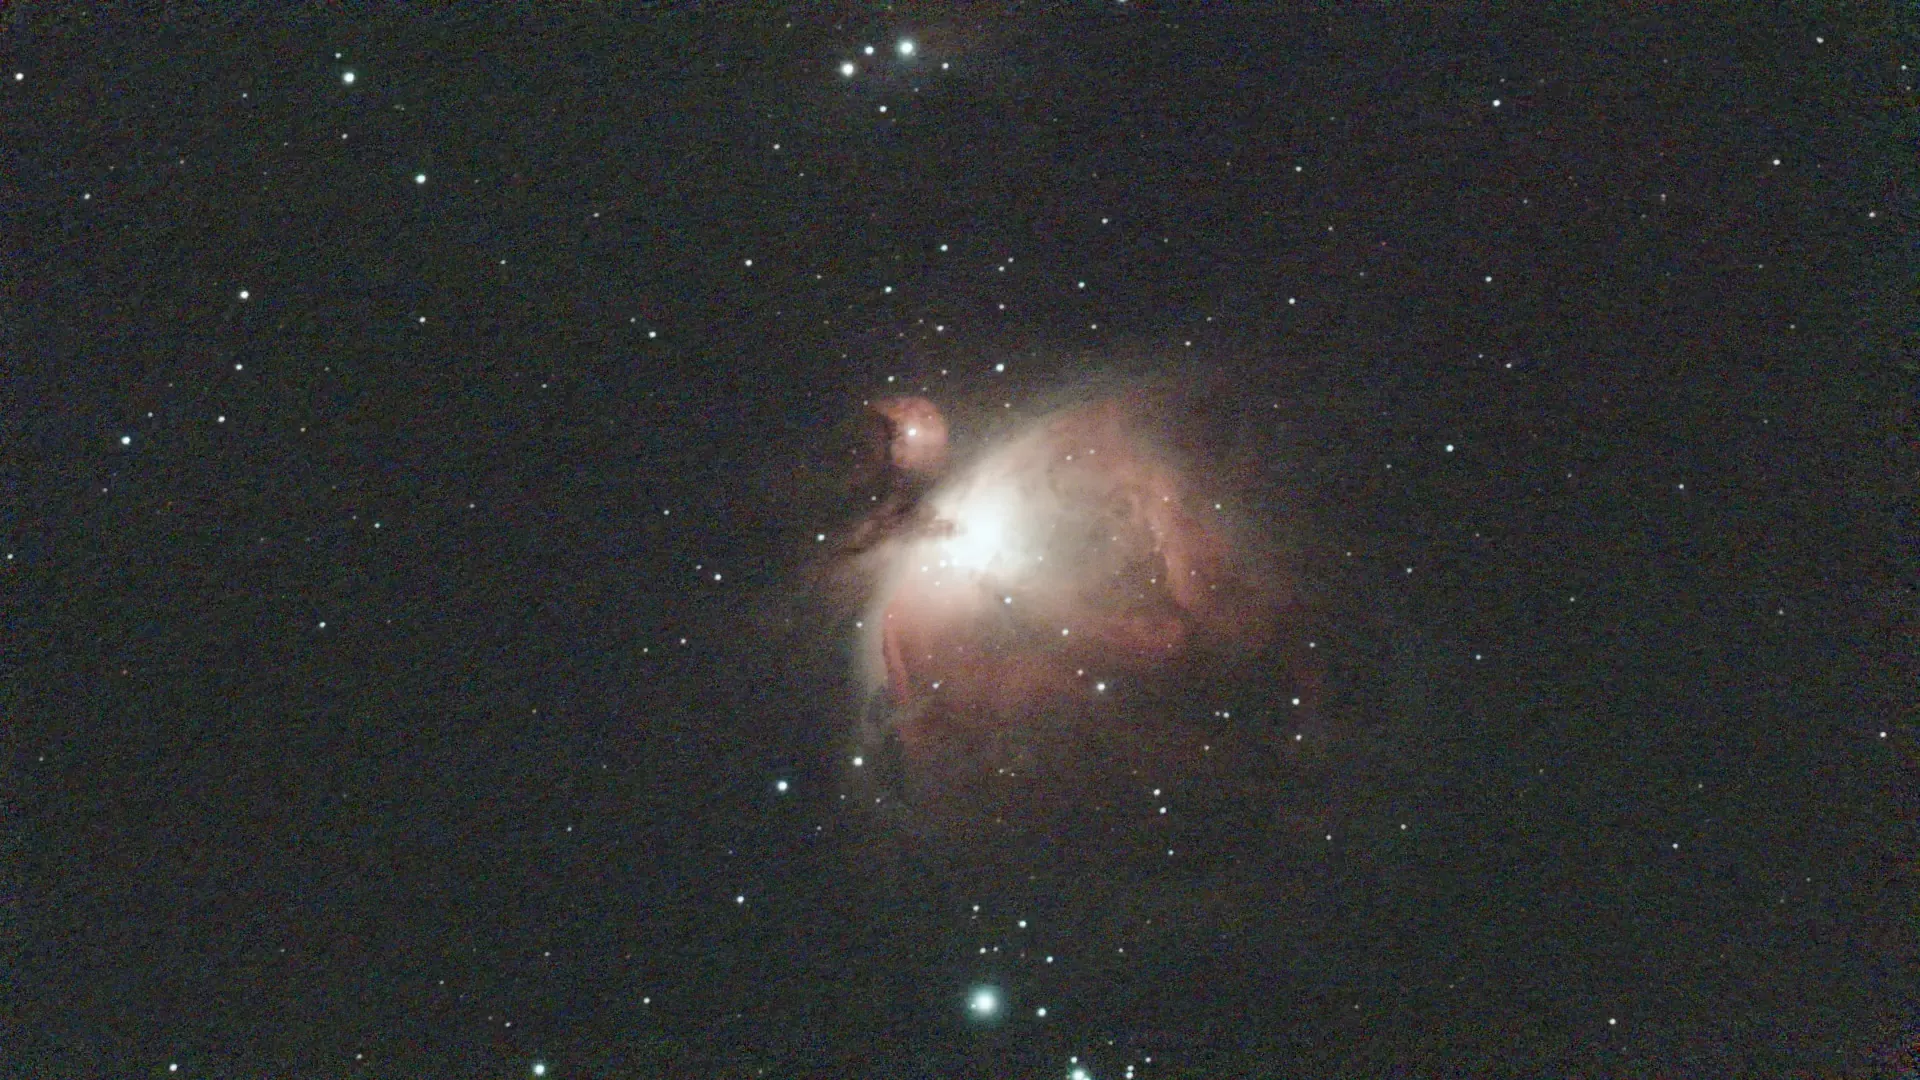
This is the file called stacked.jpg, produced by the Mini after stacking 28 shots, each exposed for 15 seconds. I took 32 shots, but four were marked “failed”, probably due to some cloud or passing planes or satellites (thanks, Elon — the 10,000-odd Starlink satellites are causing serious problems for astro imaging).
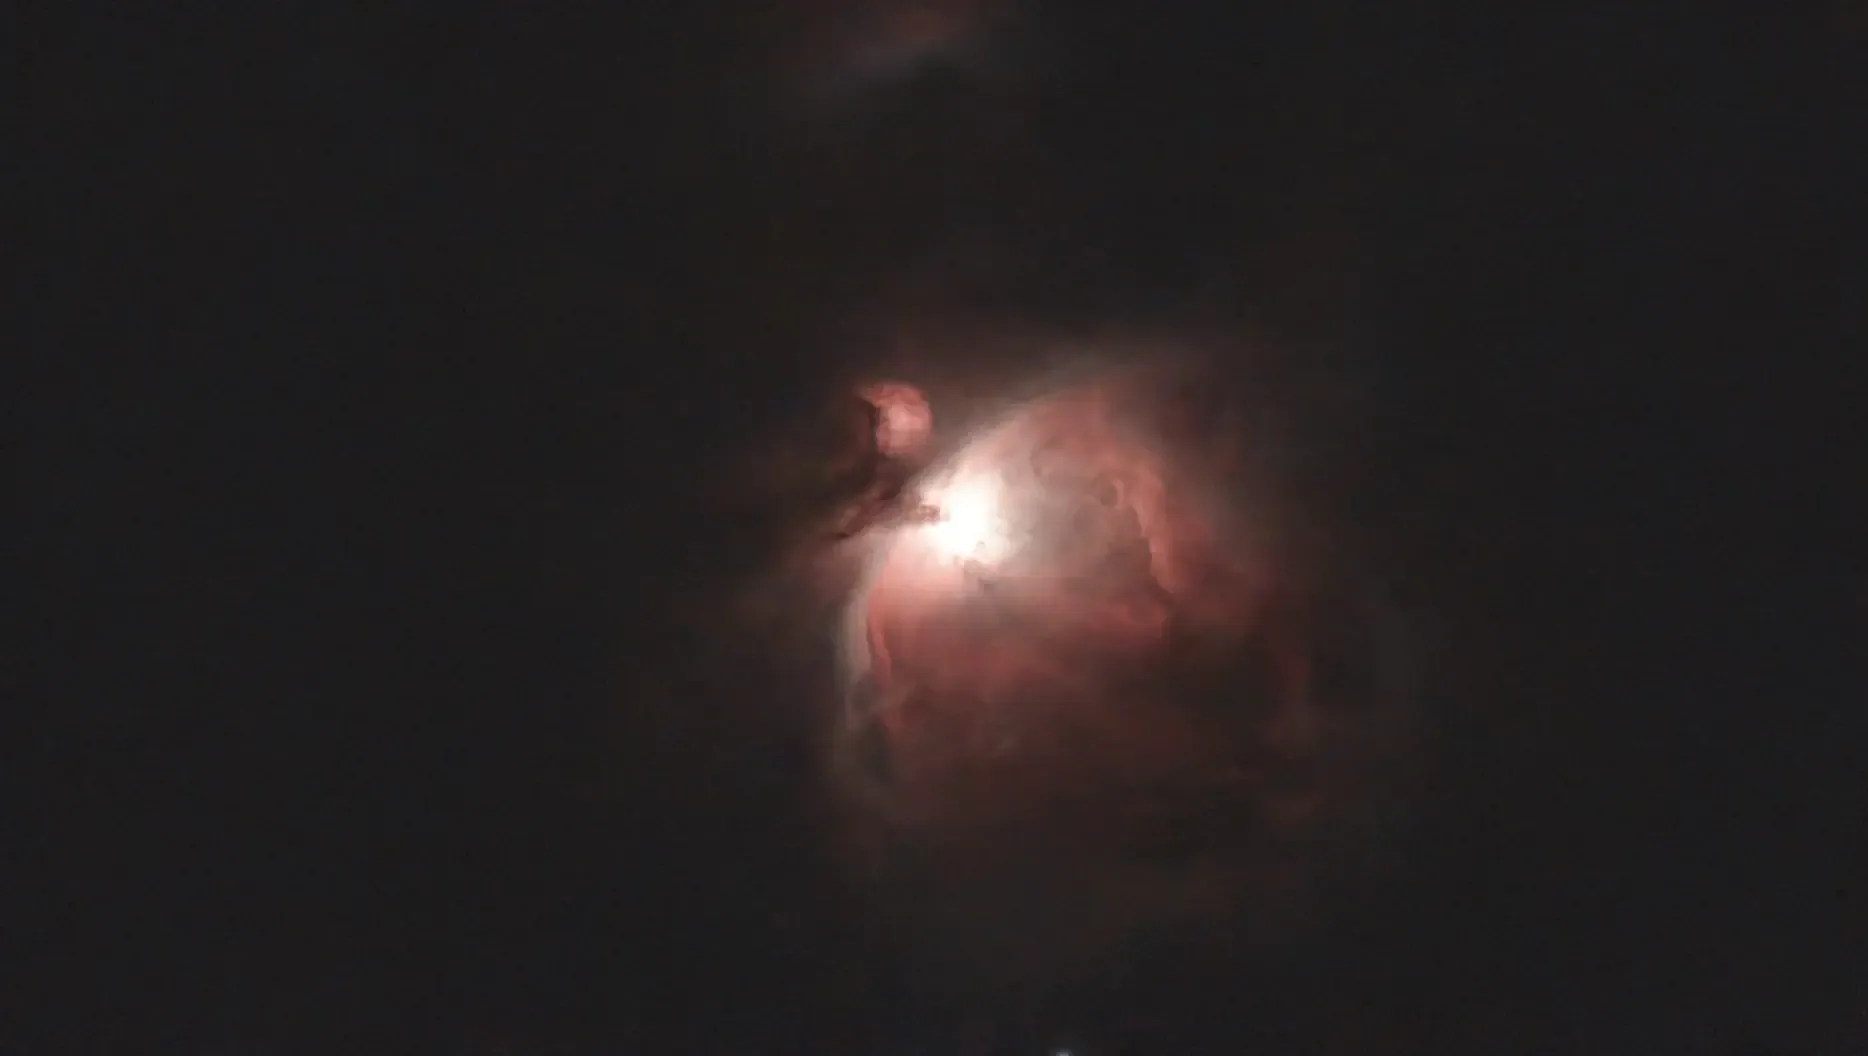
If you look at this full-size (click on it), you can see there is some noise in the image. The scope has a facility called Stellar Studio which performs some extra processing, including noise reduction:
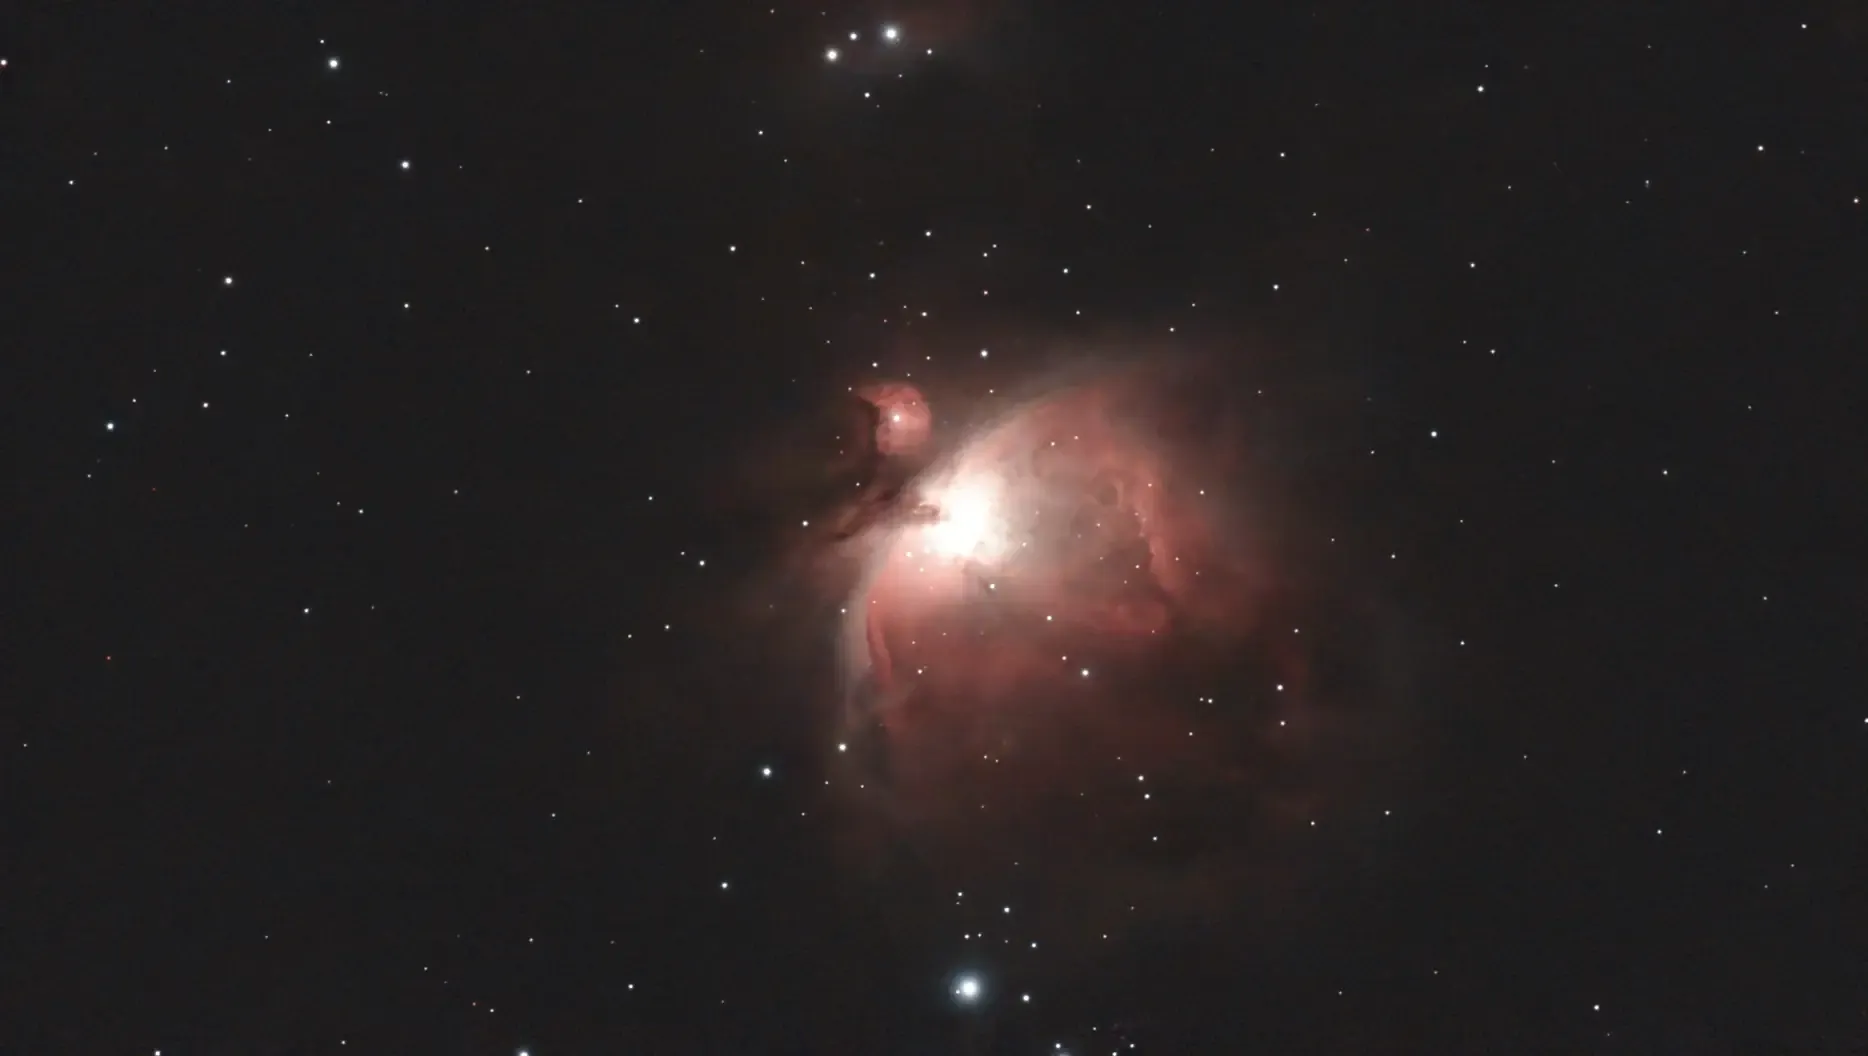
I used Stellar Studio’s Auto setting for this, which as well as reducing noise sharpens up the stars and increases the contrast.
If you load this into PhotoDesk, you can boost the faint areas of nebulosity by adjusting the red channel in the Gamma secion of Image Processing, then correcting the sky colour by sampling a previously black area in Image Processing>Balance:
Stellar Studio can also remove the stars completely, interestingly:
This feature isn’t just cosmetic — it enables any image editing to concentrate on the nebula, without stellar distraction.
All the photos above used the JPEGs produced by the Dwarf Mini. But any serious editing should use the 16-bit raw files, either in TIFF or FITS format. Unfortunately RISC OS cannot currently process these, to my knowledge. I had set the format to TIFF for these images, and loading one into PhotoDesk gives this:
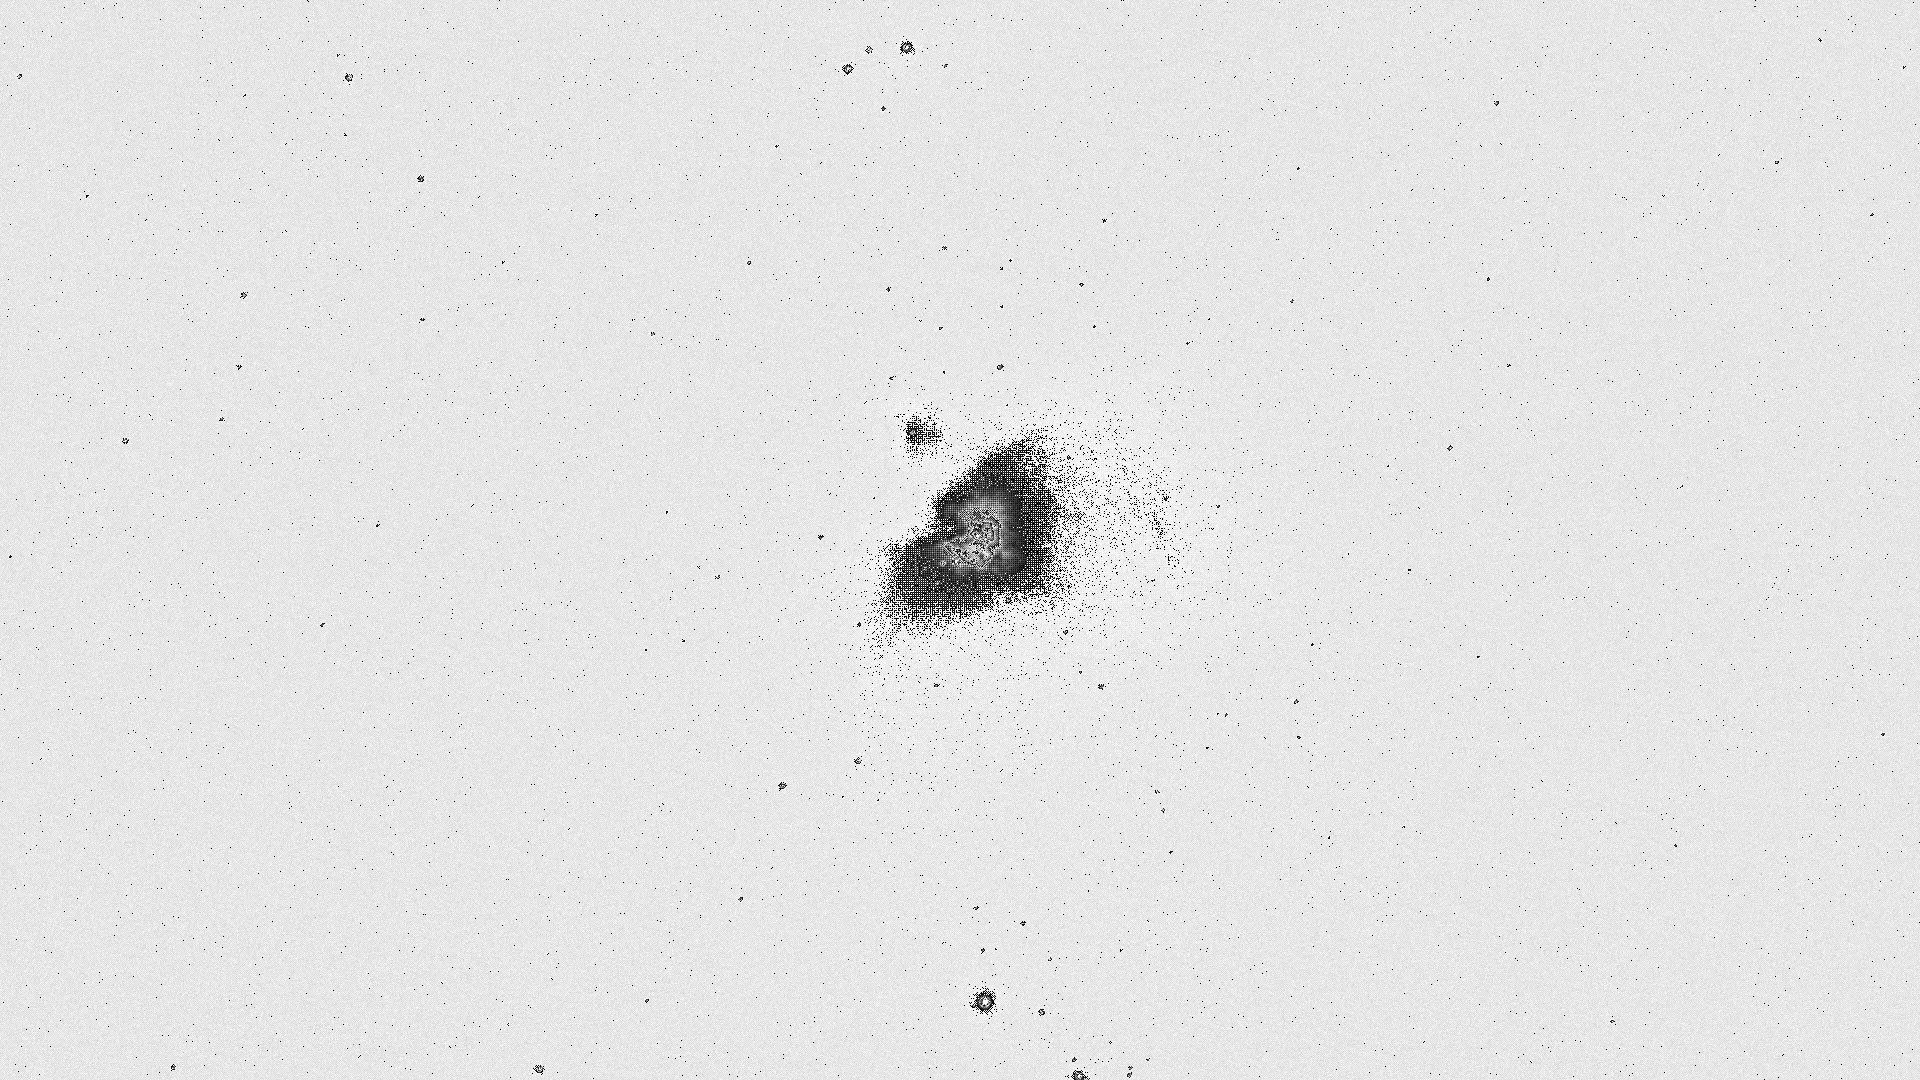
At least PhotoDesk can load it — ChangeFSI fails, with a “Subscript out of range” error. The image is greyscale as the Bayer pattern has not been decoded yet — all camera sensors are actually greyscale, with colour information provided by filters over various alternating pixels; correcting this is known as demosaicing, or debayering. And as the original image is 16 bits per channel, a lot of data is lost — PhotoDesk can only handle 8 bits per channel. It’s also inverted, for some reason.
RISC OS does have a port of imagemagick, which is theoretically capable of demosaicing images, as well as handling 16-bits per channel. But it’s a complex subject, and will have to wait for another post…
Add comment
Fill out the form below to add your own comments