Dwarf Mini Notes and Observations
This post covers some miscellaneous notes and observations on using the Dwarf Mini, after a few months of using it.
It’s another long post, so click:
Tripods and Mountings
While you can use the Mini without any kind of mount — just plonk it down on a stable flat surface, which is an Alt-Az mount — to get the best results you should attach it to a tripod. This lets you set up what’s known as an Equatorial mount, which points the Mini’s vertical axis towards Polaris. This means that the Mini only needs to move in one axis in order to track objects as they move across the sky, and thus avoids any nasty field rotation, which causes the edges of the images to get misaligned, with resulting artefacts in the image.
The Mini can compensate to some extent when it stacks the images but can’t avoid it entirely. Alt-Az mode also caps the maximum exposure time to 30 seconds, and doesn’t let you use the mosaic feature (which combines about four fields of view into a single image).

Good quality tripods come in two parts: the legs, and the head. Our main tripod, which we’ve had for ages, comprises Manfrotto 190MF4 legs, which are carbon-fibre and thus lighter and more rigid, and a Manfrotto 701RC2 head. This is a pan-and-tilt head with adjustments in two axes — loosen one of the screws and you can move the scope/camera smoothly left/right or up/down using the long handle. It also has a bubble level.
There’s little slippage when you re-tighten the screws, which is good. But ideally I’d like a geared head, which gives much more precise control.
Setting up an EQ mount for the Mini is pretty easy, and quick. Note this does have to be done at night, with visible stars, but it’s not necessary to be able to see Polaris, the Pole Star — or, in the southern hemisphere, Sigma Octantis.
First level the tripod using the bubble level and adjusting the legs (this bit can be done in daytime, of course).

Tip: If your tripod doesn’t have a bubble level, you might be able to use your smartphone instead. Google “bubble level”, and if your phone supports it you get an interactive spirit level; just place the phone (carefully!) on the tripod head.
Now attach the Mini securely to the tripod head, and tilt it to roughly your latitude, pointing North. If you’re using a power bank now is the best time to plug it in; doing it after it’s aligned might jog the alignment. The photo shows our typical set-up — without the Mini, but with a cat’s back end1. North is to the left of the picture.
Power the scope up, and connect it to your phone. Go to the Live view, and make sure the stars are focussed properly2. Select Deep sky mode, and from the three dots menu select EQ Mode. Then follow the instructions. It usually takes just two or three small adjustments to get perfect alignment, although once I was lucky and it needed none.
Dithering and Dark Frames
You may have noticed an apparent inconsistency in the timings I’ve been providing for images. For example:
Details:
Target: C 11 (NGC 7635), Bubble Nebula
Time: 2026-07-10 01:09..03:03
Equipment: Dwarf Mini, Duo-Band filter; perfect EQ mode
Integration: 1hr 37mins (195×30secs, +2 failures), gain 60
Conditions: Clear, Bortle 6
Processing: PhotoDesk equalisation, gamma
Here the first image was taken at 01:09, and the last at 03:03, so just under two hours. But we took 195 30-second images, which is only 1hr 37mins. So what’s with the missing time, about 20 minutes?

Some could be due to processing overheads, but most is due to dithering3. Tracking an object means the Mini tries to keep the target in the same place on the sensor. But every sensor suffers from hot pixels, which often appear as coloured dots; these are always in the same place on the sensor. To help identify these, in addition to the normal tracking every so often the Mini will add an extra movement to shift the target slightly on the sensor; the animation shows how this might work, with hot pixels in red (the actual moving algorithm is not known). The hot pixels can then be removed prior to the normal aligning and stacking process. For exposures under 60 seconds, this adjustment happens after every 6 shots.
The Mini also takes a new dark frame at this point, and updates its darks library. Darks need updating when the temperature changes, as it often does overnight; taking a dark frame involves changing the internal filter, which explains the occcasional clicking noise during sessions.
All this is done as part of the noise-reduction process, and helps to identify hot pixels. For longer exposures it’s done every 10 frames.
What’s this “Bortle” thing?
The image details I’ve been providing include an entry for “Bortle” in the Conditions section. The Bortle scale is a measure of light pollution, much used by astronomers, both amateur and professional. It goes from 1, meaning a perfectly dark sky, to 9, a city-centre sky with much light pollution. This Wikipedia entry gives a summary.
You can find the Bortle rating for your location from the very useful lightpollutionmap.info website. I live in a suburban area a mile or so from a city centre, for which the site gives a Bortle rating of 6 or 7.
While you’ll get better results from darker skies, the Mini’s filters (Astro and Duo-Band) reduce light pollution significantly — which includes bright moonlight. As you can see from my results, you can still get excellent results from urban/suburban sites.
Schedules and the Sky Atlas
The Dwarf Mini lets you set up schedules, which are pre-programmed sequences of observations. You select the targets, and tell it when to start and end observing and what imaging parameters to use (filters, exposure times etc). Once you’ve set up a schedule you synchronise it with the scope, which enters “sleep” mode. At the appointed time/s it wakes up and starts shooting. This means that the Mini can operate completely unattended. You’re free to close down the app during a scheduled shoot, but you can reconnect and monitor what’s happening at any time.
Important: Be very careful with the weather. If there’s the slightest chance of bad weather do not leave the Mini outside — it is not waterproof and there have been reports of ruined machines due to rain.
The app doesn’t need to be connected to the scope to set up a schedule, but make sure you’ve selected the correct model — it defaults to the Dwarf 3 if you’re not connected.
The Mini has a built-in Sky Atlas which you can use to select targets. But note that for EQ aligned shoots, unless the scope is connected and EQ aligned correctly the target frame will not be correctly rotated. You can get round this by using Stellarium to frame your target, as described below. Remember that for mosaics — which work fine in a schedule — you have to be in EQ mode.
So what I do to set up a schedule is set it up in the app in the daytime, using Stellarium to frame my targets. When it gets dark enough to see a few stars I attach the Mini to the roughly aligned tripod and a power bank, and set up EQ mode. Perhaps take a test shot or two, then synchronise the schedule and go to bed.
And pray it doesn’t rain.
Stellarium and the Mini
The Stellarium application is very useful as a project planner for smart telescopes, and works well with the Dwarf Mini.
Stellarium is a sky atlas. It’s free open-source software, and although it isn’t available for RISC OS it is available for most other platforms: Linux (including the Raspberry Pi), Windows and Apple. It shows the constellations and much else in real time, according to your location. It’s highly interactive, and the Dwarf Mini uses the same database for its own built-in sky atlas.
Stellarium can be set up so it displays the actual field of view of a Mini. You’ll need to have the “Oculars” plug-in enabled; if it’s already active there’ll be a set of four icons at top right. If not, open the pop-out sidebar by moving the mouse pointer to the lower left side of the screen. Click on the Spanner, which opens the configuration dialogue. Or just press the F2 key. Open the Plug-ins tab, and select Oculars from the list. Select Load at startup if you want it always available.
You should now have a set of four icons at the top right of Stellarium’s display. Now click on the Spanner (the rightmost icon), which opens another dialogue. Select the Sensors tab, and click on Add. Set up the fields like this:
Name: Dwarf Mini
Resolution x (pixels): 1920
Resolution y (pixels): 1080
Chip width (mm): 5.60
Chip height (mm): 3.20
Leave the rest at their defaults. Use the up-arrow to move it to the top of the list.
You could also set up another sensor for a full mosaic:
Name: Dwarf Mini Mosaic (full)
Resolution x (pixels): 3456
Resolution y (pixels): 1944
Chip width (mm): 10.08
Chip height (mm): 5.76
In the Telescopes tab, add this one:
Name: Dwarf Mini
Focal length: 150.00
Diameter: 30.00
Clear the other settings. I also added an entry for when the scope was in EQ mode; same settings, but “Equatorial mount” ticked.
To show the Mini’s field of view, click on the second icon, the rectangle-in-a-circle. Switch between sensors and scopes with the appropriate left/right arrows.
On 1 May at 2:00am I did a mosaic of the North America Nebula. Below are two images showing Stellarium’s view for that time, and the actual image I shot. Click for full size.

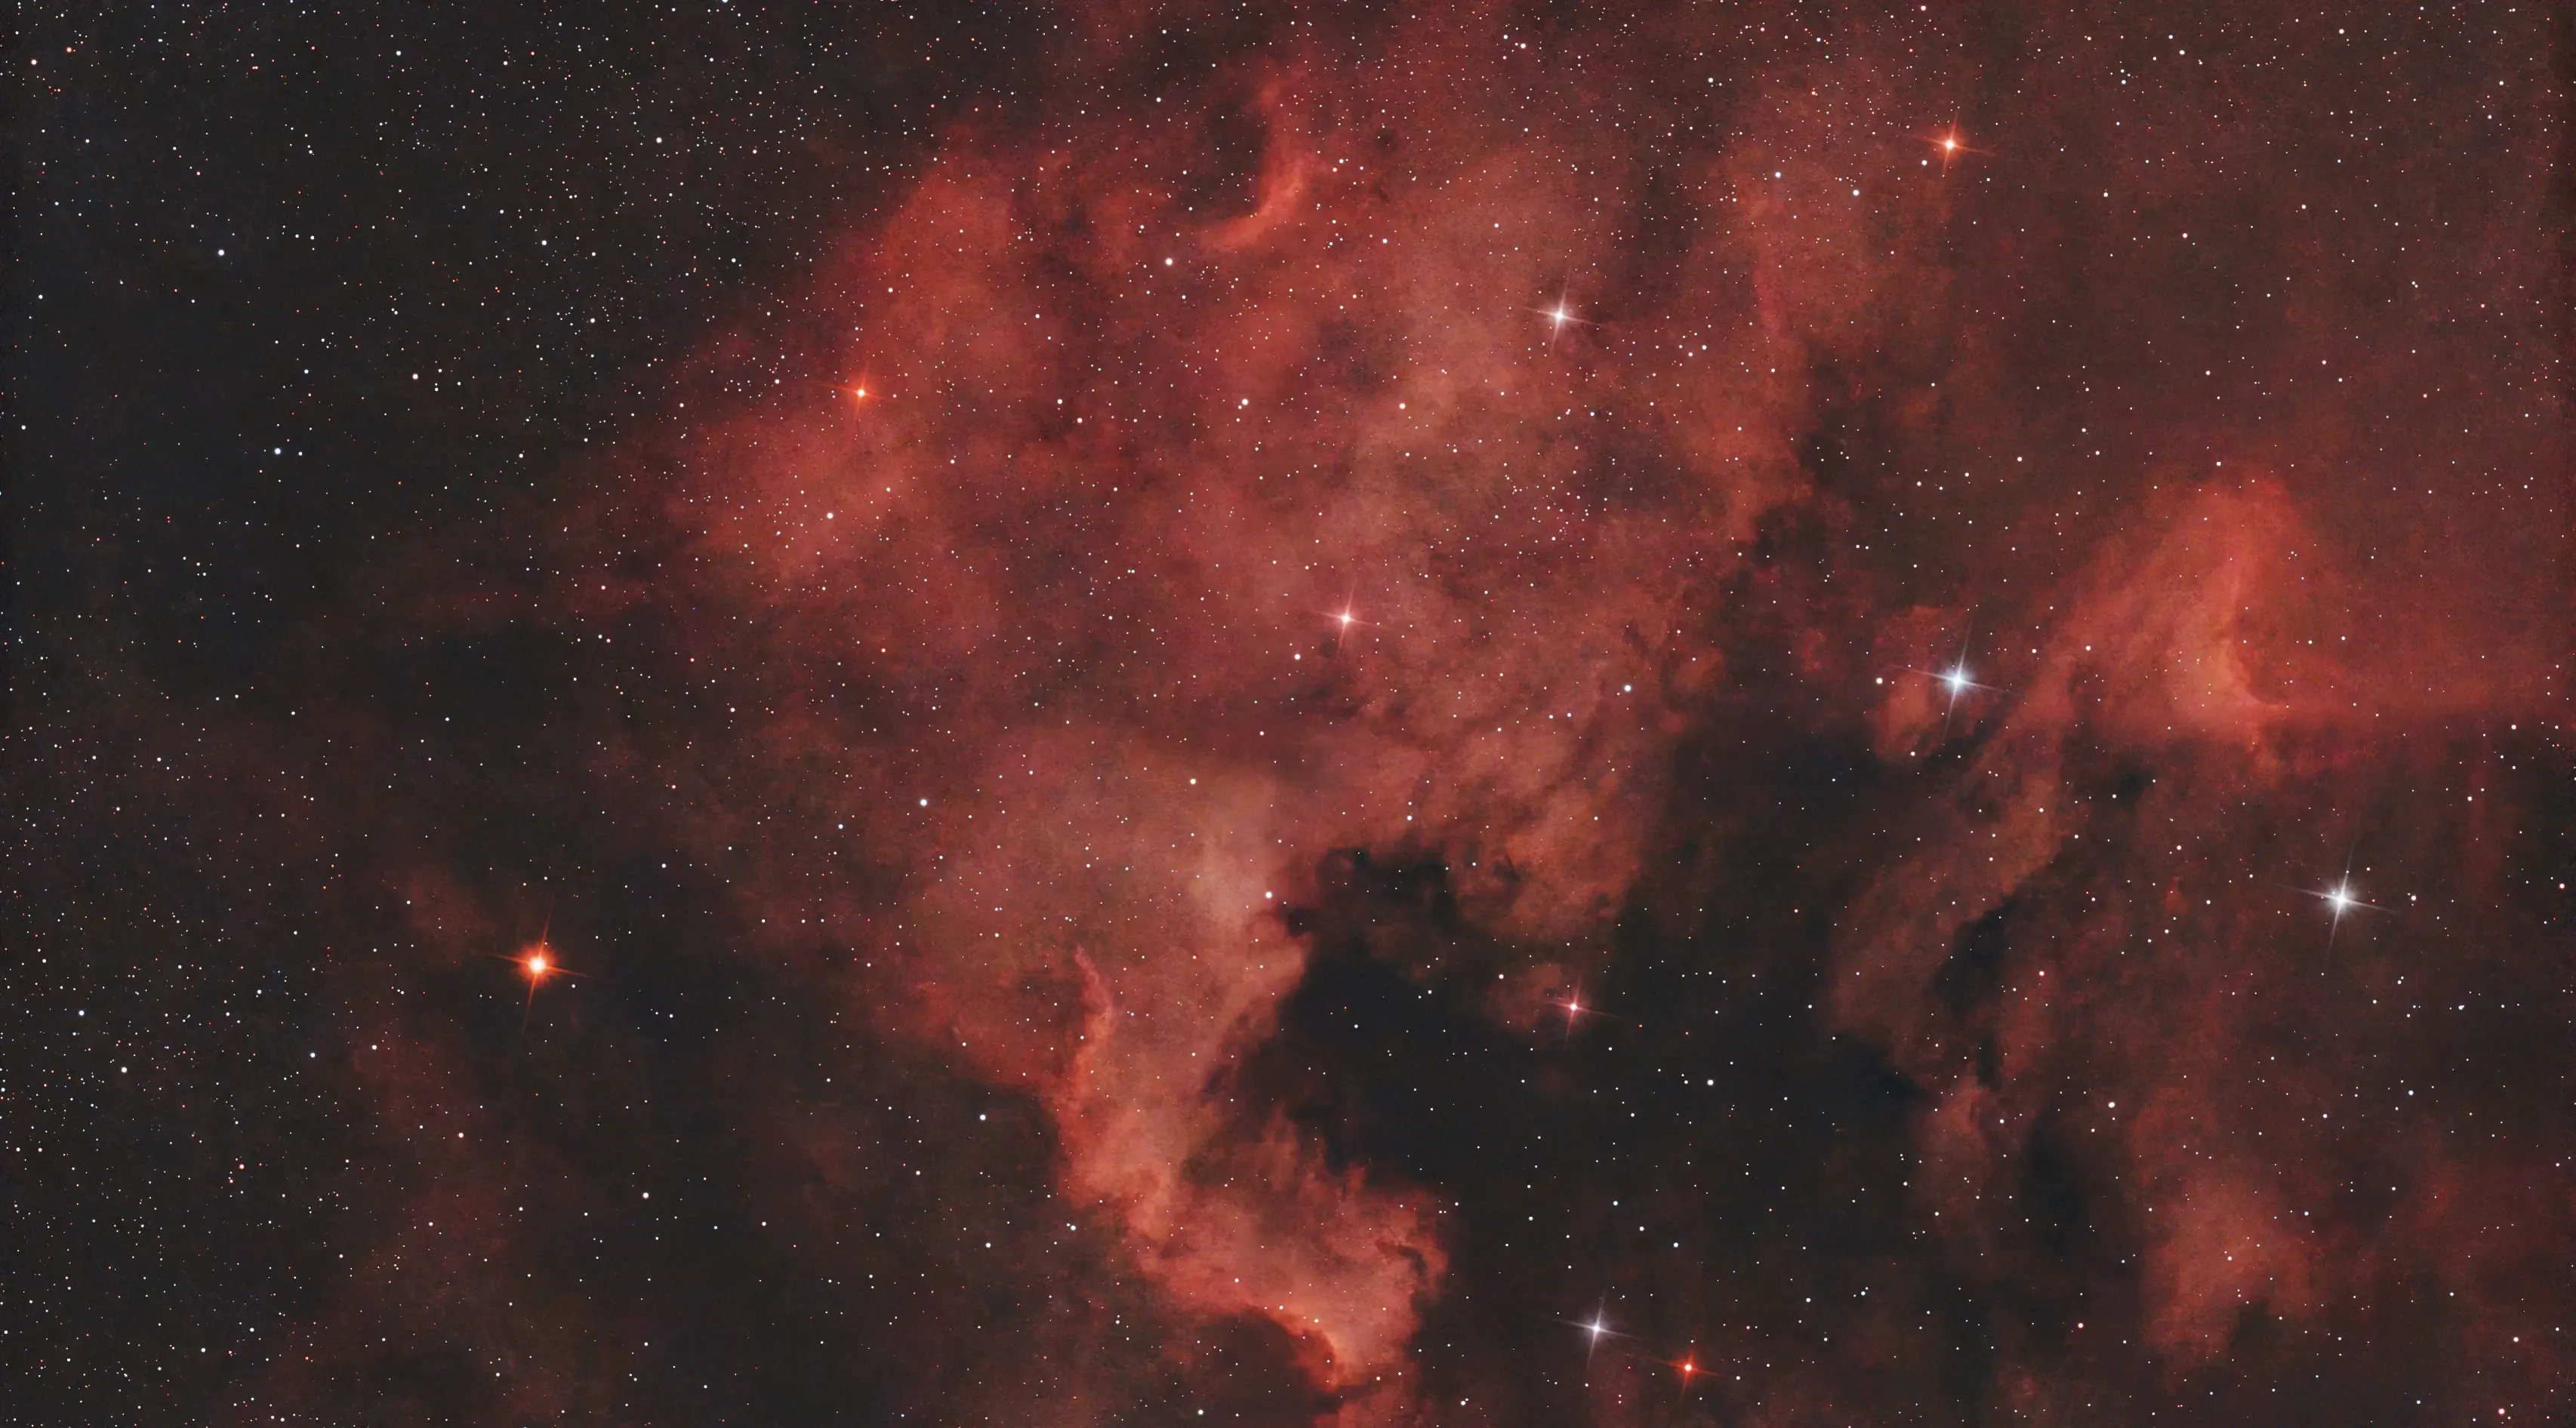
Points to note:
- The Mini’s FOV is the red outlined rectangle.
- At top right I’ve selected the full mosaic sensor, and the Mini EQ telescope.
- The selected and outlined item at the bottom of the screen (a telescope) rotates the whole display so the frame is horizontal; cosmetic but useful.
- The framing isn’t completely accurate, as the Mini will overlap the mosaic frames depending on the conditions. But it’s good enough to serve as a guide.
- The figures above the frame give the RA and Dec4 of the frame’s centre, which you can enter into the Mini as the target; useful if there’s no conveniently placed star. You’ll need to switch Stellarium to decimal format: Configuration>Tools>Use decimal degrees.
Footnotes
- Animals can be annoying, brushing up against the tripod and ruining the alignment… ↩
- Do not forget to do this. And do not forget to remove the sun filter. ↩
- This is entirely different to the identically named computer graphics technique, which improves colour rendition at the cost of resolution. ↩
- Right Ascension and Declination are the sky’s equivalents of Longitude and Latitude. ↩
Add comment
Fill out the form below to add your own comments